

Fortinet FortiManager (Beta)
Quick DetailsRecommended Agent: On-Demand
Supported Agents: On-Demand and Self-Managed
Is Auto-Discovered By: N/A
Can Auto-Discover: Fortinet Fortigate Child Inspectors
Parent/Child Type Inspector: Yes
Inspected via: API
Default Frequency: Daily. (max every 8 hours)
Data Summary: FortiManager Inspector Summary
Overview
Inspector Setup Preparation
Inspector Setup:
Create the Liongard Service API Account
The Liongard FortiManager Inspector requires a dedicated REST API Administrator account with a read-only administrator profile.
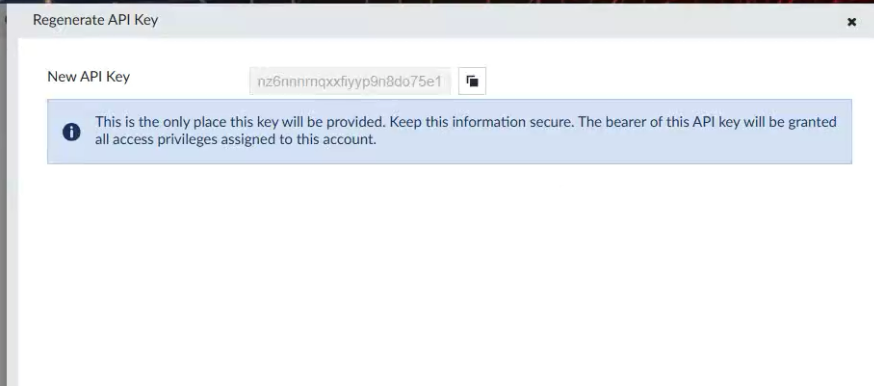
Complete the following steps to create the required account and generate an API key.
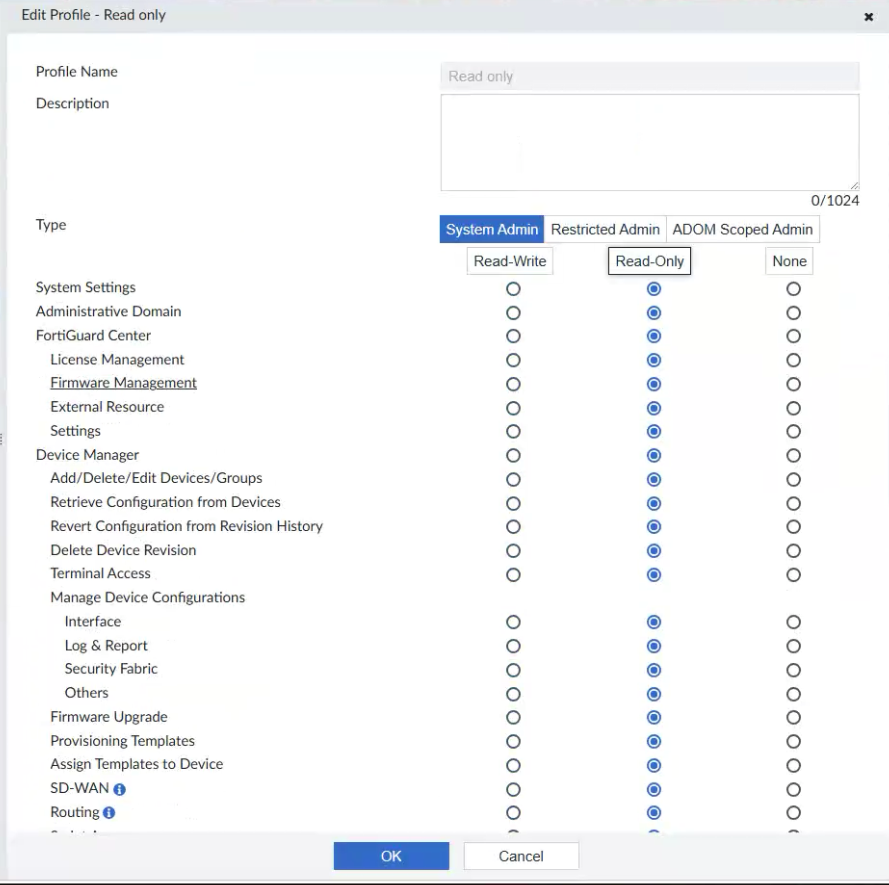
Step 1: Create a Read-Only Administrator Profile
-
In FortiManager, navigate to System Settings → Admin Profiles.
-
Click Create New.
-
Enter a name for the profile, such as Read Only.
-
Select every permission in the Read-Only column.
-
Click OK.
Step 2: Create a REST API Administrator
-
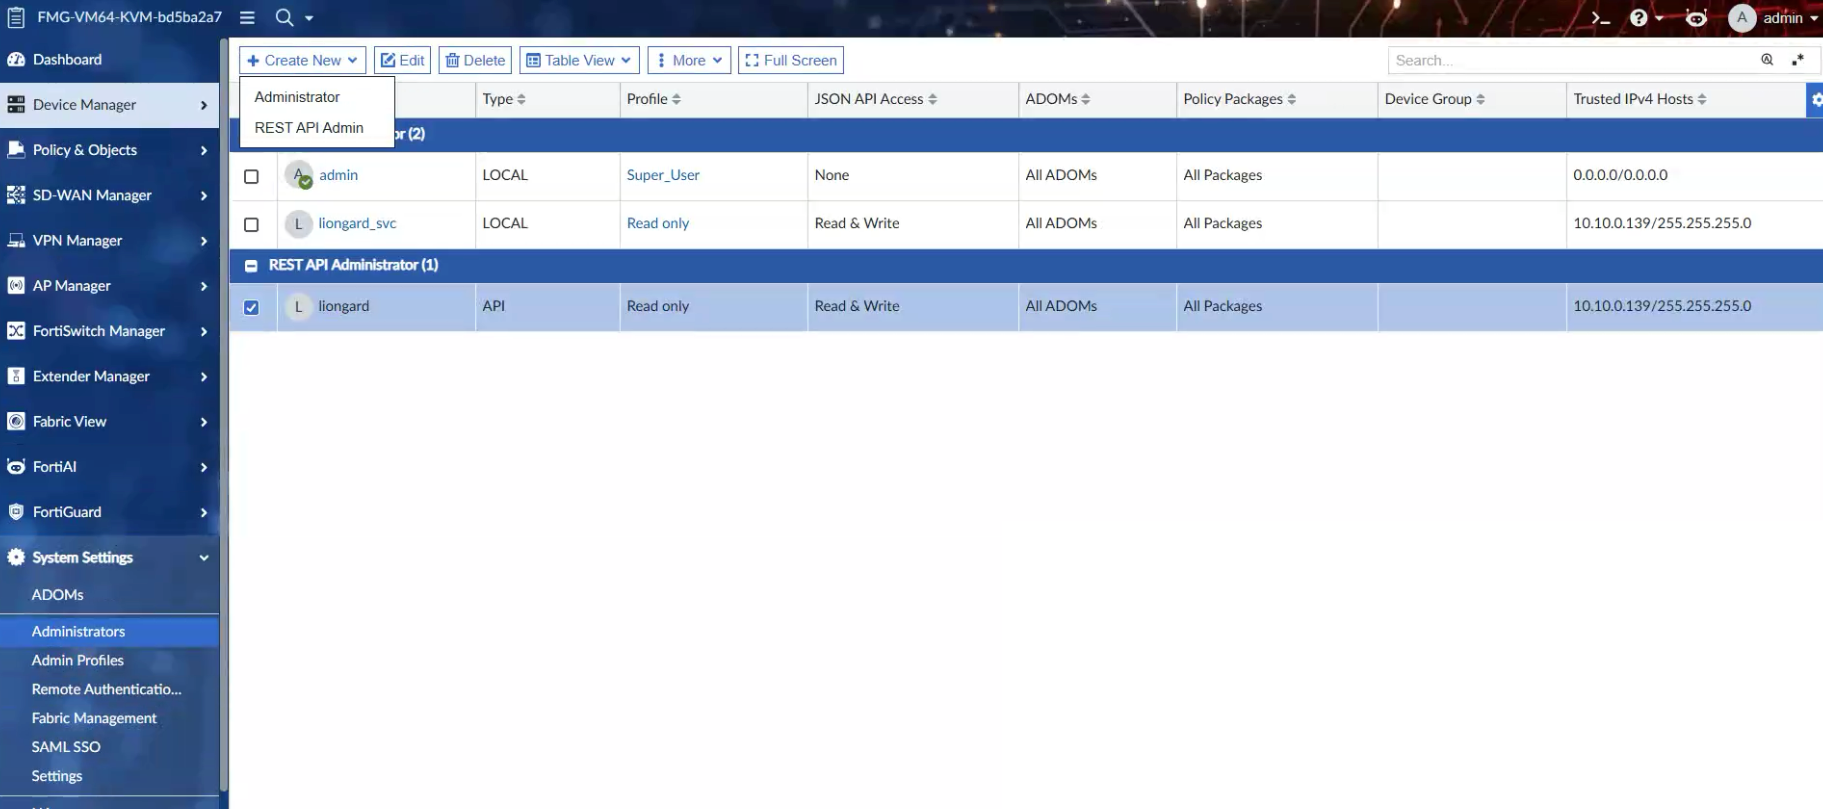
Navigate to System Settings → Administrators.
-
Click Create New → REST API Admin.
-
Configure the account using the following settings:
| Setting | Value |
|---|---|
| User Name | liongard_svc |
| Administrator Profile | Select the Read Only profile created in Step 1 |
| JSON API Access | Read and Write |
| Trusted Hosts (IPv4 Host 1) | Enter the IP address of the server where the Liongard Agent is installed |
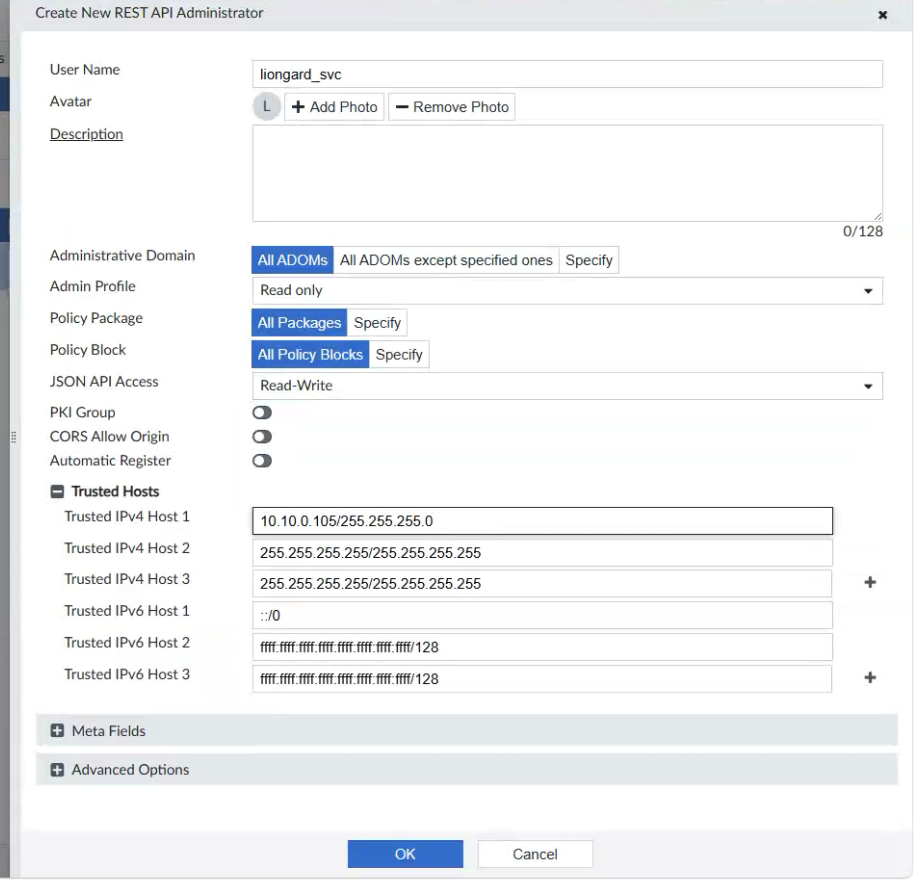
- Click OK.
Step 2: Configure the Fortinet FortiManager Inspector in Liongard
- Log in to the Liongard platform.
- In Liongard, navigate to Admin > Inspectors > Inspector Types > Navigate to the Fortinet FortiManager Inspector > Select Add System.
Since the Fortinet FortiManager Inspectors are multi-tenant systems where a single portal can be used to manage many Environments, you will set up a single "Parent" Inspector that will then auto-discover "Child" Inspectors for each Environment.
Fill in the following information:
- Type of Inspector: Parent
- Environment: Select your MSP's Environment
- Friendly Name: Suggested Naming: [Customer Name] FortiManager Parent
- Agent: Select the On-Premises Agent installed for this Environment
- Inspector Version: Latest
- Deployment Type: Select On-Premises for a directly reachable FortiManager appliance, or FortiManager Cloud for a Fortinet-hosted instance
- Host/FQDN: The IP address or FQDN of your FortiManager device. Do not include the protocol (ex: https://)
- HTTPS Port: Enter the port used to reach your device (ex: 443)
- Cloud Account ID: Enter your account ID — required only if Deployment Type is FortiManager Cloud
- Cloud Region: Enter your region — required only if Deployment Type is FortiManager Cloud
- API Key (Bearer): The API Key generated for the service account created above
- Username and Password: Optional if you are not using an API Key.
- Scheduling: The Inspector will default to running once a day at the time it is set up. Here you can adjust the schedule
- Select Save. The Inspector will now be triggered to run within the minute.
Step 3: Child Inspector Setup
After the first run of the Parent Inspector, your client Fortinet FortiGate organizations will be auto-discovered in the Discovered Systems tab on the Inspectors > Appropriate Fortinet FortiManager Inspector page.
- Activate or Archive your Discovered Systems by ensuring that they're mapped to the correct Environment > Check the checkbox to the left of Inspector(s) > Select the Actions drop-down menu > Activate Launchpoints
- Click Save.
Updated 2 months ago