BitLyft (Beta)
Quick DetailsRecommended Agent: On-Demand
Supported Agents: On-Demand and Self-Managed
Is Auto-Discovered By: N/A
Can Auto-Discover: BitLyft Child Inspectors
Parent/Child Type Inspector: Yes
Inspected via: API
Data Summary: Here
Overview
The BitLyft Inspector brings BitLyft AIR (Automated Incident Response) platform data into Liongard for unified visibility across managed security environments. This inspector ingests tenant information, user and role configurations, connector health, security cases, SOAR orchestration data, SIEM dashboard metrics, alerting rules, contracts, saved searches, reports, and onboarding status — providing MSPs with a centralized, auditable view of their clients' BitLyft security posture without needing to log into the BitLyft console.
Feature Highlights
- Multi-Tenant Auto-Discovery: Automatically discovers all accessible BitLyft tenants via the parent inspector and creates child inspectors for each, enabling scalable management across client environments with zero manual tenant configuration.
- Security Operations Visibility: Surfaces SIEM dashboard metrics (log counts, log size, MTTR, MTTD), security cases by severity/status, triggered and enabled alerts, and SOAR playbook/action activity — all in one place.
- Connector Health Monitoring: Tracks all configured integration connectors with health status (healthy, unhealthy, degraded) and change detection, enabling proactive identification of broken data feeds before they create gaps in threat coverage.
- User & Role Auditing: Ingests users with role assignments, inherited permissions, subtenant membership, and days since creation. Provides admin user count tracking and email list metrics for access hygiene reviews.
- SOAR Orchestration Insights: Provides visibility into available SOAR actions (by IT Ops / Sec Ops category), playbook configurations, execution history with duration tracking, and SOAR rules with enable/disable status.
- Contract & Billing Visibility: Captures tenant contract details, including expiration tracking, billing contacts, and onboarding status for service management oversight.
Inspector Setup Preparation
Prerequisites & Access Requirements To configure the BitLyft Inspector, ensure you have the following:
Access to the Liongard platform
A BitLyft AIR account with API access
Network connectivity from the Liongard agent to the BitLyft AIR API:
- Production:
https://soar.bitlyftsecurity.com
Inspector Setup:
Create a BitLyft Integration Key
Use this guide to create a new BitLyft AIR® integration key for third-party integrations and secure system-to-system authentication.
BitLyft Integration Keys allow external systems to authenticate with your BitLyft AIR® tenant. To create an integration key, you must be logged in to BitLyft AIR® as an Admin.
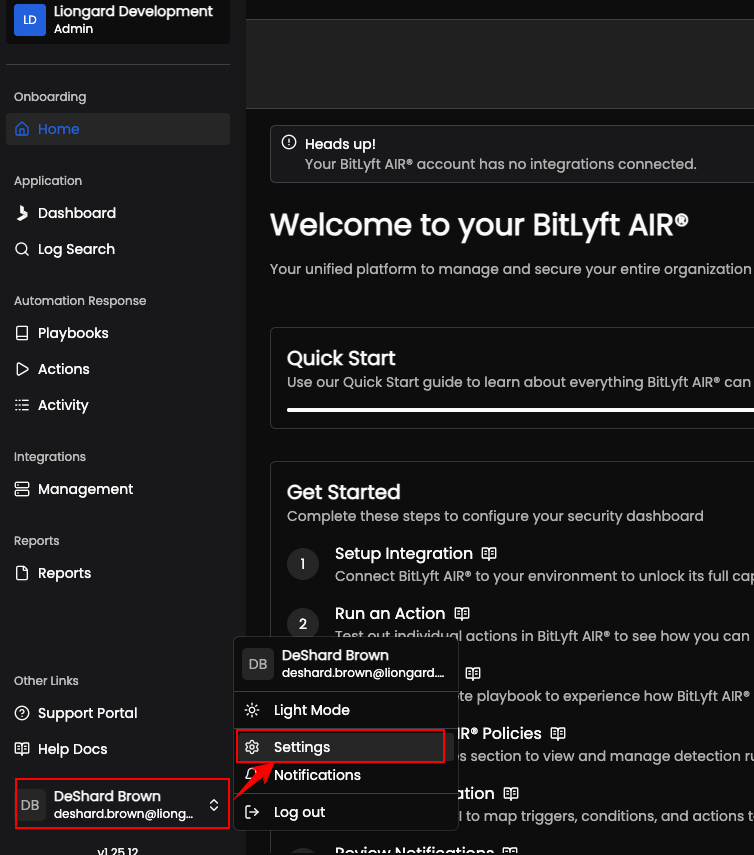
Step 1: Open Settings
From anywhere in BitLyft AIR®, click your profile in the lower-left corner of the screen. From the profile menu, select Settings.
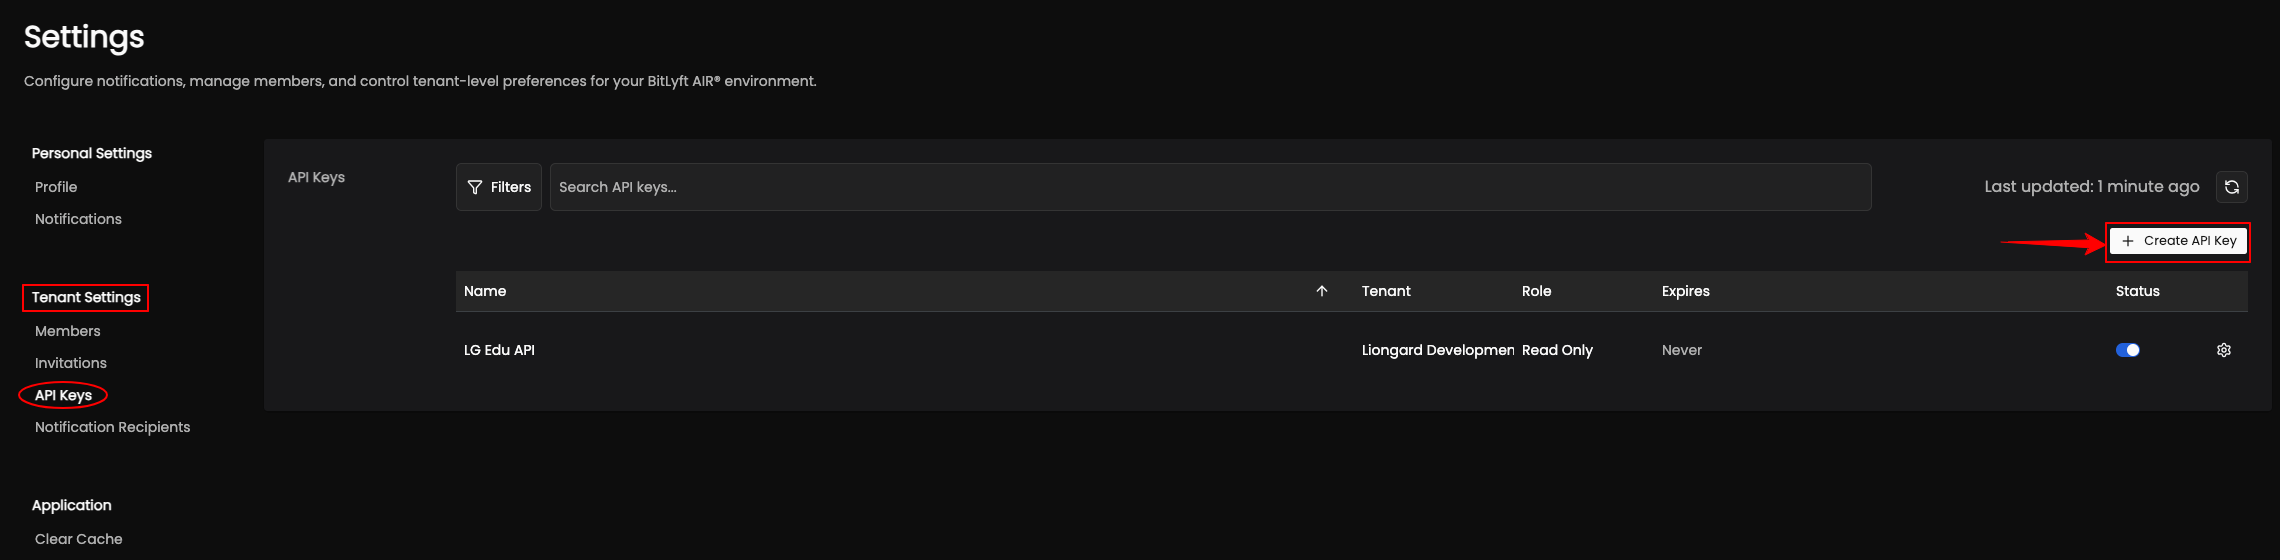
Step 2: Go to API Keys
On the Settings page, use the left navigation under Tenant Settings and select API Keys. Then click + Create API Key in the upper-right corner of the API Keys panel.
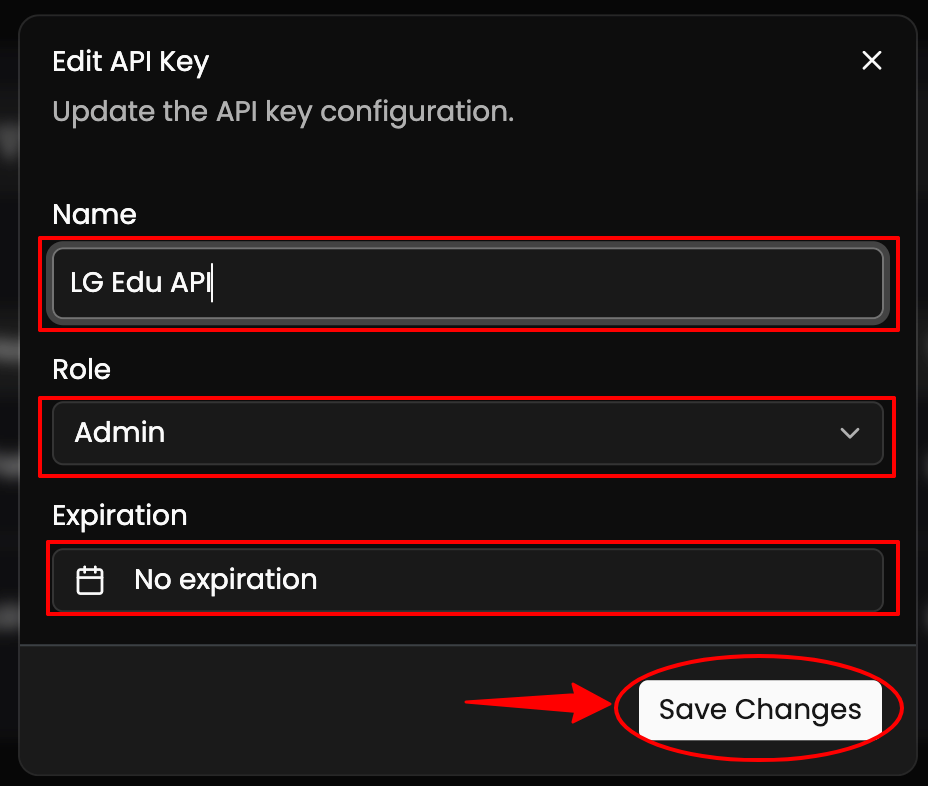
Step 3: Enter the key details
In the Create API Key window, enter a descriptive Name, choose the AdminRole, and set an Expiration if needed. By default, the key is created with No expiration. When you are ready, click Create Key.
Step 4: Save the Key ID and Signing Key
After the key is created, BitLyft AIR® displays the Key ID and Signing Key. Copy both values immediately and store the Signing Key in a secure location such as a password manager or secrets vault. When you are finished, click Done.
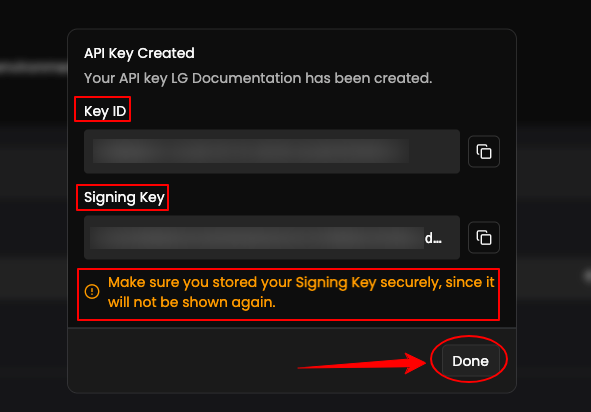
Important
The Signing Key will not be shown again after you close this window. If it is lost, you will need to create a new integration key.
Configure the BitLyft Inspector in Liongard
- Log in to the Liongard platform.
- In Liongard, navigate to Admin > Inspectors > Inspector Types > Navigate to the BitLyft Inspector > Select Add System.
Since the BitLyft Inspectors are multi-tenant systems where a single portal can be used to manage many Environments, you will set up a single "Parent" Inspector that will then auto-discover "Child" Inspectors for each Environment.
Fill in the following information:
- Type of Inspector: Parent
- Environment: Select your MSP's Environment
- Friendly Name: Suggested Naming: SP Name] [nspector Name] P Parent
- Agent: Select On-Demand Agent
- Inspector Version: Latest
- BitLyft Base URL https://soar.bitlyftsecurity.com
- Integration Key ID Integration key UUID from BitLyft AIR (Example
a1b2c3d4-...) - Signing Key Hex-encoded ECDSA private key
- Scheduling: The Inspector will default to run once a day at the time the Inspector is set up. Here you can adjust the schedule
- Select Save. The Inspector will now be triggered to run within the minute.
Step 3: Child Inspector Setup
After the first run of the Parent Inspector, your client BitLyft organizations will be auto-discovered in the Discovered Systems tab on the Inspectors > Appropriate BitLyft Inspector page.
- Activate or Archive your Discovered Systems by ensuring that they're mapped to the correct Environment > Check the checkbox to the left of Inspector(s) > Select the Actions drop-down menu > Activate Launchpoints
- Click Save.
Updated 3 months ago