Azure
This document provides the steps required to configure the Azure Inspector.
Quick DetailsRecommended Agent: On-Demand
Supported Agents: On-Demand or Self-Managed
Is Auto-Discovered By: N/A
Can Auto-Discover: N/A
Parent/Child Type Inspector: No
Inspection via: API
Data Summary: Here
Overview
The Azure Inspector pulls data for Azure infrastructure services. For example, virtual machines, virtual networks, etc.
If you are looking for data from Azure Active Directory accounts, data will surface in the Azure Active Directory Inspector
For more information on what data the Azure Inspector pulls, please review our System Inspector Summary document.
See it in Action
Inspector Setup Preparation
Separate Launchpoints per Azure Tenant/AccountUnlike our Microsoft 365 Inspector, we do not support creating a single MSP-wide Azure Application to inspect all of your customers.
Instead, you will need to repeat the following steps to create separate Azure Applications in each Azure account that you wish to inspect.
Create an Application in Azure Active Directory
- Log in to the Azure Portal of the Azure instance you would like to inspect.
- Create an application by navigating to "Azure Active Directory" > "App Registrations" > "New registration".
- Name the application "Liongard Azure Inspector".
- Set the supported account types to "Accounts in this organizational directory only".
- Click Register.
If you also have a Microsoft 365 Inspector:We recommend using separate Azure Applications for the Azure Inspector and the Microsoft 365 Inspector. For the purposes of security segmentation, we do NOT recommend using the same Client ID and Secret values for both Azure and Microsoft 365 Inspectors.
Secret StorageThis Secret value is sensitive and can facilitate access into your customers' Microsoft 365 instances. If you choose to store this value after completing these steps, store it as securely as you would a highly credentialed password.
- Under "Certificates & Secrets", create a new client Secret.
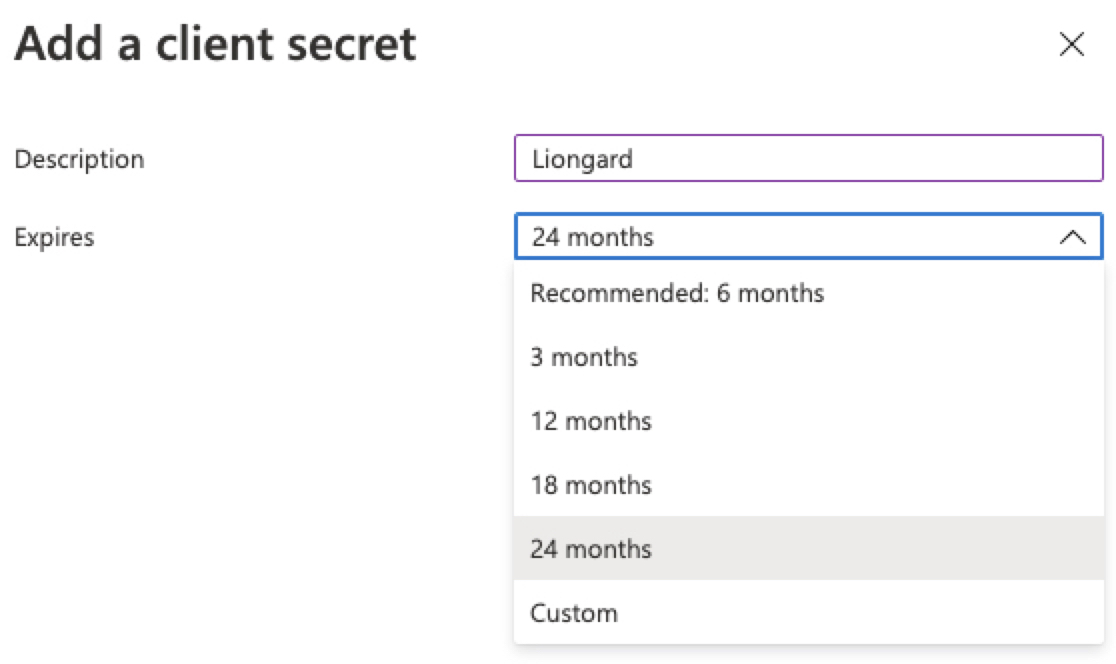
- In the panel that appears, fill in the Description and select an expiration date. Microsoft recommends 6 months, but your Inspectors will fail after the secret expires. Therefore, Liongard suggests selecting 24 months to reduce the frequency of regenerating the secret.

- Save the Secret as it will not be visible later.
- Click "Overview" on the left to get the other values needed.
- At this point, gather the credentials for the template in Liongard. You will need:
- Application (client) ID
- Directory (tenant) ID
- Client Secret (gathered above).
API Permissions
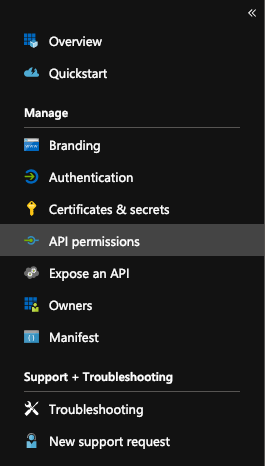
- In the slide-out panel that appears, select API permissions

- Under API permissions, click the Add a permission button.

- Click on Microsoft Graph under Select an API

Application Permissions vs. Delegated PermissionsIt is important that you select all the permissions below from the "Application Permissions" section and not the "Delegated Permissions" section. Choosing permissions from the "Delegated" section may prevent the Inspector from working correctly.
- On the next screen, click on Application permissions.
- Select the following permissions:
- Group.Read.All
- User.Read.All
- Click on the Add permissions button at the bottom of the screen.
- Next, under the Grant consent section click on the Grant admin consent for___ button.

Assign IAM Permissions in Azure
- Go to the "Subscriptions" section.
- Select a Subscription, click "Access control (IAM)". Then, click "Add" > "Add Role Assignment".
- Repeat this process for every subscription you wish to monitor.
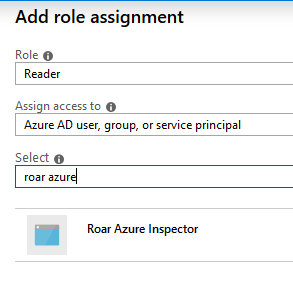
- Select the "Reader" role. Search for "Liongard Azure", and click on "Liongard Azure Inspector."
- Click "Save" to add the role assignment.

The Azure set up process is now complete.
After you have finished, you may create and configure the Liongard System Inspector.
Resource Provider SettingsIf your inspector is failing unexpectedly, check to see that "Microsoft.Network" is registered as a Resource Provider in your Azure subscription.
This setting can be checked by clicking Subscriptions > Resource Providers
Liongard Inspector Setup
Individual Inspector Setup
In Liongard, navigate to Admin > Inspectors > Inspector Types > Navigate to the Azure Inspector > Select Add System.
Fill in the following information:
- Environment: Select the Environment this System should be associated with
- Friendly Name: Suggested "Azure nvironment Name]" "
- Agent: On-Demand Agent
- Inspector Version: Latest
- Azure Directory (Tenant) ID: The Directory ID you created in the steps above
- Scheduling: The Inspector will default to run once a day at the time the Inspector is set up. Here you can adjust the schedule.
Select Save. The Inspector will now be triggered to run within the minute.
Optional: Turn on Flexible Asset/Configuration Auto-Updating
If you would like this Inspector's data to be sent to ConnectWise and/or IT Glue, turn on Flexible Assets/Configurations for this Inspector:
- ConnectWise: Admin > Integrations > ConnectWise > Configuration Types > Confirm the "Configuration Auto-Updating" toggle is enabled
- IT Glue: Admin > Integrations > IT Glue > Flexible Assets > Confirm the "Flexible Asset Auto-Updating" toggle is enabled
Roll out Inspectors at Mass via CSV Import
For more information, please visit our documentation.
To import Azure Inspectors via CSV Import, navigate to Admin > Inspectors > Azure > Select the down arrow icon in the top right-hand to Download CSV Import Template.
In the CSV Template, each row, starting on row three, will represent an Inspector. Fill in the following information for each Inspector you want to roll out:
- Agent.Name: Enter "On-Demand Agent"
- Inspector.Name: Enter "azure-inspector"
- Environment.Name: This column is case sensitive. Copy and paste the associated Environment name from the Dashboard screen
- Alias: Enter the Desired Friendly Name
- Config.CLIENT_ID: Enter the ID of the client created in the Inspector Setup Preparation
- SecureConfig.CLIENT_SECRET: Enter the Secret you created in the Inspector Setup Preparation
- Config.PARENT_TENANT_ID: Enter the Directory ID you created in the Inspector Setup Preparation
- FreqType: Enter "days"
- FreqInterval: Enter "1"
When ready to Import the CSV Template of Inspectors, navigate to Admin > Inspectors > Azure > Select the up arrow icon in the top right-hand to Import CSV > Select your saved template.
After the successful import notification, reload your browser to find your imported Inspectors.
These Inspectors will automatically trigger themselves to run within a minute.
Azure Quick Tips/FAQs
Updated 5 months ago
