Cloudflare
This document provides the steps required to configure the Cloudflare Inspector.
Quick DetailsRecommended Agent: On-Demand
Supported Agents: On-Demand or Self-Managed
Is Auto-Discovered By: N/A
Can Auto-Discover: Cloudflare Child Accounts, Domain Inspector
Parent/Child Type Inspector: Yes
Inspection via: API
Data Summary: Here
Overview
The Cloudflare Inspector inspects the Cloudflare platform and returns data for DNS, Domain, User, Account, and Zone information.
See it in Action
Inspector Setup Preparation
Generating an API Key
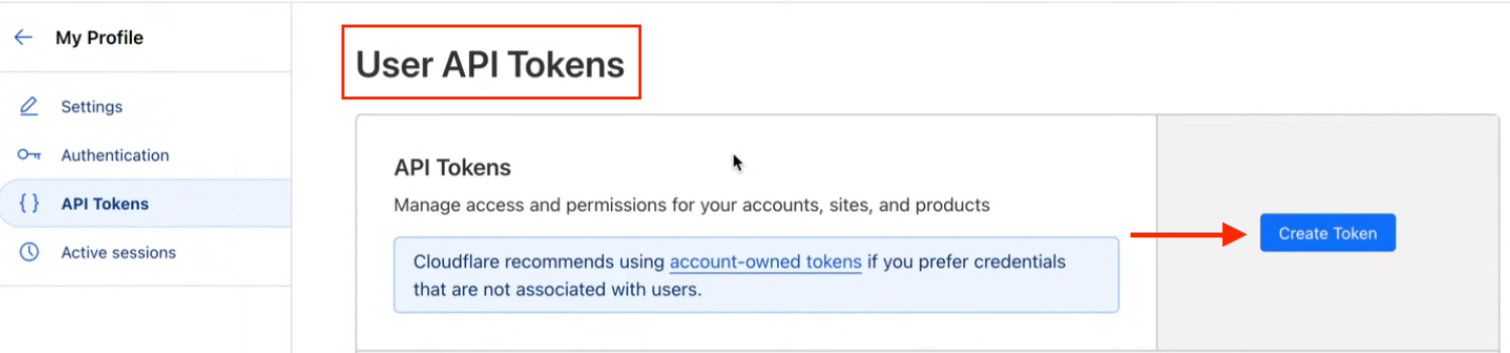
- Navigate to your profile (https://dash.cloudflare.com/profile)
- Then navigate to "API Tokens" and select "Create Token"
- Select "Read all resources" as shown below

-
Select how long you want this token to last in the TTL setting
(Note: You can monitor this expiration date from within Liongard using the API Expiration Metric) -
Confirm and Create the Token Be sure to save this token as you will need it for the inspector setup
API Token CreationImportant: Cloudflare offers two types of API tokens—User Tokens and Account Tokens. Liongard’s Cloudflare Inspector is compatible only with User Tokens. If you experience issues during setup, please verify that you followed the configuration steps correctly and that a User Token was used.
Liongard Inspector Setup
In Liongard, navigate to Admin > Inspectors > Inspector Types > Navigate to the Cloudflare Inspector > Select Add System.
Fill in the following information:
- Type of Inspector: Parent
- Environment: Select the Environment this System should be associated to
- Friendly Name: Suggested "Cloudflare ironment Name]"
- "
- Agent: Select On-Demand Agent or select the On-premises Agent installed for this Environment
- Inspector Version: Latest
- API Key: The API Key you generated above
Select Save. The Inspector will now be triggered to run within the minute.
Optional: Turn on Flexible Asset/Configuration Auto-Updating
If you would like this Inspector's data to be sent to ConnectWise and/or IT Glue, turn on Flexible Assets/Configurations for this Inspector:
- ConnectWise: Admin > Integrations > ConnectWise > Configuration Types > Confirm the "Configuration Auto-Updating" toggle is enabled
- IT Glue: Admin > Integrations > IT Glue > Flexible Assets > Confirm the "Flexible Asset Auto-Updating" toggle is enabled
Updated 10 months ago