Reports
Liongard AcademyLearn more about Reports with Liongard Academy's "Get to Data Faster with Liongard's Metrics and Reports" course.
Access it today at Liongard Academy.
Overview
Liongard's Reports allows users to easily create, save, and schedule reports using Liongard's Metrics. Reports can be created from user-generated templates or for one-time use. The Reports feature can be found in the Liongard toolbar.

Types of Reports
Reports can be created for one-time use or from a report template. If a report is going to be used on a recurring basis, creating a report template will shorten the time necessary to regenerate the report. All reports in Liongard can also be scheduled to generate automatically.
Report Templates
Report templates make building repeatable reports easier. Your team can build one template with the desired Metrics, save it, and reuse it to create Reports over and over again.
Default Templates
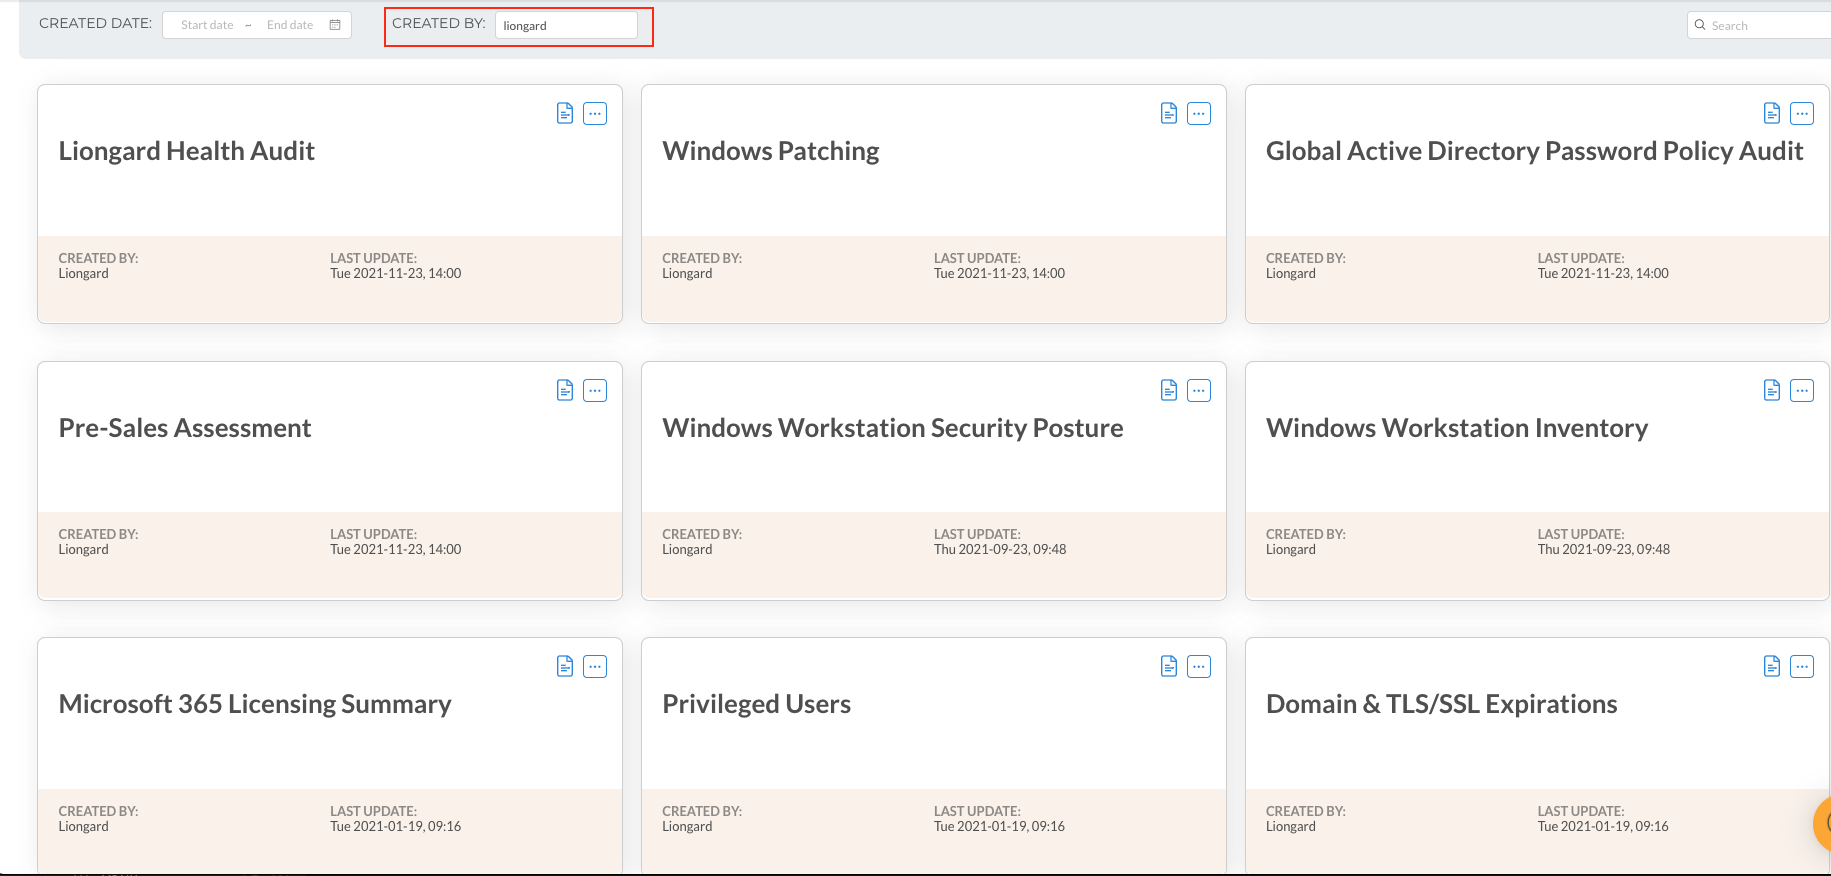
There are several default Liongard templates in the report template library. Input "Liongard" into the Created By field to see all of the available Report Templates
To edit Liongard created templates, you must clone the template.
Reports Permissions
Only Liongard users are able to view Liongard reports.
Environment-specific groups and roles only have access to reports and data for the appropriate Environments.
Global System Integrators can view reports and report templates. They are not able to create new reports or report templates.
All other user groups have ability to create and edit reports and report templates.
Only users with Global permissions can edit or delete other users' reports and templates.
Accessing Reports
Once a report is saved, it can be accessed in the Reports tab on the main Reports screen.

- Actions: Here you can schedule, download, or share the report. You can also edit or delete the report.
- Report Name: Clicking the report name will take you to view the report.
- Type: Indicates whether a report is "Manual" or "Scheduled."
- Status: Identifies whether the report is "Saved" or "Sent"
- Sent to: List of email addresses the report was sent to
- Environments: List of Environments included in the report
- Created By: Who created the report
- Created On: When the report was created
- Inspection Date: "Specific Date" indicates the date used to build the report. "Latest Inspection" indicates that the "Latest Inspection" date was selected when building the report.
Scheduled Reports
All Liongard reports can be scheduled to automatically generate. To view and/or make adjustments to scheduled reports, navigate to the Reports > Scheduled tab.

- Scheduled Report: Clicking the Report Name will take you to view the report. Here you can learn more about the scheduled report and/or make adjustments.
- Reports Generated: Number of reports generated.
- Next Report Will Generate On: The date and time the next report will generate on
- Environments: List of Environments included in the report
- Created By: Who created the report
- Created On: When the report was created
Adding a Schedule to an existing Report
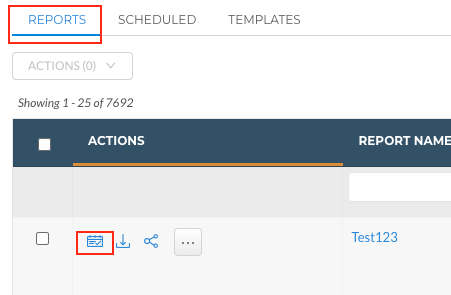
To add a schedule to an already generated report, navigate to the Reports > Reports tab.
- In the Actions column, click the Add Schedule icon.
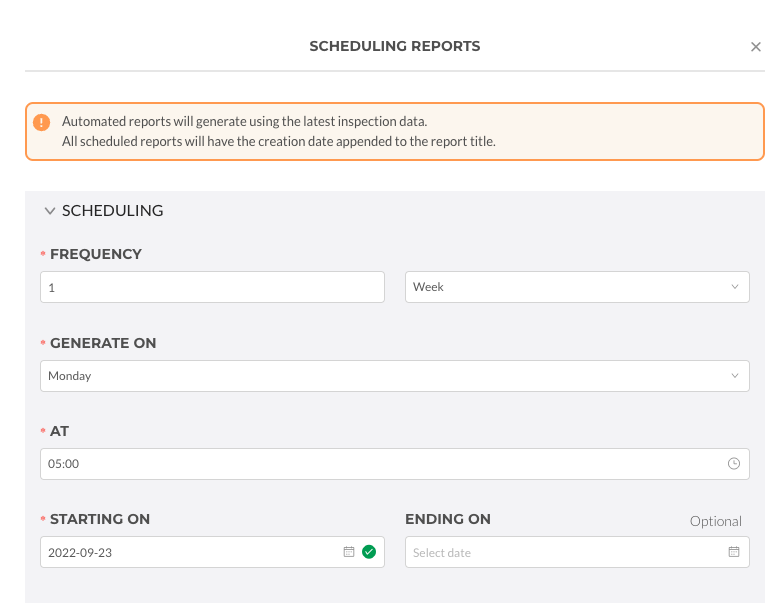
- Complete the required fields to set the schedule of the report.
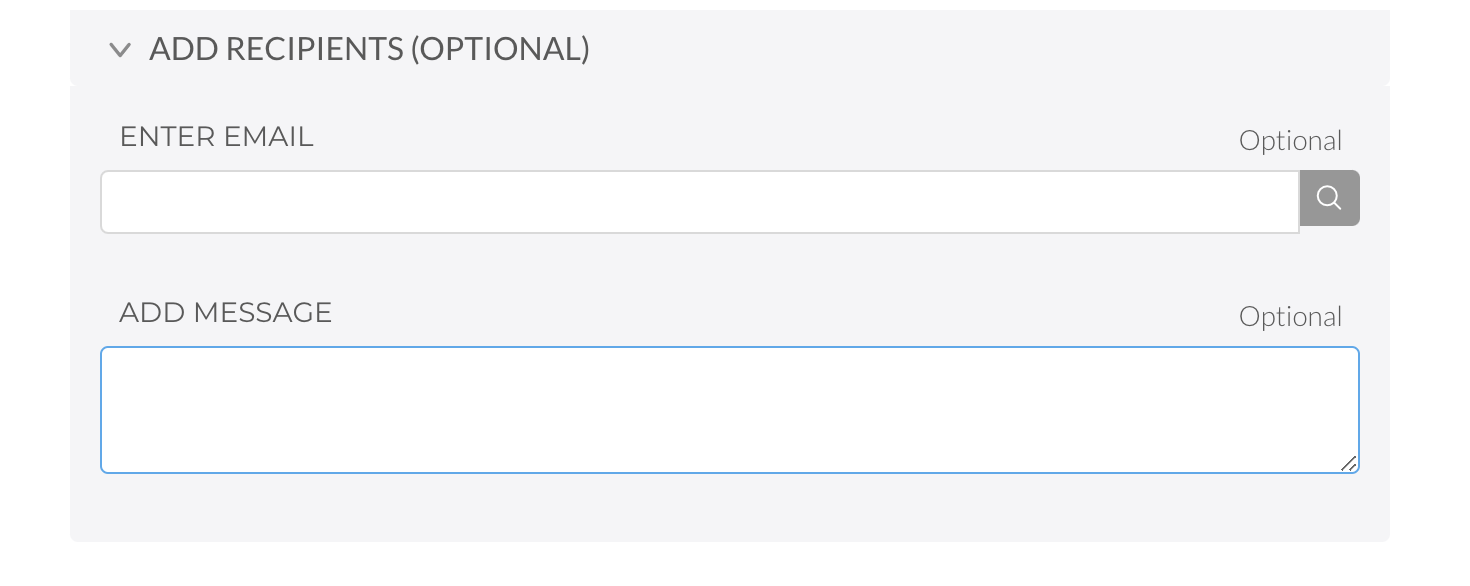
- Optionally, you can choose to automatically email the report to Liongard users.
- Select Schedule
Modify a Report Schedule
To change any details of an existing report schedule, navigate to the Reports > Scheduled tab. Click into the desired Scheduled Report
This screen will display any generated reports from the report schedule. In the top-right corner of the screen, there is a toolbar with the following actions:
- Generate a report now: Will generate a report.
* Edit Schedule: Here you can modify the report's schedule. - Edit Recipients: Here you can edit the recipients of this report
- Edit Report: Here you can edit the report.
- Delete Schedule: Here you can delete the report schedule.

Removing a Schedule from an Existing Report
To remove a schedule from a Report, navigate to the Reports > Scheduled tab.
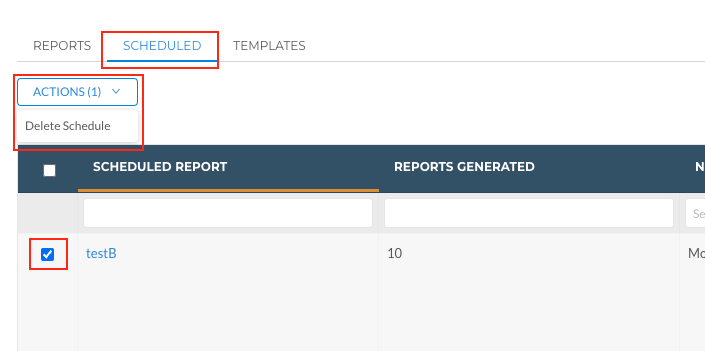
Select the Scheduled Report(s) for which you would like to remove the schedule, and in the Actions pulldown, select Delete Schedule
Clone, Edit, and/or Delete Templates or Reports
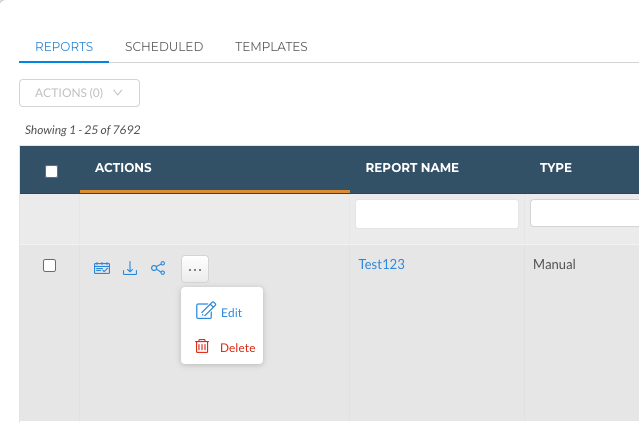
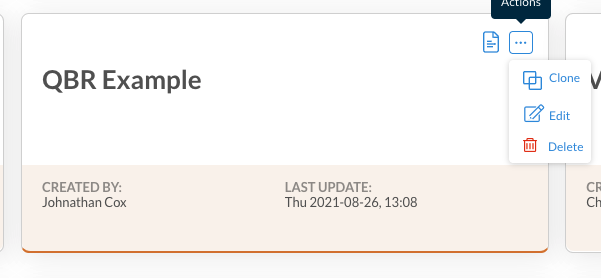
Templates and reports can be cloned, edited, or deleted by selecting the three dots next to the template or report that you want to clone/edit/delete
Editing a Report
If you have already created a report that you would like to edit, for example, using a different inspection date, you can do so by:
- Find the report on the Reports tab.
- Select the three dots in the Actions column and select Edit.
- Edit the report as needed.
- Select Continue.
- Select Finish.
Cloning, Editing, or Deleting a Template
If you have already created a template that you would like to clone, edit, or delete you can do so by:
- Find the Template on the Templates tab.
- Select the three dots on the template and select Edit, Clone or Delete.
- If editing or cloning, make the necessary changes and click Save Template in the top right corner of the screen.
Updated 5 months ago
