Hyper-V
This document provides the steps required to configure the Hyper-V Inspector.
Quick DetailsRecommended Agent: Self-Managed
Supported Agents: Self-Managed
Is Auto-Discovered By: Windows Server Inspector
Can Auto-Discover: N/A
Parent/Child Type Inspector: No
Inspection via: CLI
Data Summary: Here
Overview
See it in Action
Inspector Setup Preparation
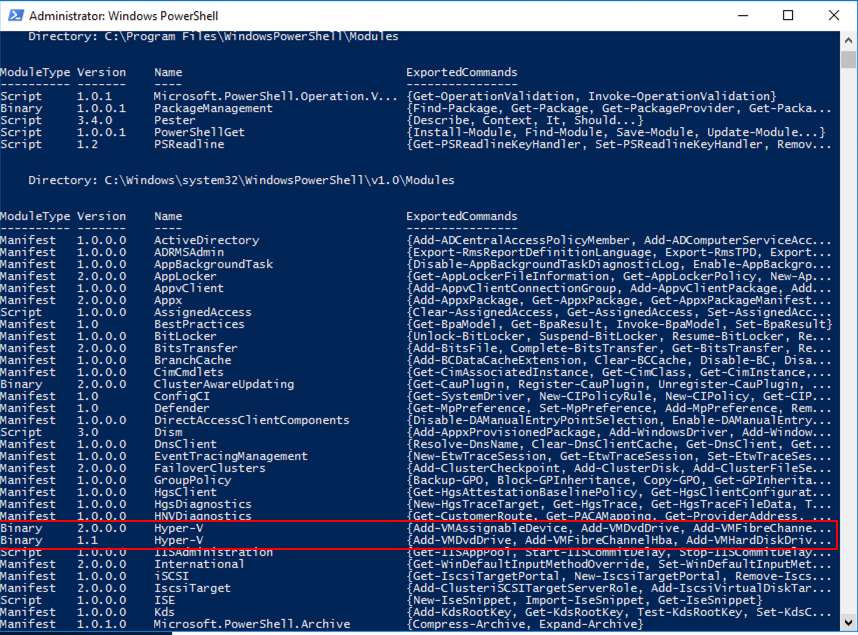
Step 1: Check if Hyper-V Powershell Modules are Installed (HyperV Host Only)
Run the following Powershell command in a powershell console window to check if you have the Hyper-V modules installed.
Get-Module -ListAvailable
If the Hyper-V modules are not listed, then run the following command (note that if a restart is required then the command result will have "Restart Needed" set to "Yes".
Add-WindowsFeature -Name Hyper-V-PowerShellFinally to test the module is installed and importable run the following command.
Import-Module Hyper-V
Inspecting RemotelyIf you are running the Agent on a server that does not have Hyper-V manager installed, please note that PSRemoting is required to be enabled on the server running Hyper-V manager.
Username and Password are required if you are inspecting a server running Hyper-V manager which is not on the domain. The Username will likely need to be in the format: COMPUTERNAME\USERNAME
To enable PSRemoting use the following powershell command.
Enable-PSRemoting
ThreatLockerLiongard has received reports of Threatlocker blocking the Hyper-V inspection. This was identified with the inspector failing with a status message of "Unable to read powershell output file". You may need to add approval or exclusions for the following PowerShell Scripts run by the inspector:
- C:\program files (x86)\liongardinc\liongardagent\jobs*\dist\powershell\extract\extract-hyperv.ps1
- C:\program files (x86)\liongardinc\liongardagent\jobs*\dist\powershell\extract\pre-flightremote.ps1
Liongard Inspector Set up
Hyper-V Host NOT tied to an Active Directory DomainIf you have a Hyper-V Host not tied to an Active Directory Domain, our best practice is to roll out an additional On-Premises Agent to the server that the Host is installed on. The additional Agent will auto-discover an Inspector for the local Windows server, and once activated, that Inspector will auto-discover a Hyper-V Inspector.
To roll out an additional On-Premises Agent, visit our Agent Documentation.
Activating Auto-Discovered Inspectors
If you have activated your Windows Server Inspector(s), it will auto-discover your Hyper-V Inspectors. Follow the steps below:
Navigate to Admin > Inspectors > Inspector Types > Select Hyper-V > Select the Discovered Systems tab
Here you can Activate your Discovered Hyper-V Inspector(s):
- Select the checkbox to the left of the Inspector(s) that you would like to Activate
- Select the Actions drop down menu above the Discovered Systems table
- Select Activate Launchpoints
Single Inspector Setup
In Liongard, navigate to Admin > Inspectors > Navigate to the Hyper-V Inspector > Select Add System.
Fill in the following information:
- Environment: Select the Environment this System Inspector should be associated to
- Friendly Name: Suggested "Hyper-V nvironment Name]" "
- Agent: Select the On-premises Agent installed for this Environment
- Inspector Version: Latest
- Server Name: If running remotely, the fully qualified domain name of the server running Hyper-V manager
- MAC Address: This field is used when Hyper-v is auto-discovered to help provide a unique identifier. It is read-only.
- Username: If the server is not on the domain, the username used to log in to the server running Hyper-V manager
- Password: If required, the password for the user specified above to be able to login to the server running Hyper-V manager if the server is not on the domain.
- Scheduling: The Inspector will default to run once a day at the time the Inspector is set up. Here you can adjust the schedule
Select Save. The Inspector will now be triggered to run within the minute.
Optional: Turn on Flexible Asset/Configuration Auto-Updating
If you would like this Inspector's data to be sent to ConnectWise and/or IT Glue, turn on Flexible Assets/Configurations for this Inspector:
- ConnectWise: Admin > Integrations > ConnectWise > Configuration Types > Confirm the "Configuration Auto-Updating" toggle is enabled
- IT Glue: Admin > Integrations > IT Glue > Flexible Assets > Confirm the "Flexible Asset Auto-Updating" toggle is enabled
Possible FailuresOften failures are a result of one of the issue listed below.
- Only Windows 2016/Windows 8 or better is supported.
- Unable to import the Hyper-V module, please verify the Hyper-V tools are installed on this system.
- Unable contact server, please verify the server Hostname is correct and network access is available.
- Unable establish a remote session with the server, please verify the server Hostname is correct and network access is available.
Updated 5 months ago
