Configure the IT Glue Integration with Liongard
Liongard's IT Glue integration allows you to create rich Flexible Assets in IT Glue. Liongard updates these Flexible Assets automatically every time an inspection runs which by default is every 24 hours.
Configure the IT Glue Integration with Liongard
In Liongard, navigate to Admin > Integrations > Select the IT Glue tab in the left sidebar
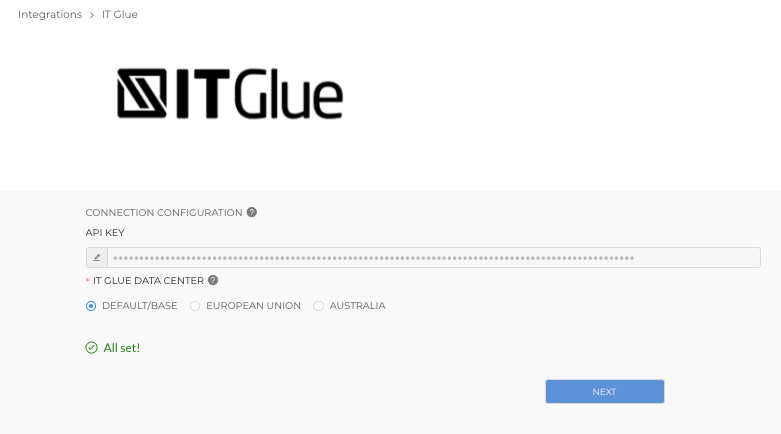
Step 1: API Key
- Insert the API Key generated in the prior steps
- Click Test Connection
- Click Save

Step 2: Filter Options
- Navigate to the Import & Mapping page > Select the Select Filter Options tab
- Here, select the Statuses and Types from IT Glue for the companies you want to bring into Liongard. This is especially valuable in IT Glue instances that have many companies but only a small subset of those are active managed services customers.
- Click Save

Statuses and TypesLiongard pulls your Statuses and Types field information from what you have created in IT Glue.
You should select ALL Statuses and Types that apply to the Environments you would like to see in Liongard.
If a company is not showing up in Liongard, then revisit what these fields are labelled in IT Glue.
Importing Organizations from IT GlueIf you have already imported Companies/Accounts from your PSA to Liongard, skip Step 3. Import Orgs below. Proceed to Step 4. Map Orgs to associate Liongard Environments to Organizations in IT Glue.
Step 3: Import Orgs
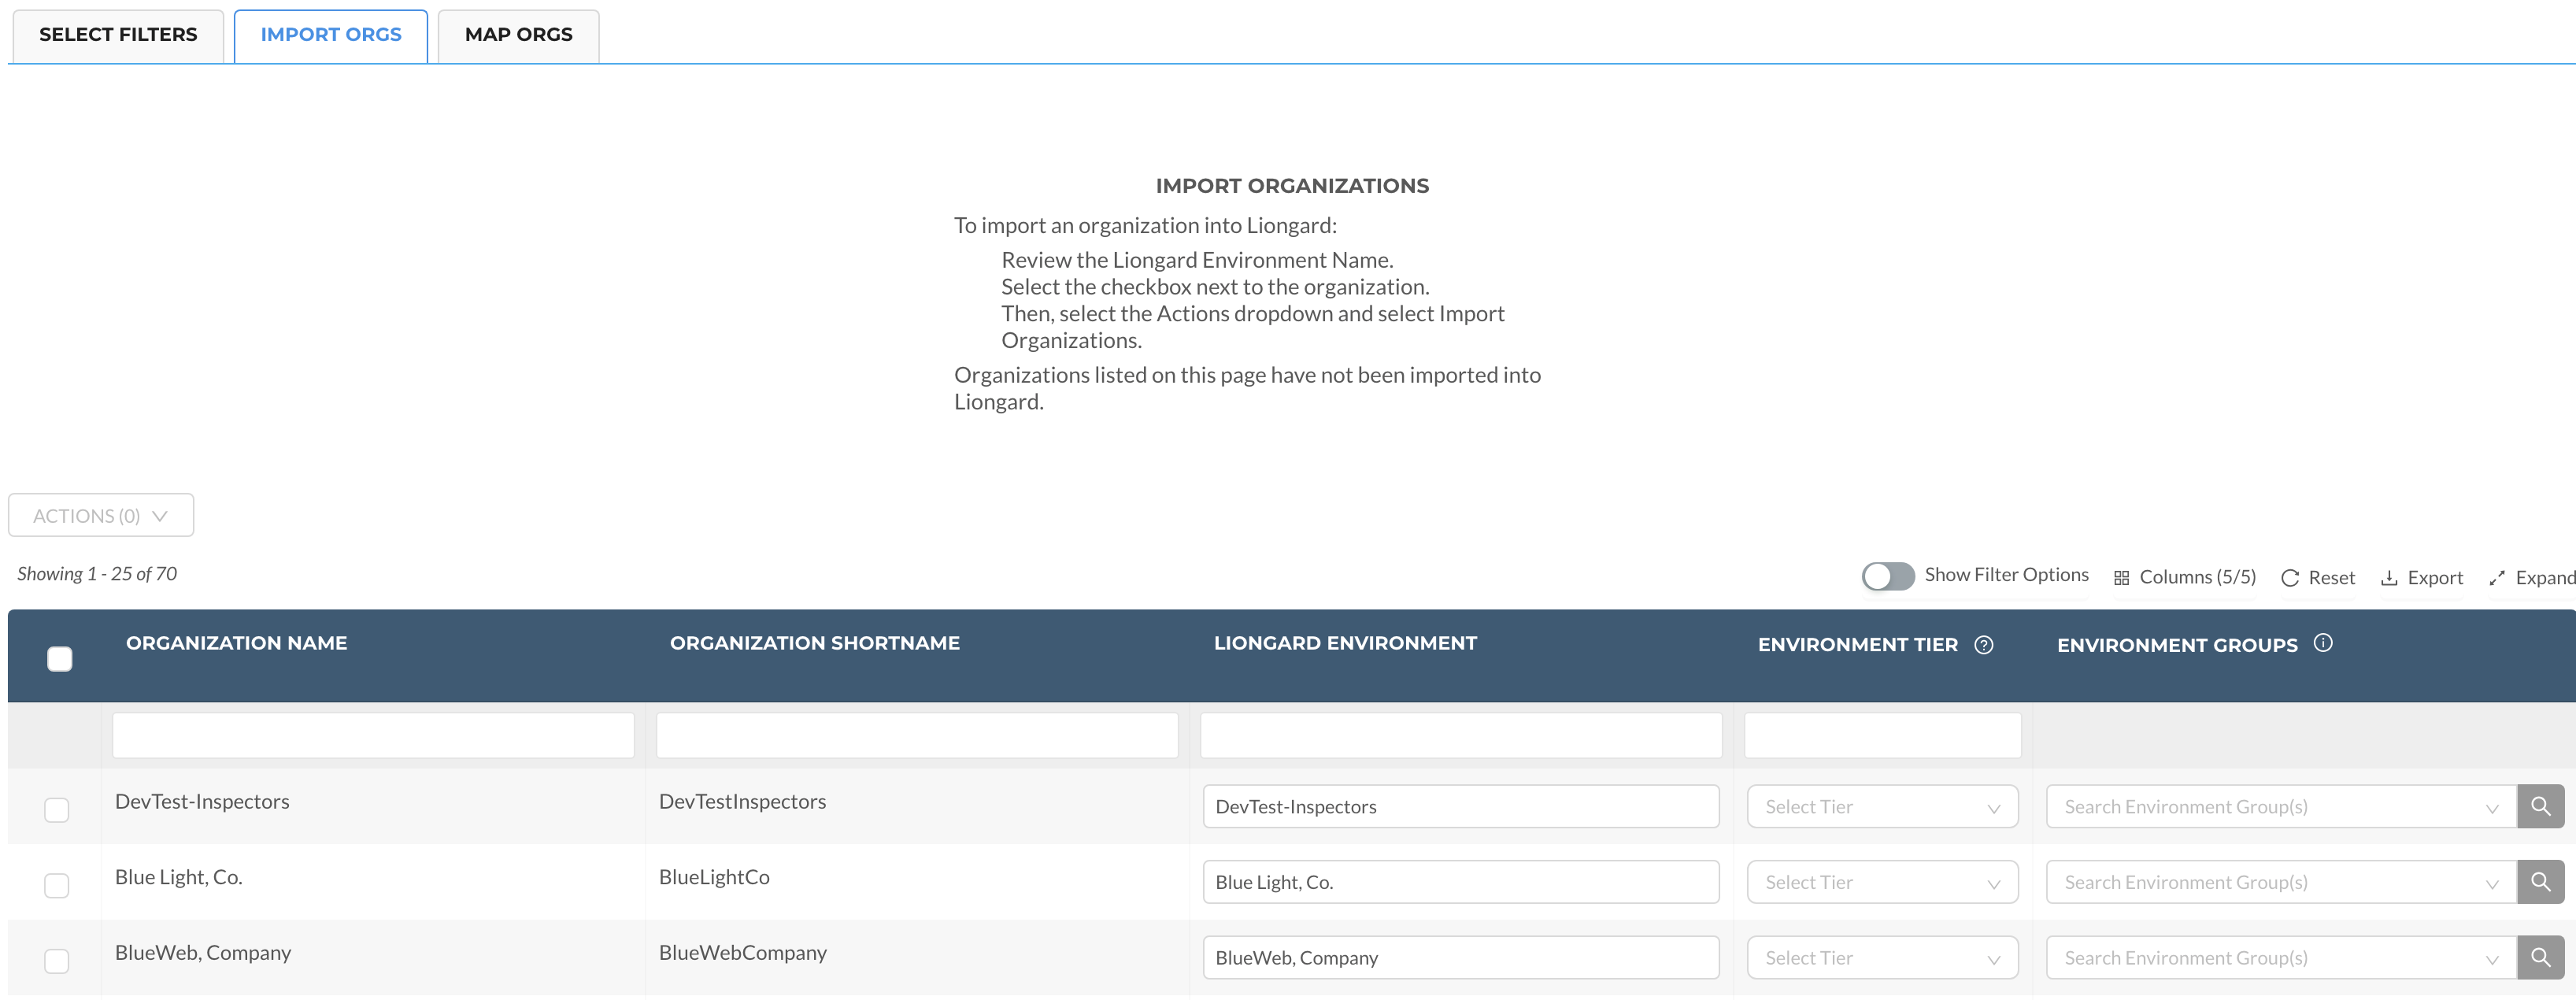
Navigate to the Import Orgs tab. Here, you'll see a table of IT Glue organizations based on your Filter Options decided in the previous tab.

To import Environments:
- Select the checkbox(es) to the left of the organization(s) you would like to import.
- If you see the Environment Tier column, you must select an Environment Tier before importing the organization(s). If you do not see this column, skip to Step 3. If you have already selected an Environment's Tier with another integration, skip to Step 3. In the Actions dropdown, click Select Tier > Select the appropriate Tier > Select Apply. For more information on Environment Tiers, please review our documentation.
- The Environment Groups column gives you the ability to assign an Environment to an Environment Group upon importing your Environment(s). For more information about Environment Groups, please review our documentation.
- Select the checkboxes to the left of the organization(s) you would like to import. In the Actions pulldown, select Import Organizations, or you can click the Import button.
Filter by Status or TypeWith tables in Liongard, you can filter by typing at the top of the column. For instance, you may want to see only "Customers" in the Type field with "Active" Status.
Step 4: Map Orgs
- Navigate to the Map Orgs tab on the IT Glue Integration page
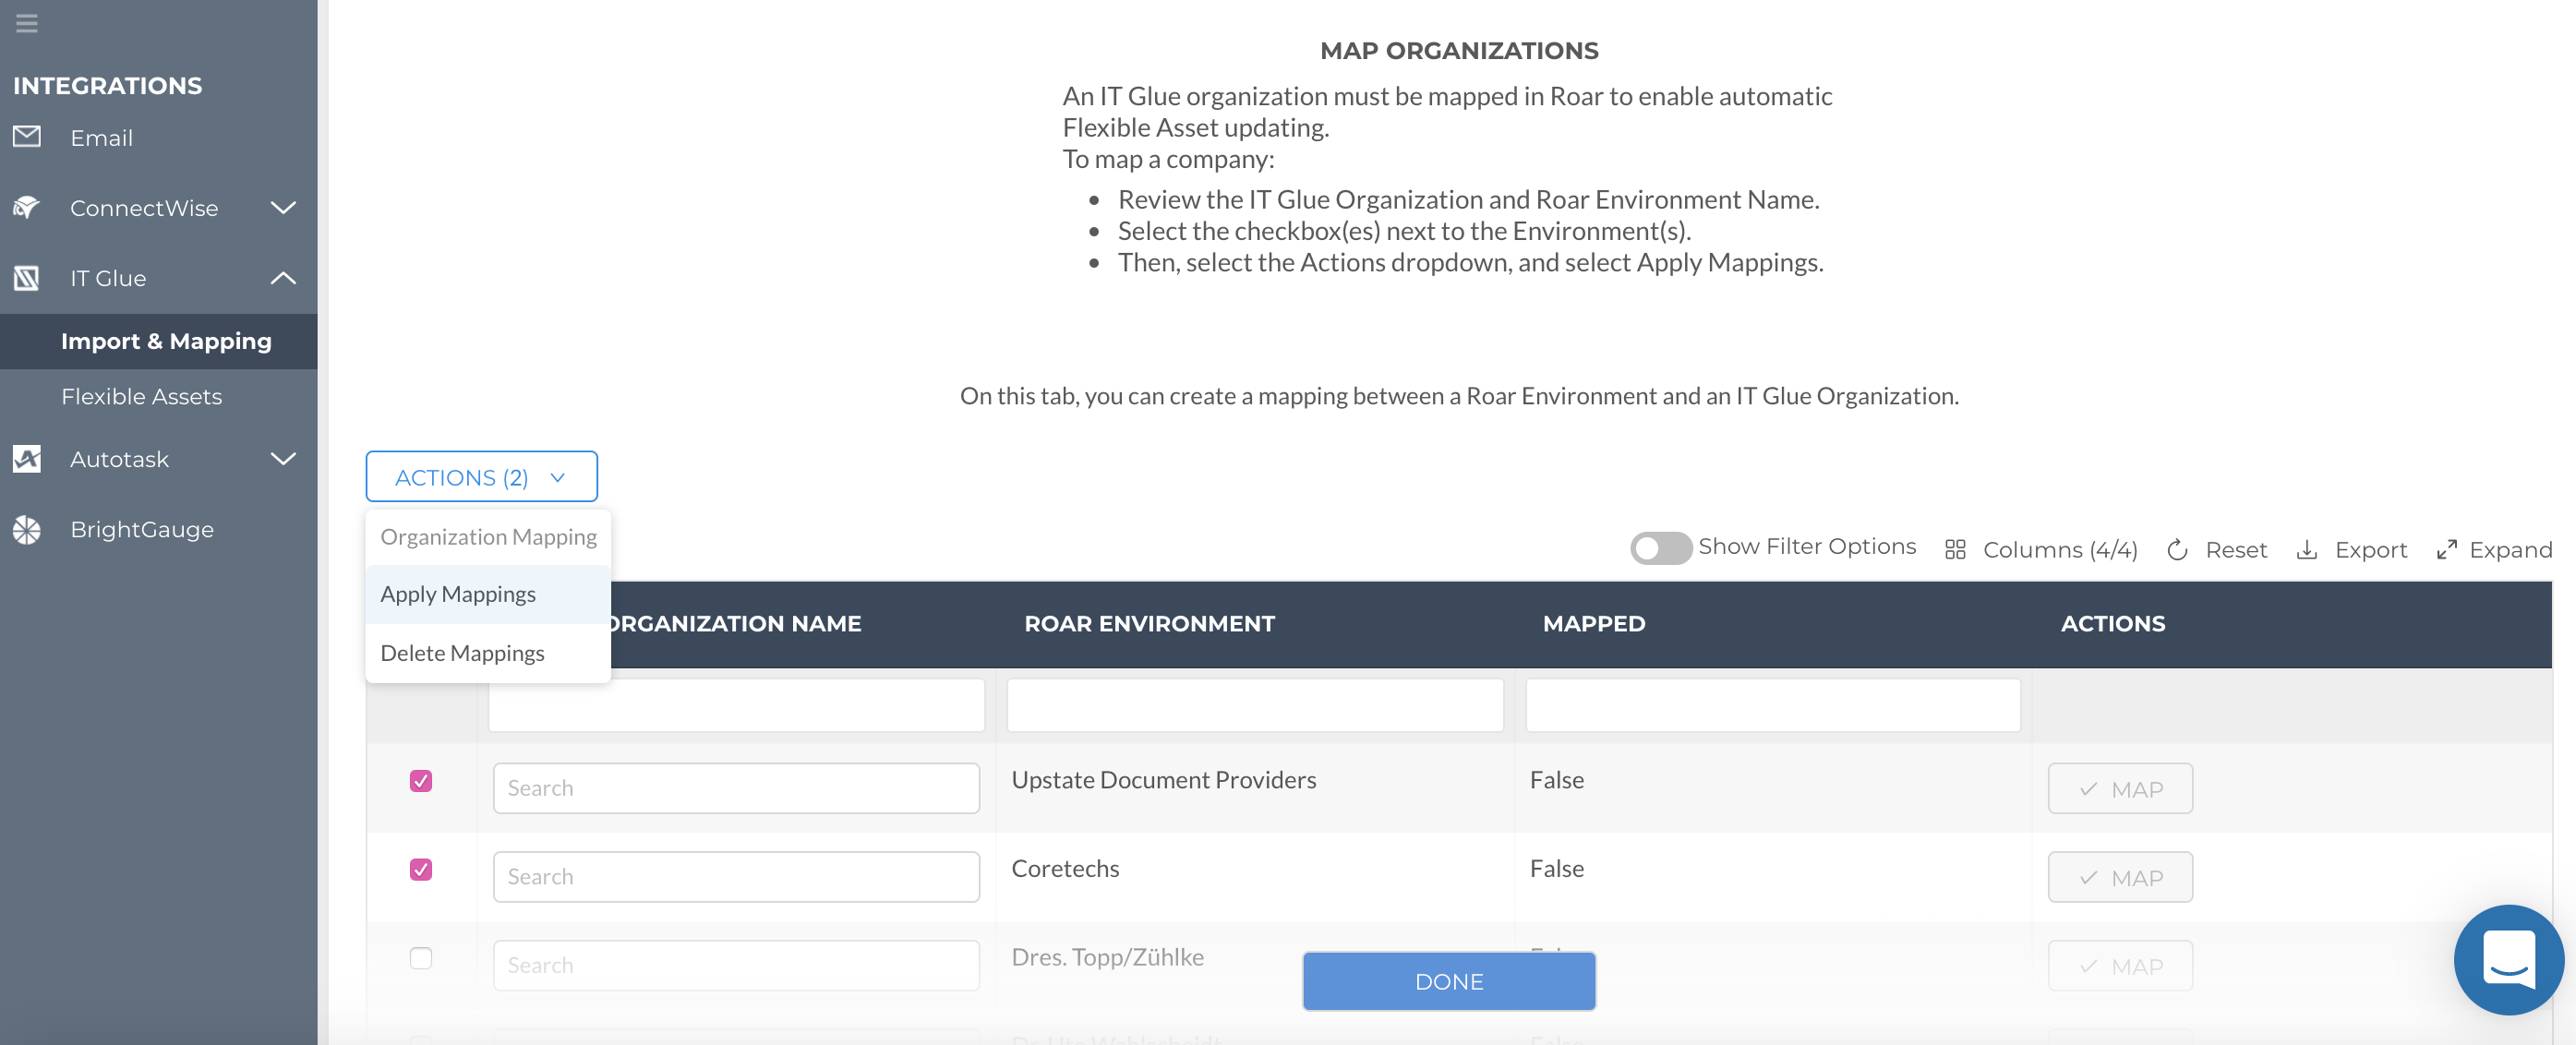
If a suggested mapping is available, the corresponding autosuggestion will be filled into the field in the left IT Glue organization column.
You can Map companies by bulk selecting through selecting checkboxes on the left and using the Actions pulldown and selecting Apply Mappings, or by individually clicking the Map button on the right. Then, select Done.
For those without suggested mappings, you can type into the empty field in the IT Glue Company column to find the correct Liongard Environment.
If there is no matching Environment, you will need to adjust your Import Options in the Import Options tab.

Missing CompaniesIf you do not see the client that you would like to map an Environment to, then check your Import Options to be sure that they are included in your selected types and statuses.
Updated 5 months ago
