Visual Insights Pro's Autotask Integration
Visual Insights Pro now allows you to use Autotask as a data source, enabling you to connect your Autotask PSA environment and unlock powerful reporting and analytics across service desk, project, contract, and financial data. This connector brings your Autotask data directly into the Visual Insights Pro reporting layer, giving you a unified view of your operational and business metrics.
Autotask Integration Setup for Visual Insights
This guide walks through the process of connecting Autotask PSA to Visual Insights.
This integration syncs your Autotask PSA data — including service desk, projects, time tracking, and financials — into Visual Insights, enabling real-time dashboards and reporting across your organization.
Follow the steps below to configure the required API permissions, create the integration user, and establish a secure connection.
Configure Autotask API Access for Visual Insights
This document outlines the steps required to:
- Create a custom security level in Autotask
- Create a dedicated API user
- Connect Autotask to Visual Insights
Part 1: Create a Custom Security Level in Autotask
Create a restricted, read-only security level for the API user to ensure secure access while allowing necessary data retrieval.
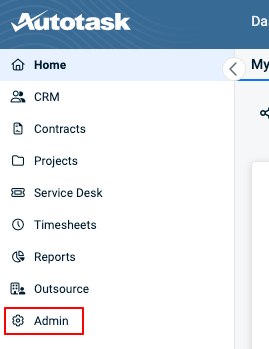
Step 1: Navigate to Security Levels
-
In Autotask, click the Admin icon in the left-hand menu.
-
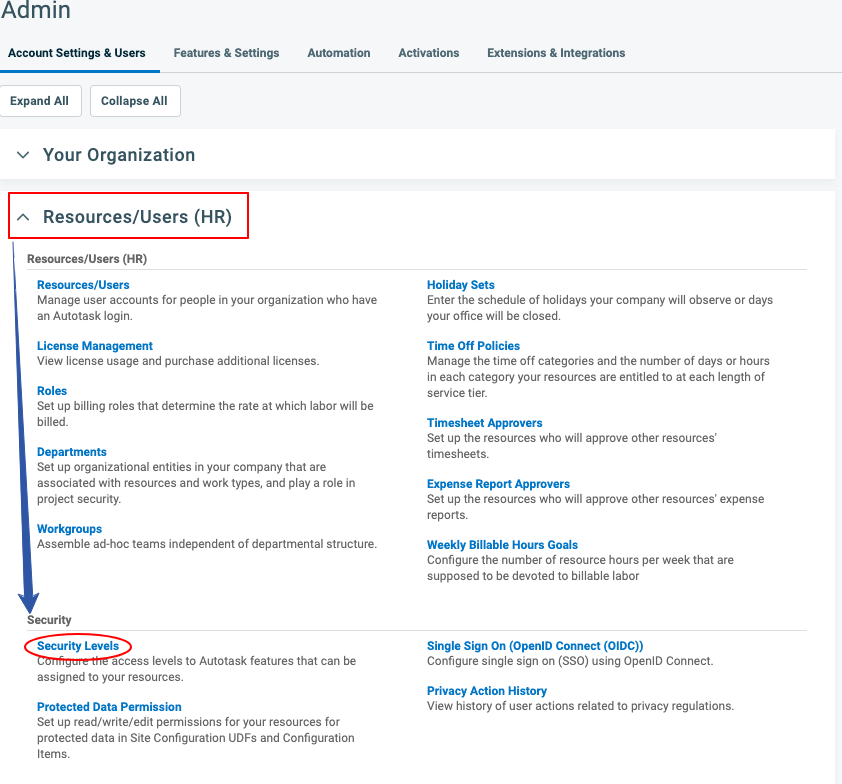
Click Account Settings & Users.

-
Expand Resources/Users (HR).
-
Select Security Levels.
Step 2: Copy an Existing Level
- Locate API User (system) (API-only).
- Click the context menu.
- Select Copy.
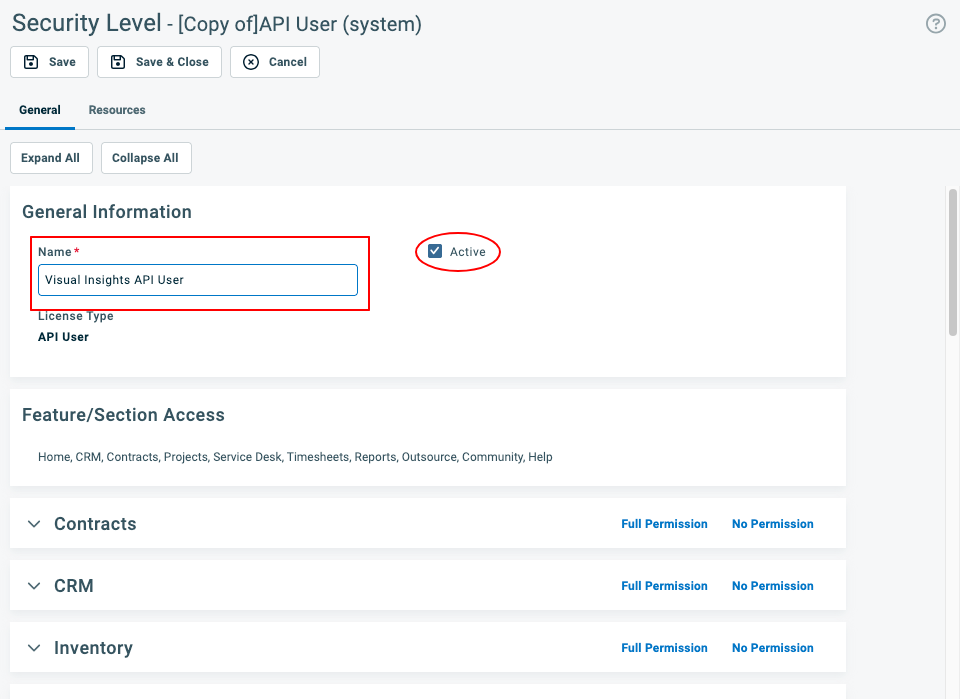
Step 3: Configure General Settings
- Name: Rename the level (e.g., Visual Insights API User).
- Active: Ensure the Active box is checked.
Step 4: Configure Object Permissions
Review each category tab carefully.
General Rule:
Set permissions to View Only (All) and remove all Add/Edit/Delete permissions unless otherwise specified.
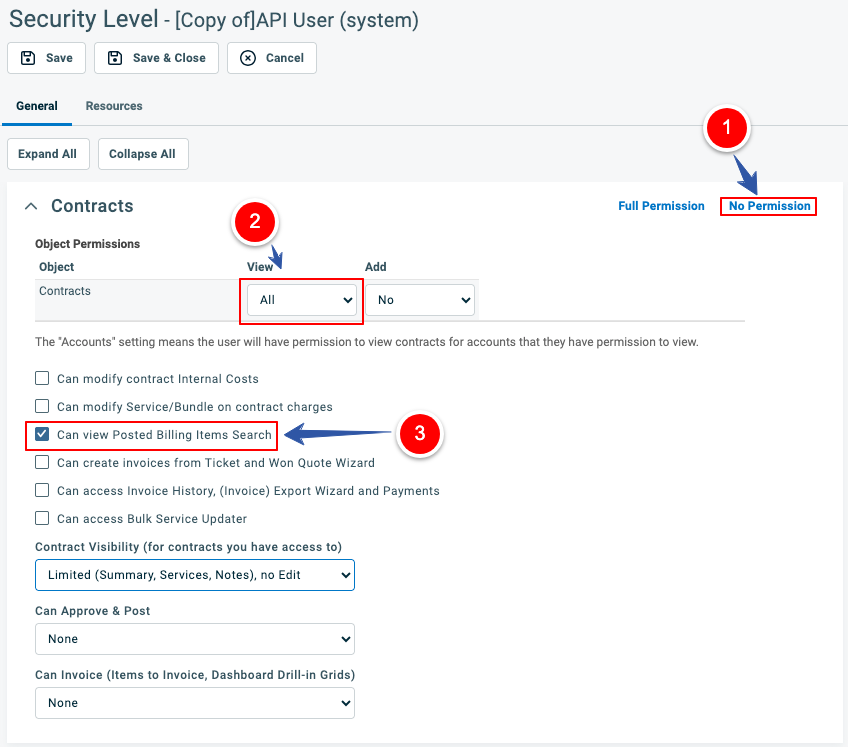
Contracts
-
Click No Permission to clear all settings.
-
Set View = All for all rows.
-
Enable:
- Can View Posted Billing Items Search
- Can View Un-posted Billing Items (If available)
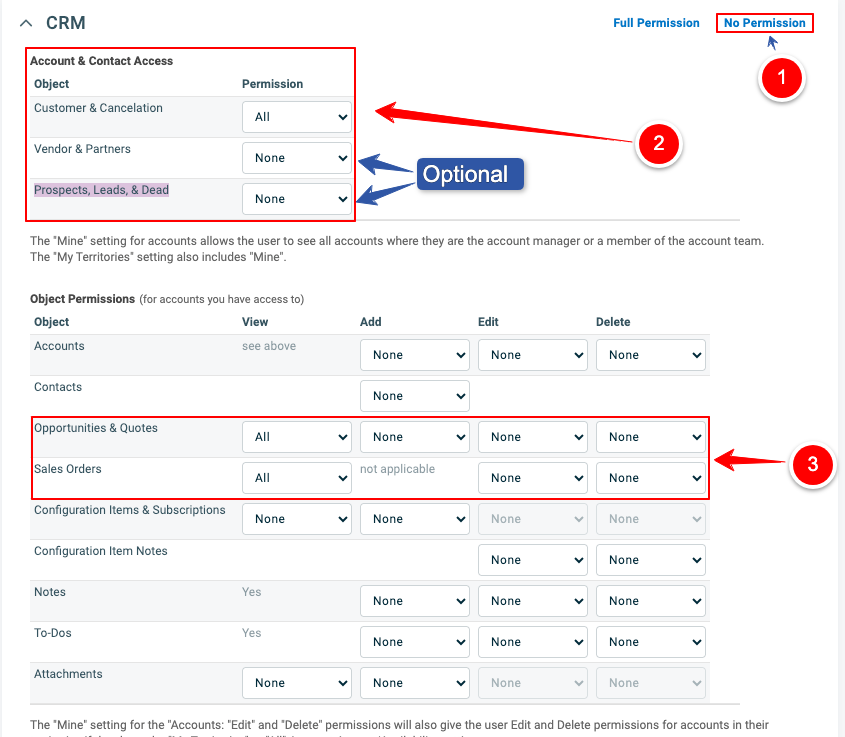
CRM
-
Click No Permission.
-
Under Account & Contact Access
- Set Customer & Cancelation to "ALL"
- Vendor & Partners to "ALL" (Optional)
- Prospects, Leads, & Dead to "ALL" (Optional)
-
Under Object Permissions set View = All for:
- Opportunities & Quotes
- Sales Orders
Inventory
- Click No Permission (leave cleared).
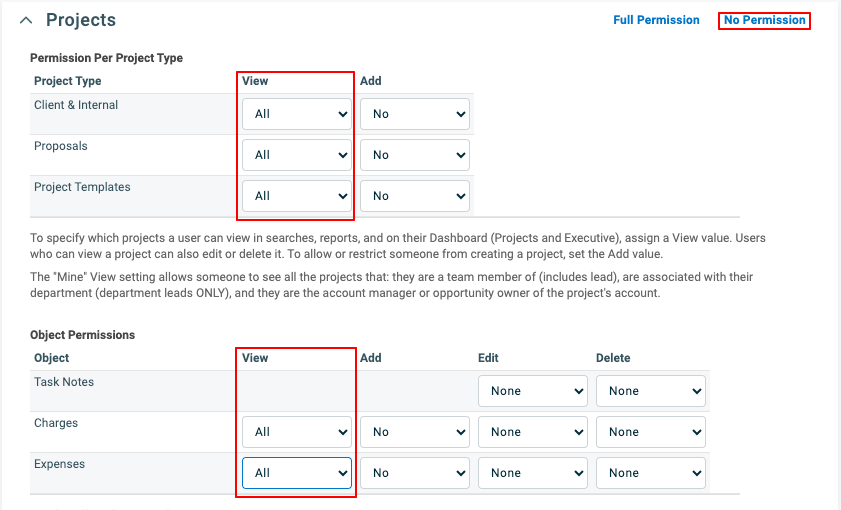
Projects
- Click No Permission.
- Set View = All for all rows.
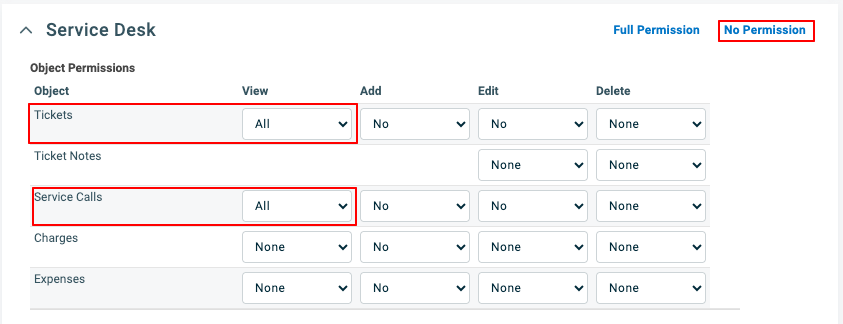
Service Desk
-
Click No Permission.
-
Set View = All for:
- Tickets
- Service Calls
Documents & Knowledge Base
- Leave as No Permission.
Timesheets
- Leave as No Permission (or View-only if required).
Reports
- Click Full Permission (or ensure all categories are enabled for viewing).
Admin
- Click Full Permission to allow visibility into configuration items.
Other
-
Click No Permission.
-
Enable:
- Can Create Webhooks
-
Set:
- Maximum number of Webhooks = 10
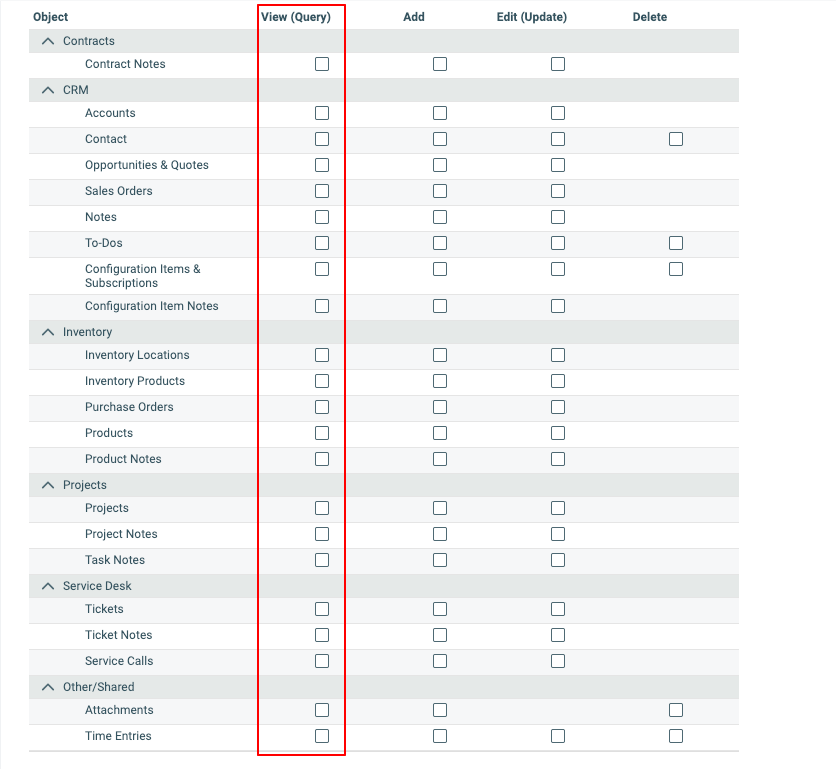
Web Services API
Ensure all View (Query) checkboxes are enabled for all objects that you require.
Step 5: Save
Click Save & Close.
Part 2: Create the API User
Now create the user account that will use the custom security level.
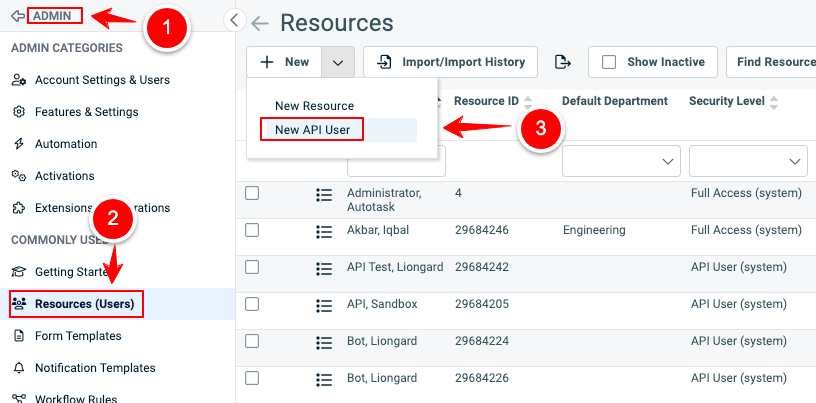
Step 1: Navigate to Resources
Go to:
Admin → Resources/Users
Click the dropdown arrow next to New and select:
New API User
Step 2: Enter User Details
- First Name: Visual
- Last Name: Insights
- Email Address: Enter a valid service email
- Security Level: Select your custom level (e.g., Visual Insights API User)
- Primary Internal Location: Select your primary location
Step 3: Generate Credentials
Click:
- Generate Key → Copy and securely store
- Generate Secret → Copy and securely store
⚠️ These credentials will not be shown again.
Step 4: Select Integration Vendor
Scroll to API Tracking Identifier.
In the Integration Vendor dropdown:
- Select Visual Insights (if available)
- If not available, leave blank or select the appropriate Liongard option (Liongard - Documentation)
Step 5: Save
Click Save & Close.
Part 3: Connect Autotask to Visual Insights
Step 1: Locate Your Zone Number
While logged into Autotask, check your browser URL.
Example:
https://ww2.autotask.netYour Zone Number = 2
Step 2: Open Visual Insights
-
In Liongard, go to Reporting.
-
Click View All Dashboards.
-
Select Data Settings.
-
Navigate to Integrations.
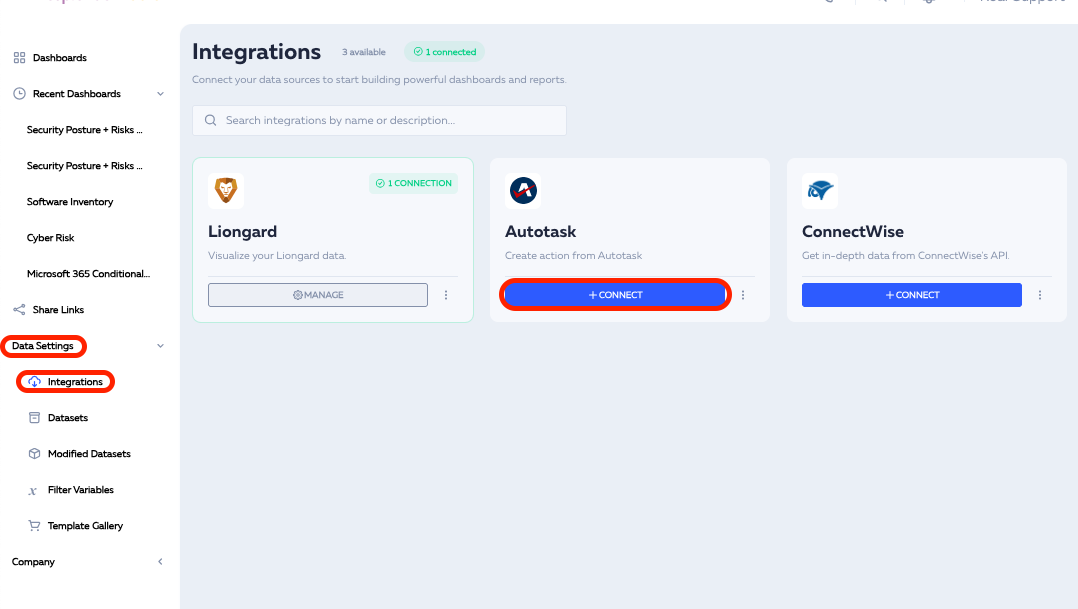
Step 3: Add the Connection
-
Locate Autotask.
-
Click + Connect.
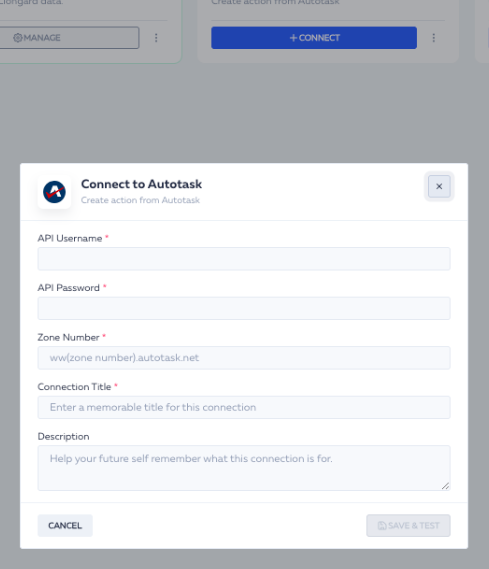
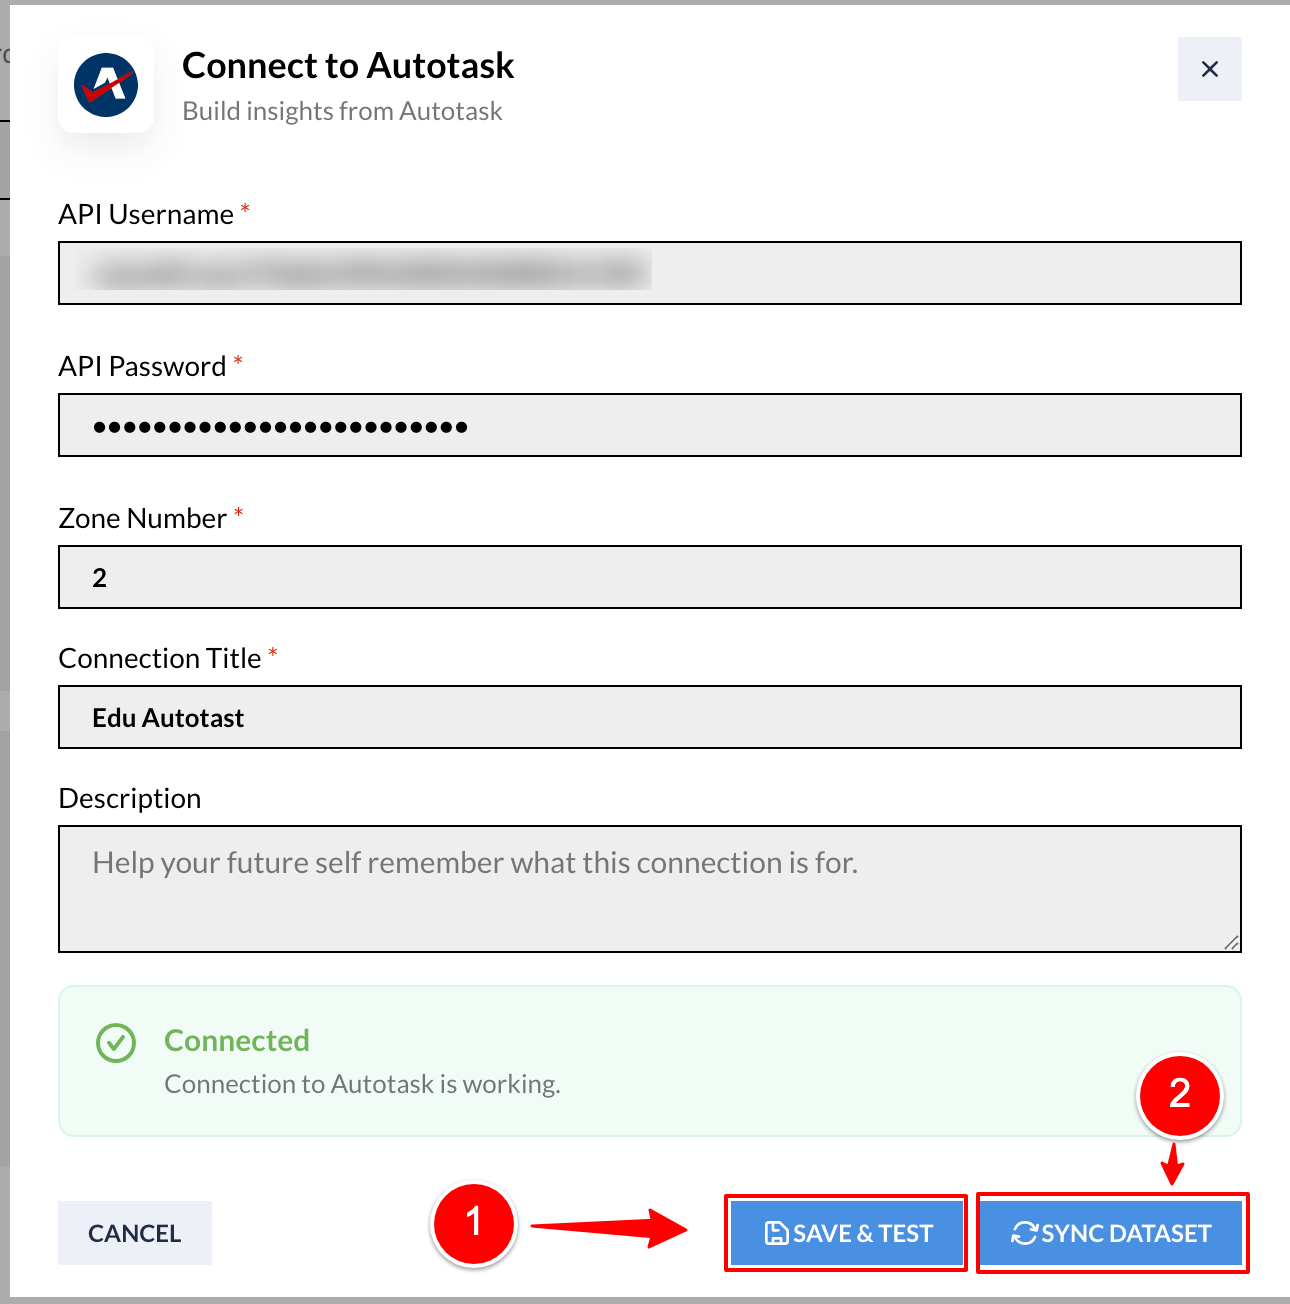
Step 4: Enter Credentials
Provide the following:
- API Username: Paste the generated Key
- API Password: Paste the generated Secret
- Zone Number: Enter your zone number
- Connection Title: Example – Autotask Sandbox
Step 5: Finalize
- Click Save & Test.
- Wait for the green checkmark confirmation.
- Click Sync Dataset to begin importing data.
Completion
Once synchronization begins, Autotask data will start populating within Visual Insights dashboards.
If connection fails:
- Reconfirm Zone Number
- Verify API credentials
- Confirm correct security level permissions
Updated 4 months ago