Create a Liongard API Account in HaloPSA
This document provides detailed instructions on setting up an API key for Liongard within your HaloPSA instance.
Liongard uses a HaloPSA Client ID and Secret to connect to HaloPSA.
Creating HaloPSA credentials
- Step 1: Create a Liongard Agent
- Step 2: Create a HaloPSA Application
Step 1: Create a Liongard Agent
- Log in to your HaloPSA Instance
- In the bottom, left menu, click Configurations > Teams & Agents > Agents
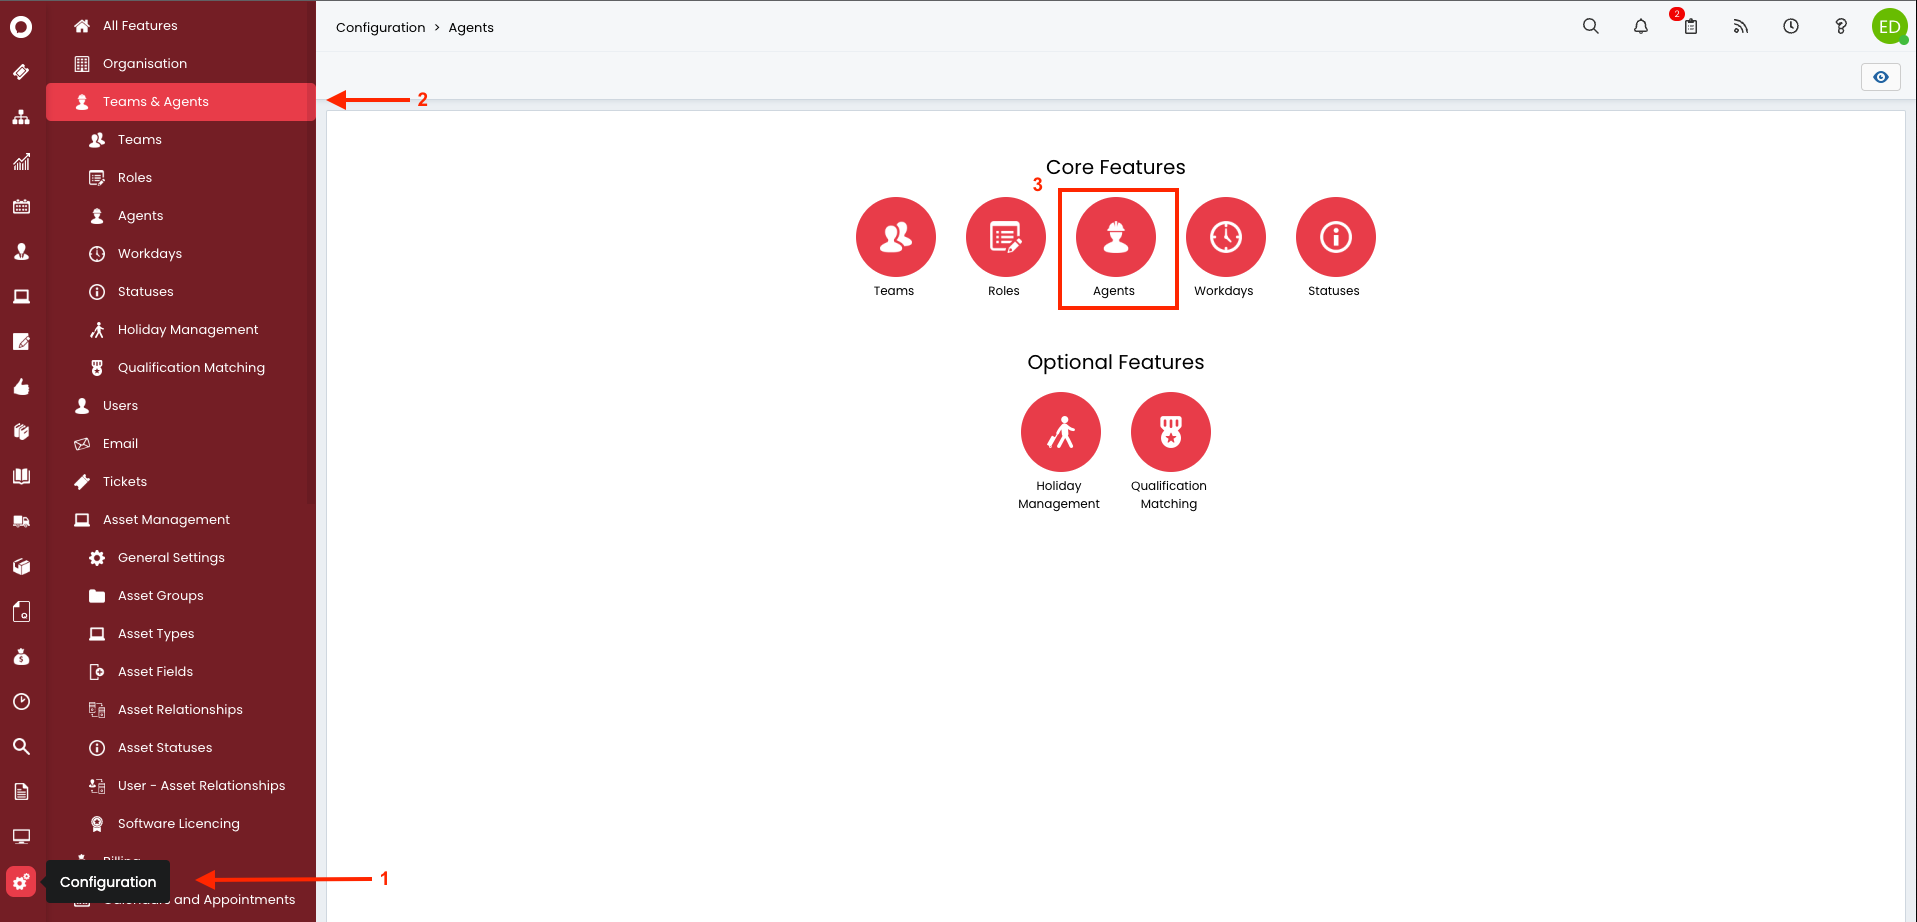
- Create a new user by selecting New in the top-right section of the page. Alternatively, you can edit an existing user with the required permissions.
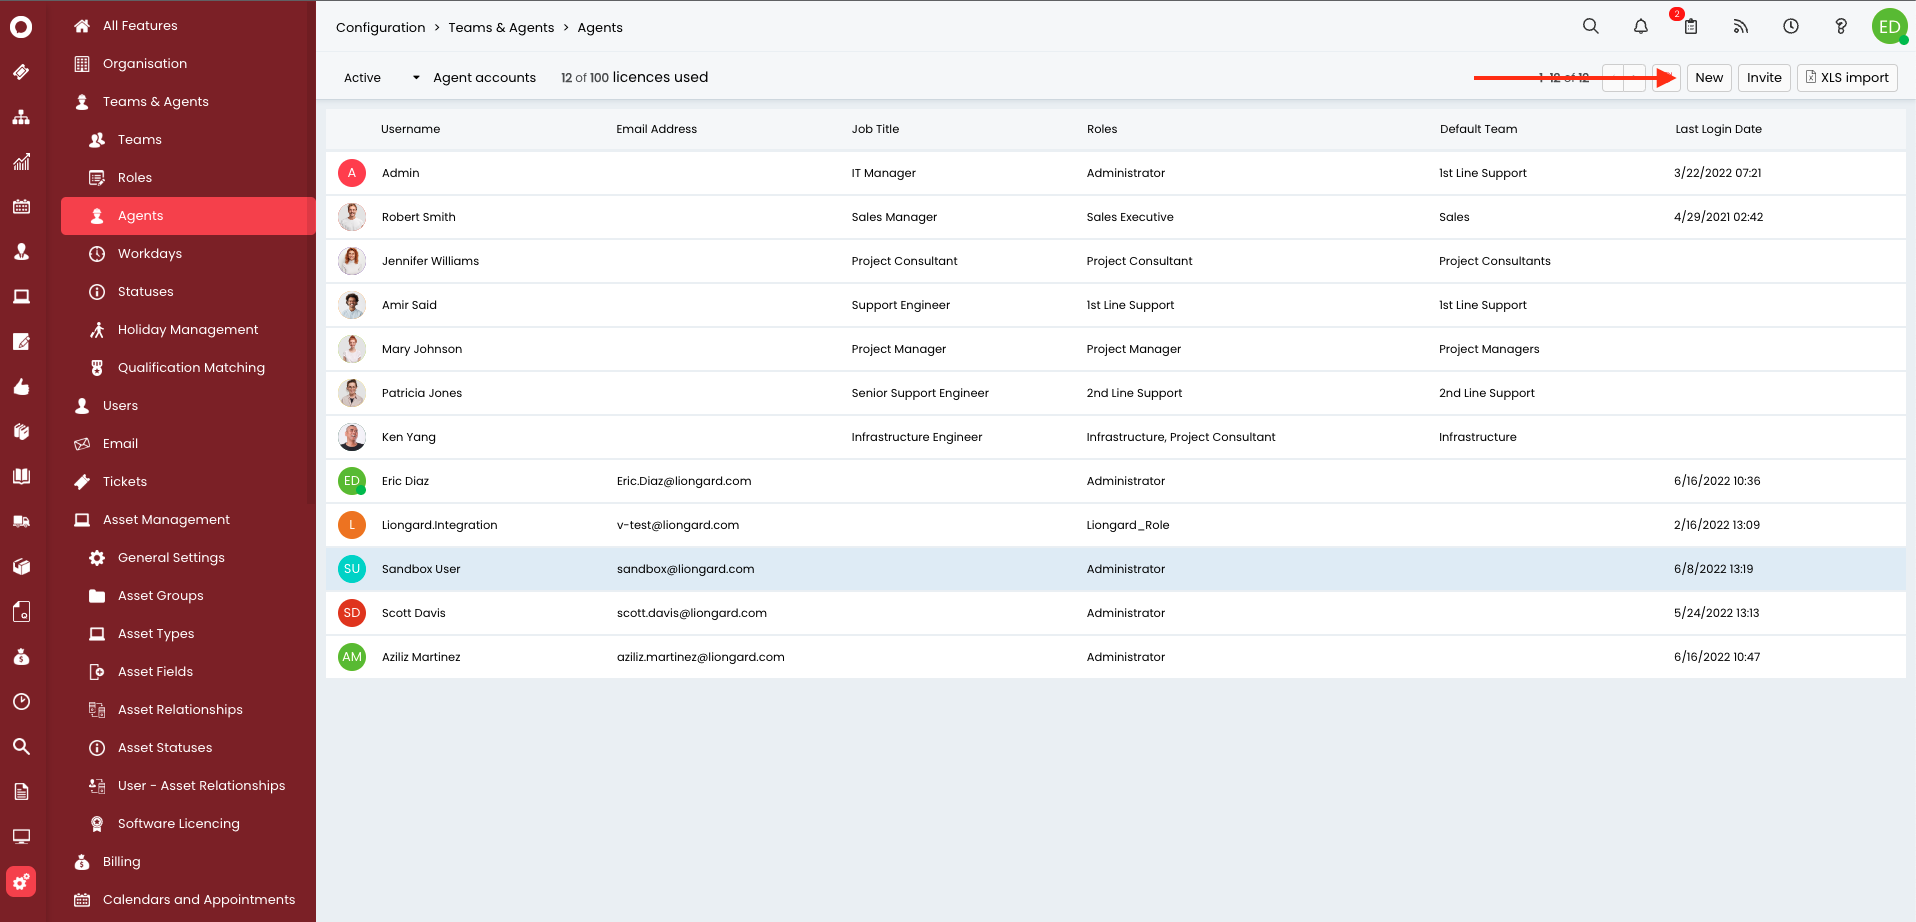
- Complete the required fields based on your company's workflows and hit Save.
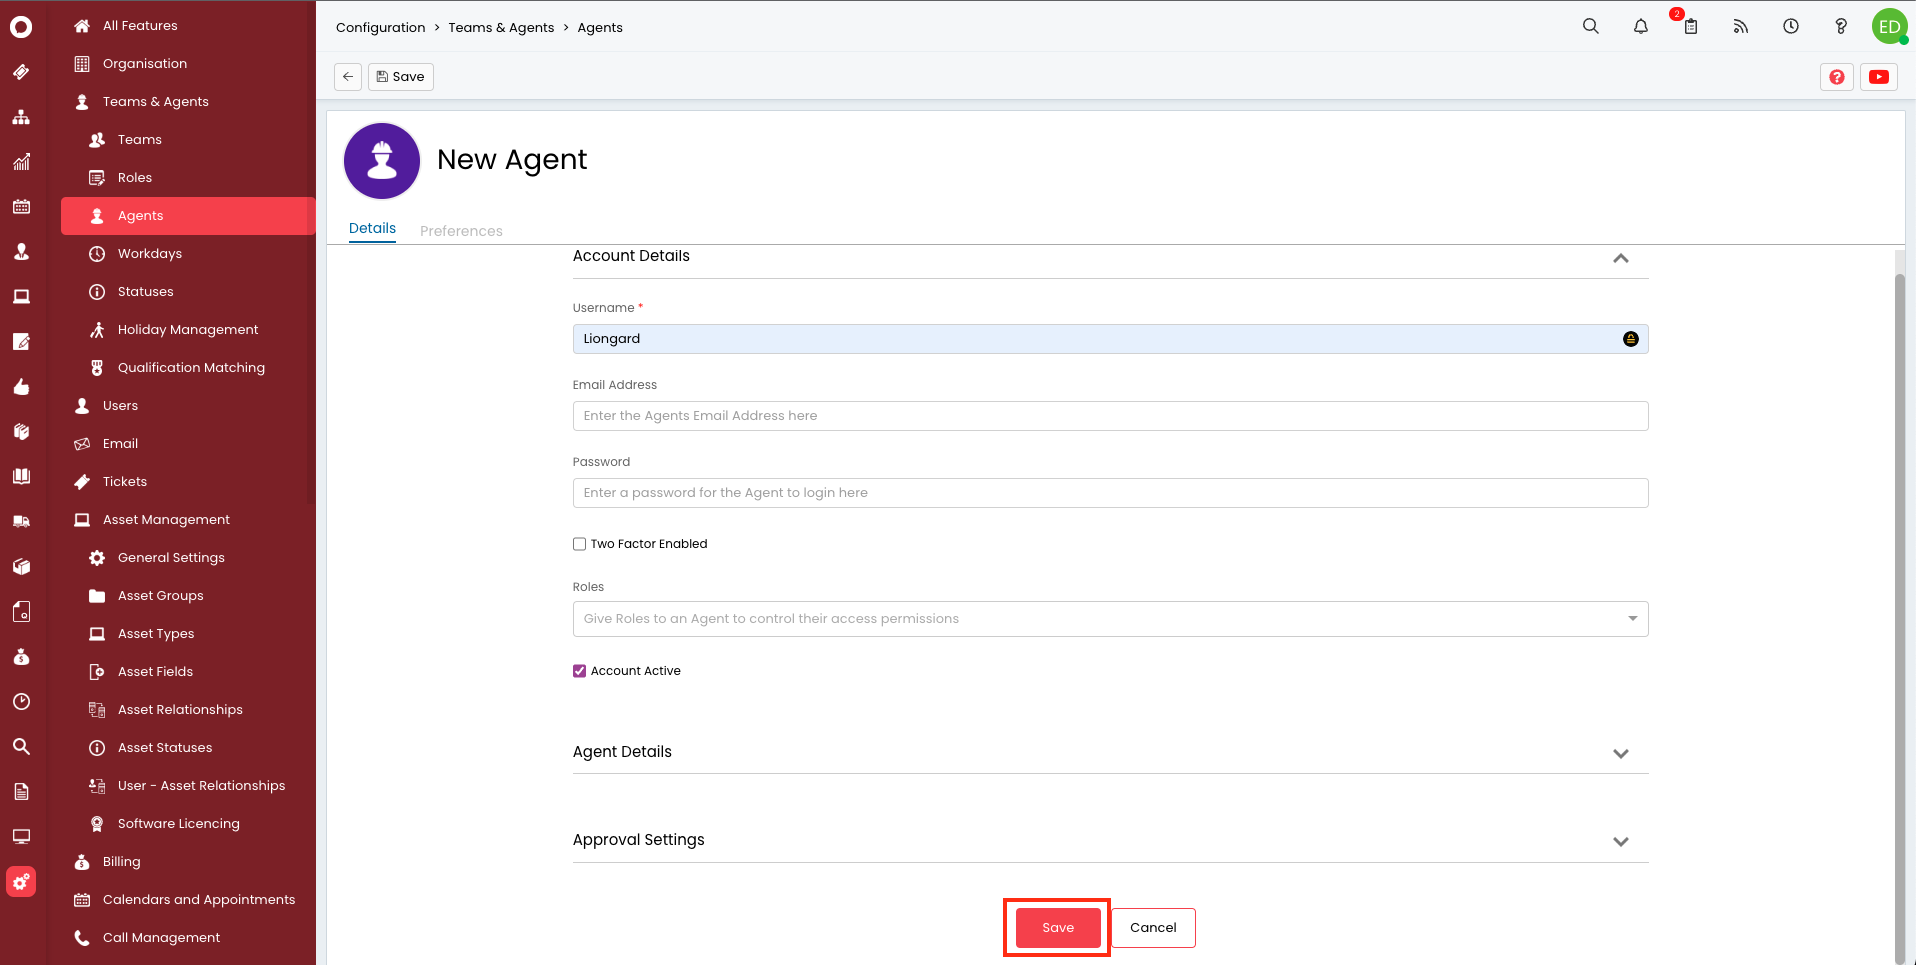
- Once you hit Save, new tabs should appear. Click Edit and select the Permissions tab.
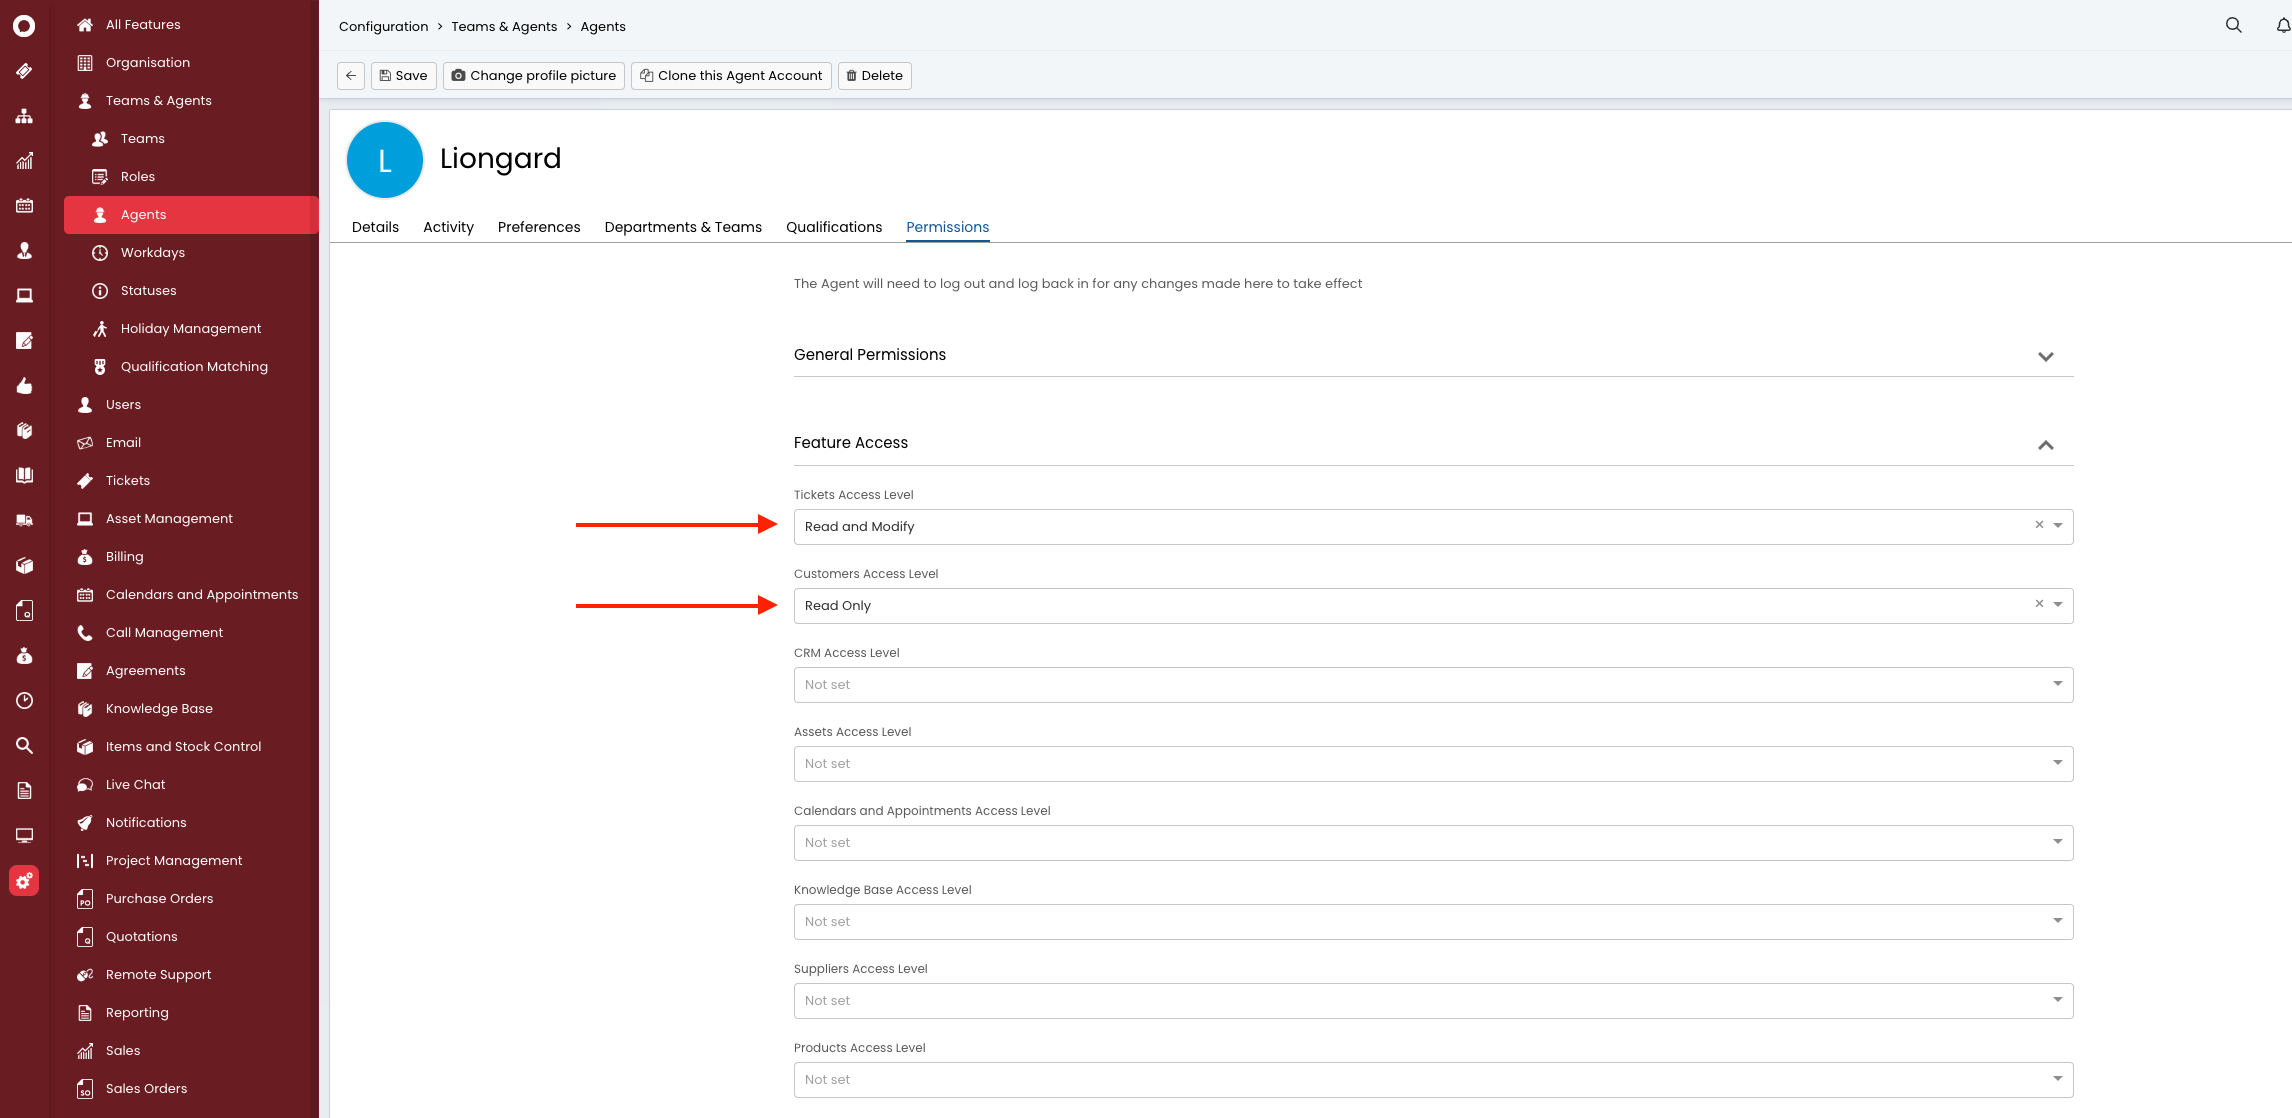
- The following permissions are required for the integration:
- Feature Access
- Tickets Access Level: Read and Modify
- Clients Access Level: Read Only
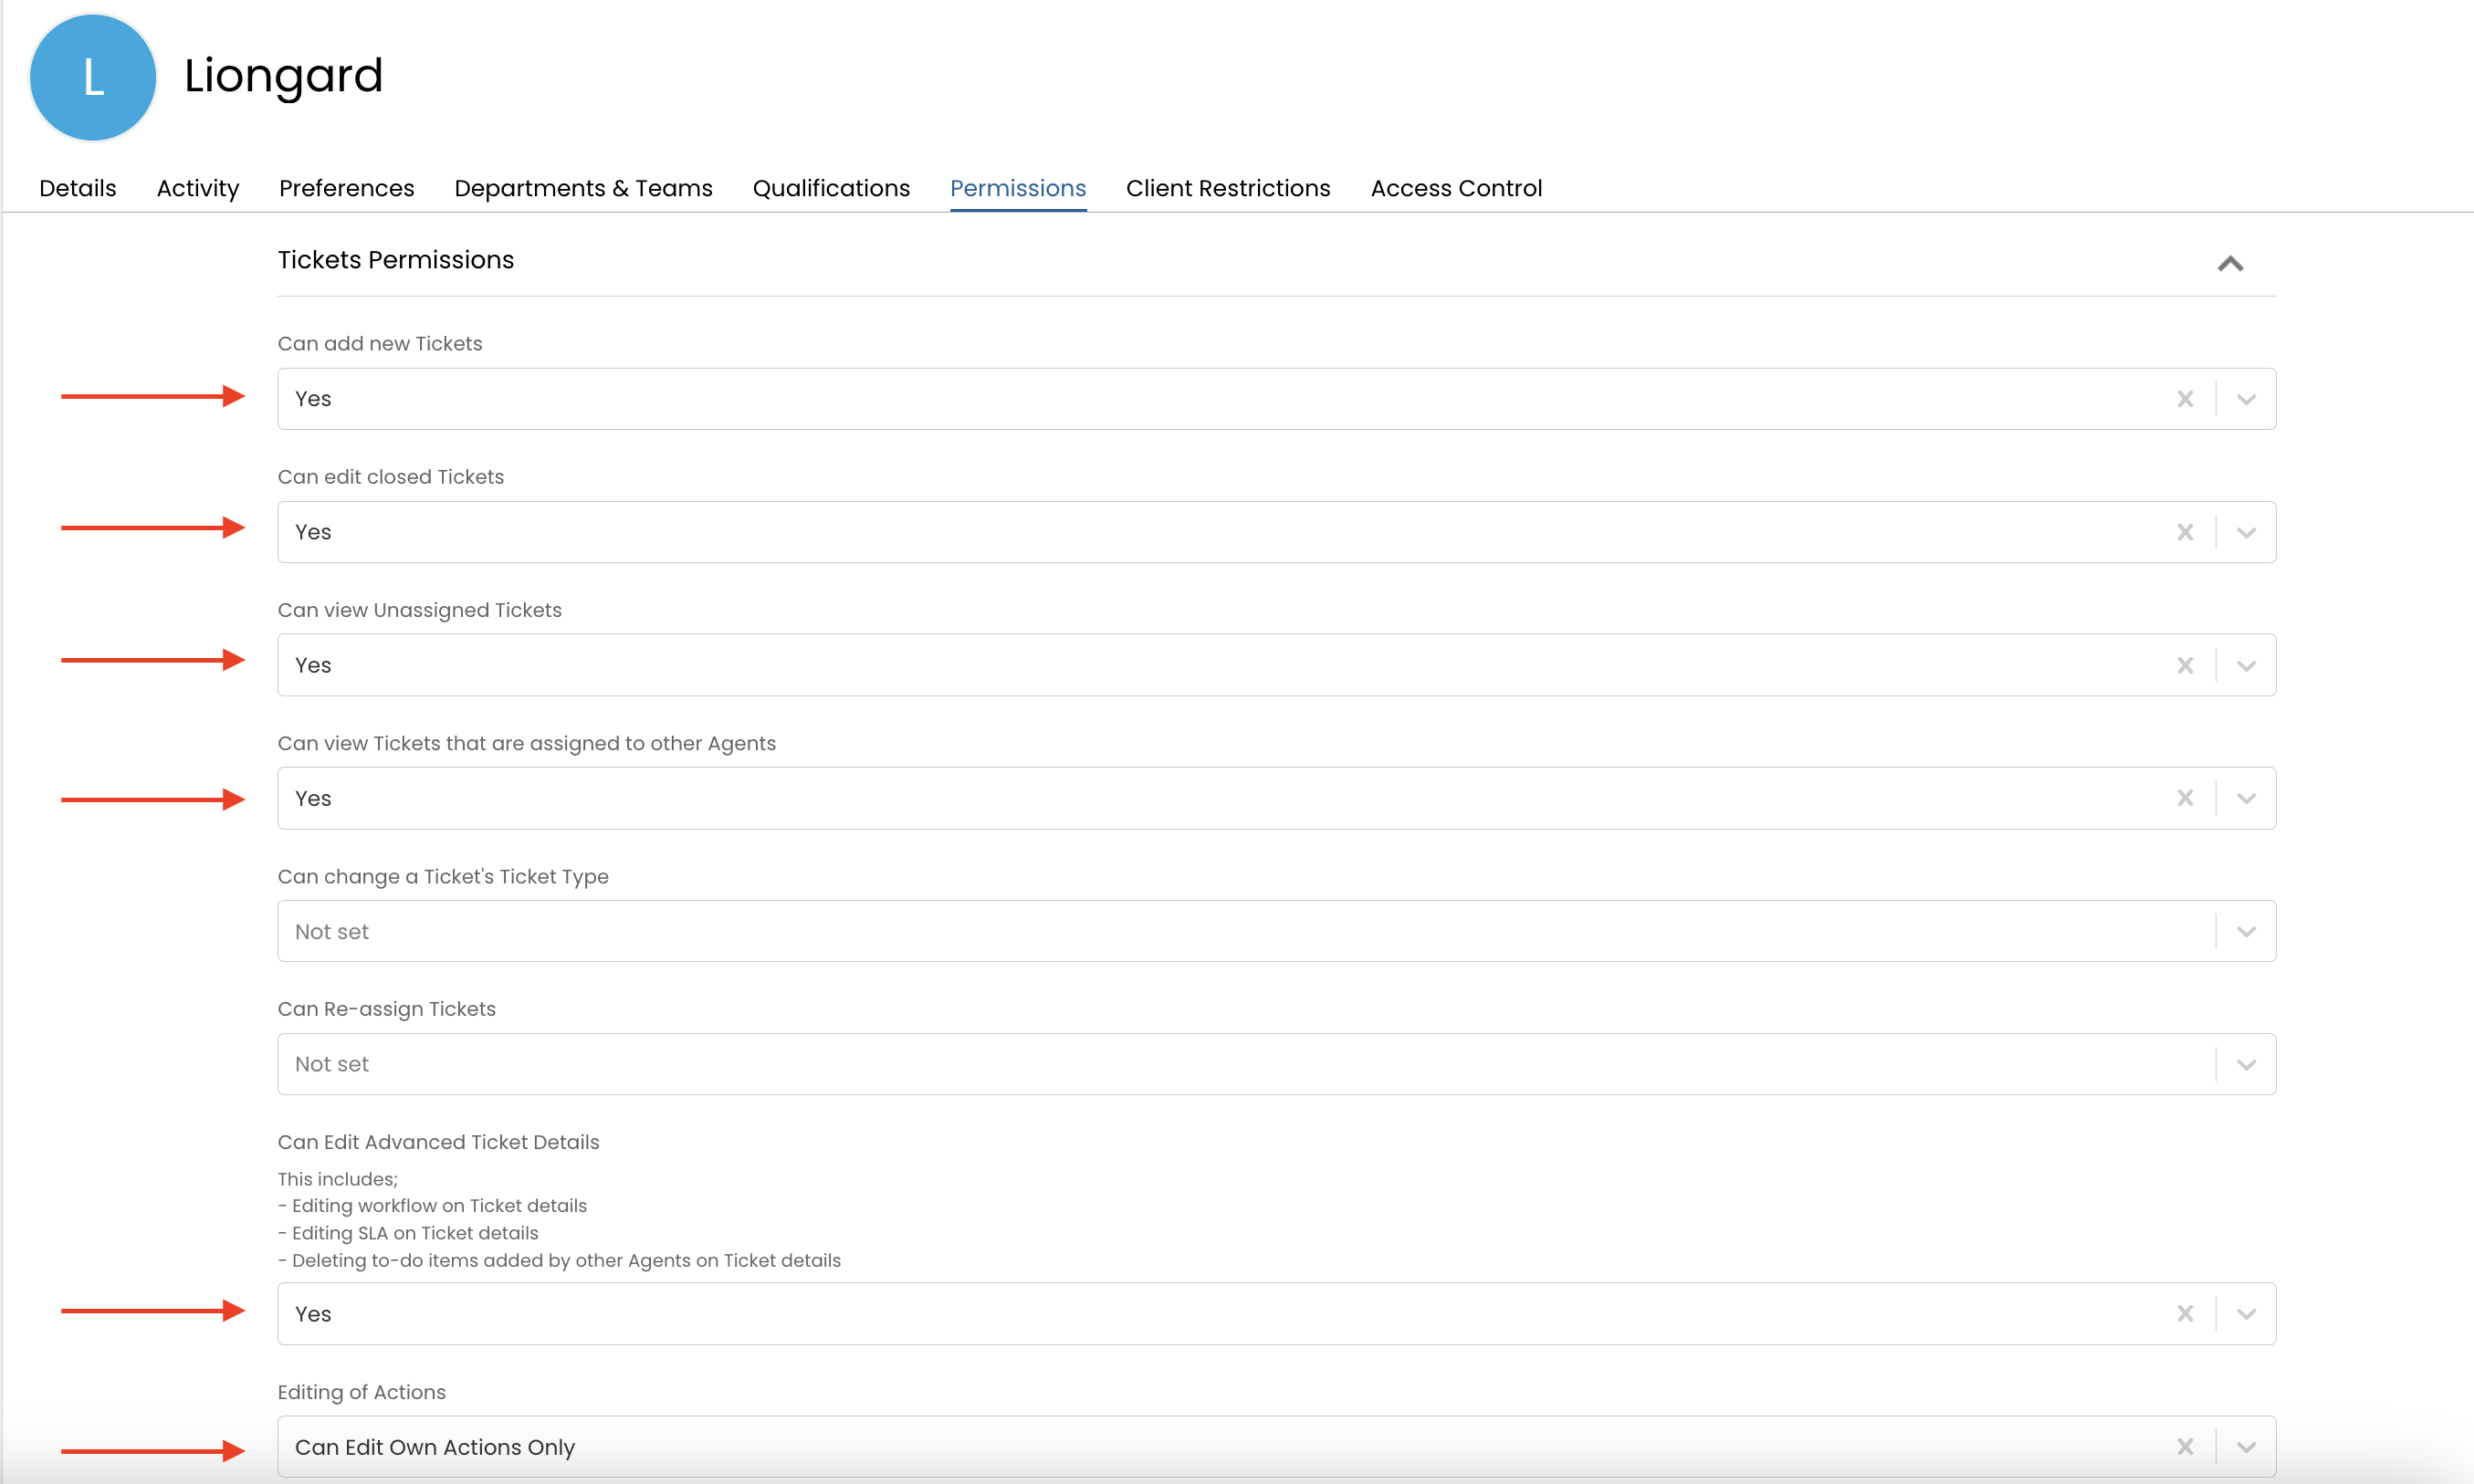
- Tickets Permissions
- Can add new Tickets: Yes
- Can edit closed Tickets: Yes
- Can view Unassigned Tickets: Yes
- Can view Tickets that are assigned to other Agents: Yes
- Can edit Advanced Ticket Details: Yes
- Editing of Actions: Can Edit Own Actions Only
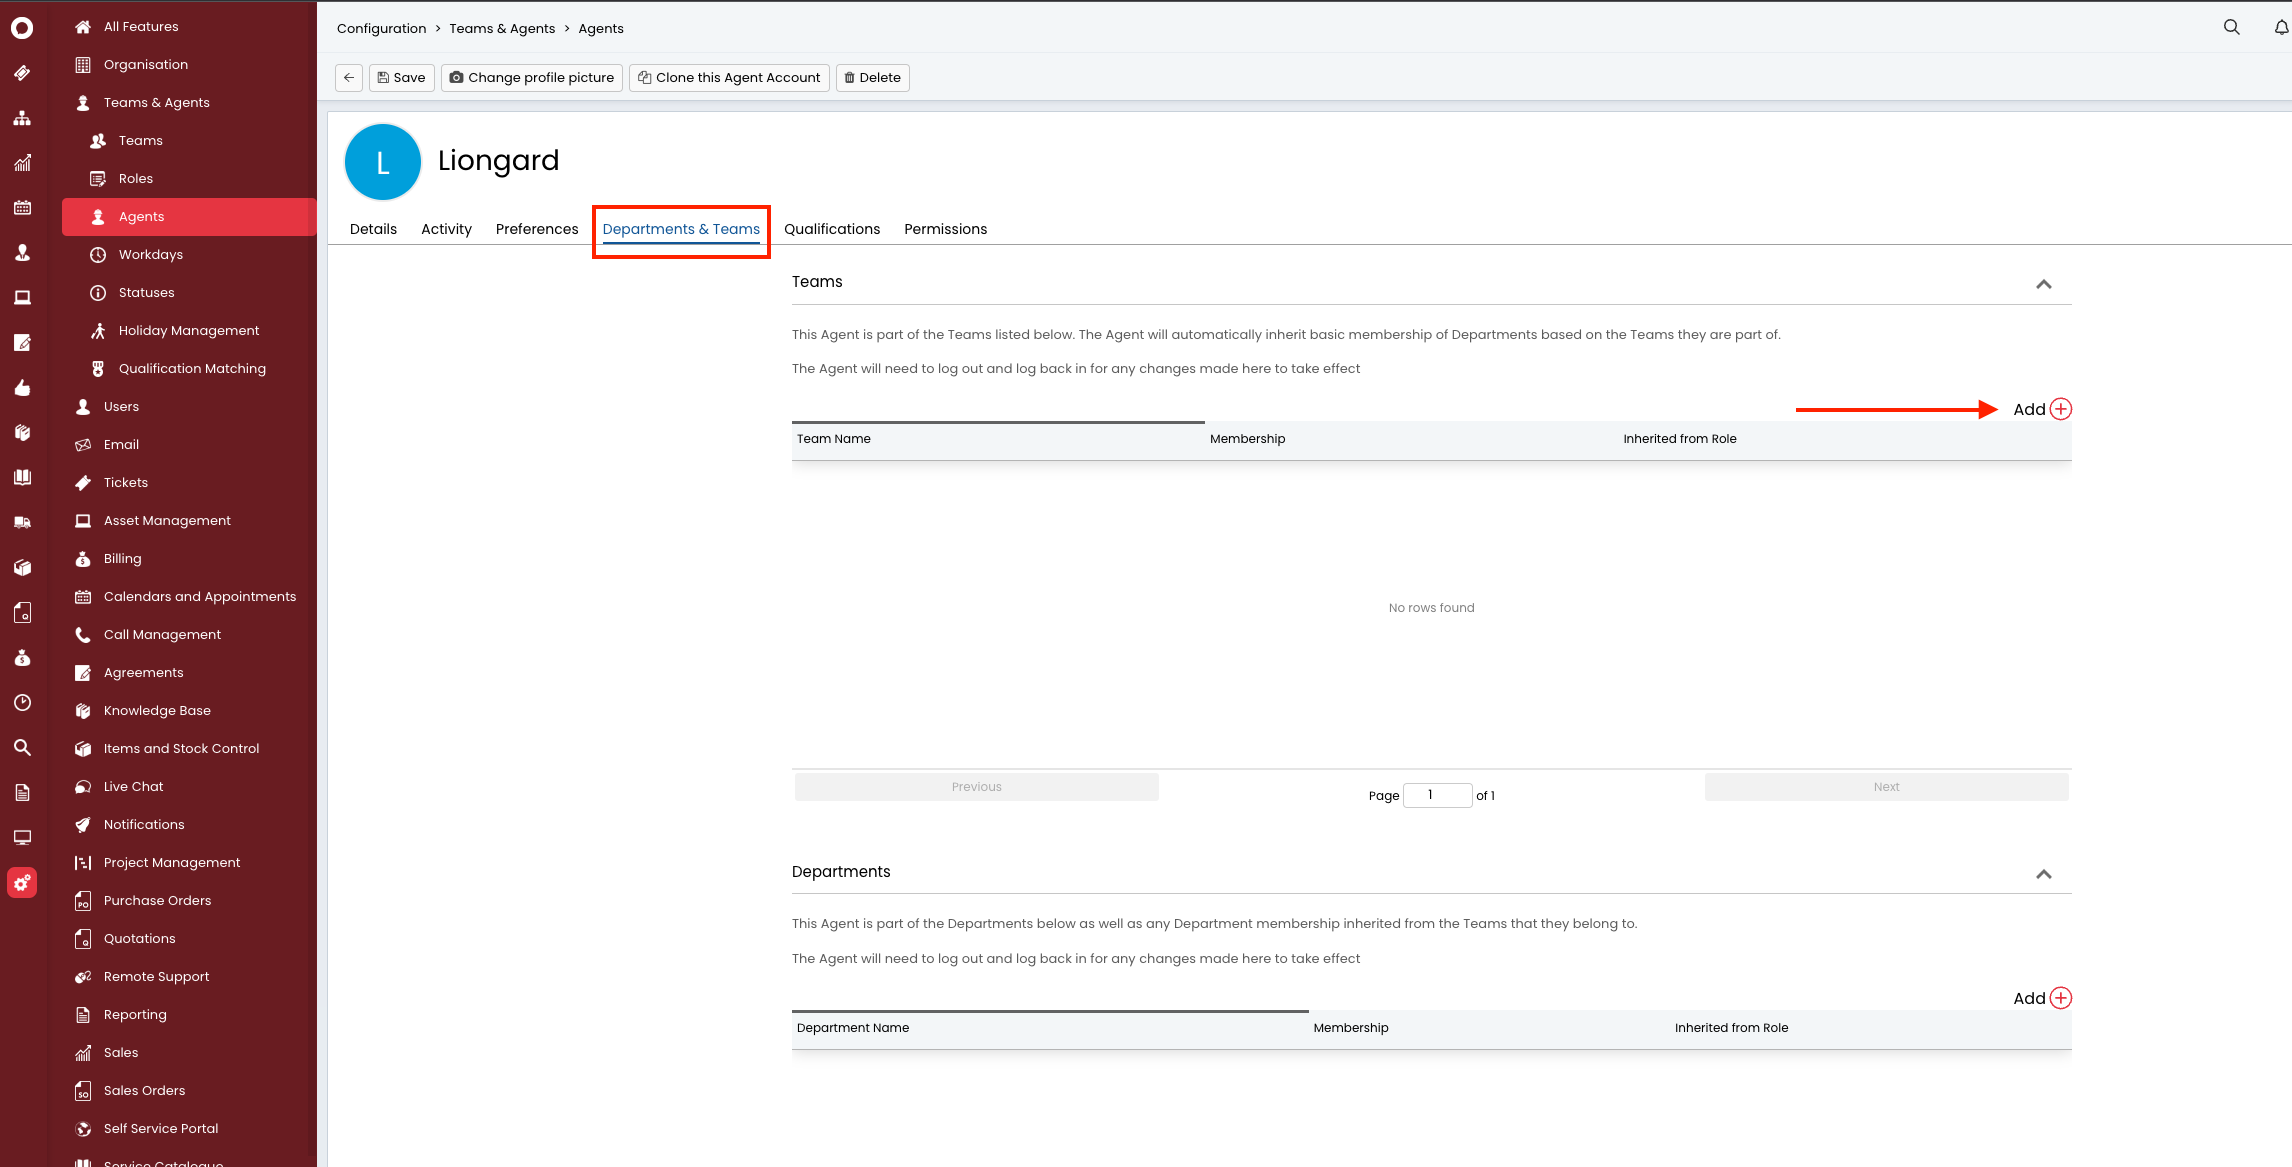
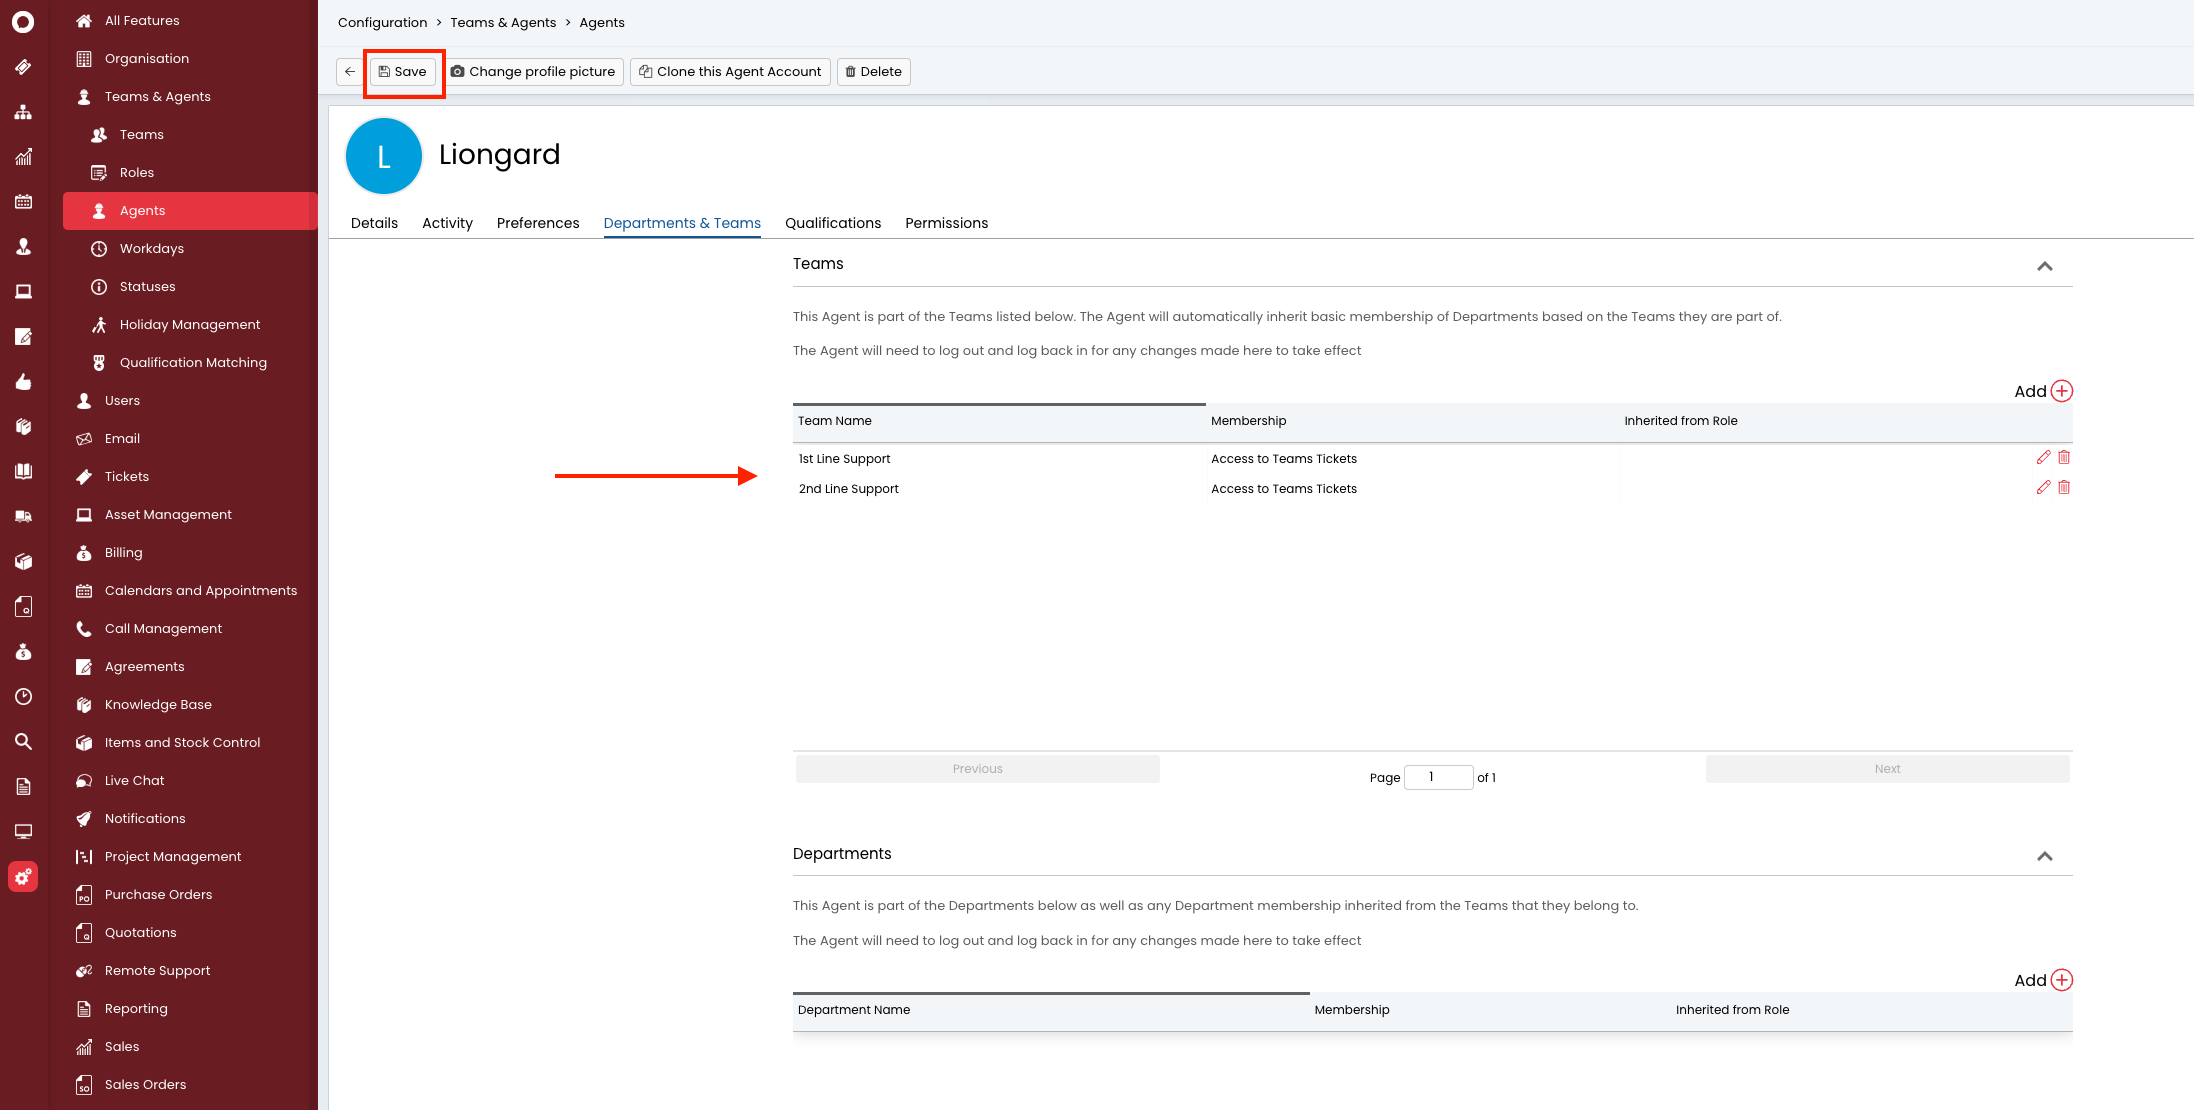
- Next, select the Departments & Teams tab and select Add under the Teams section.
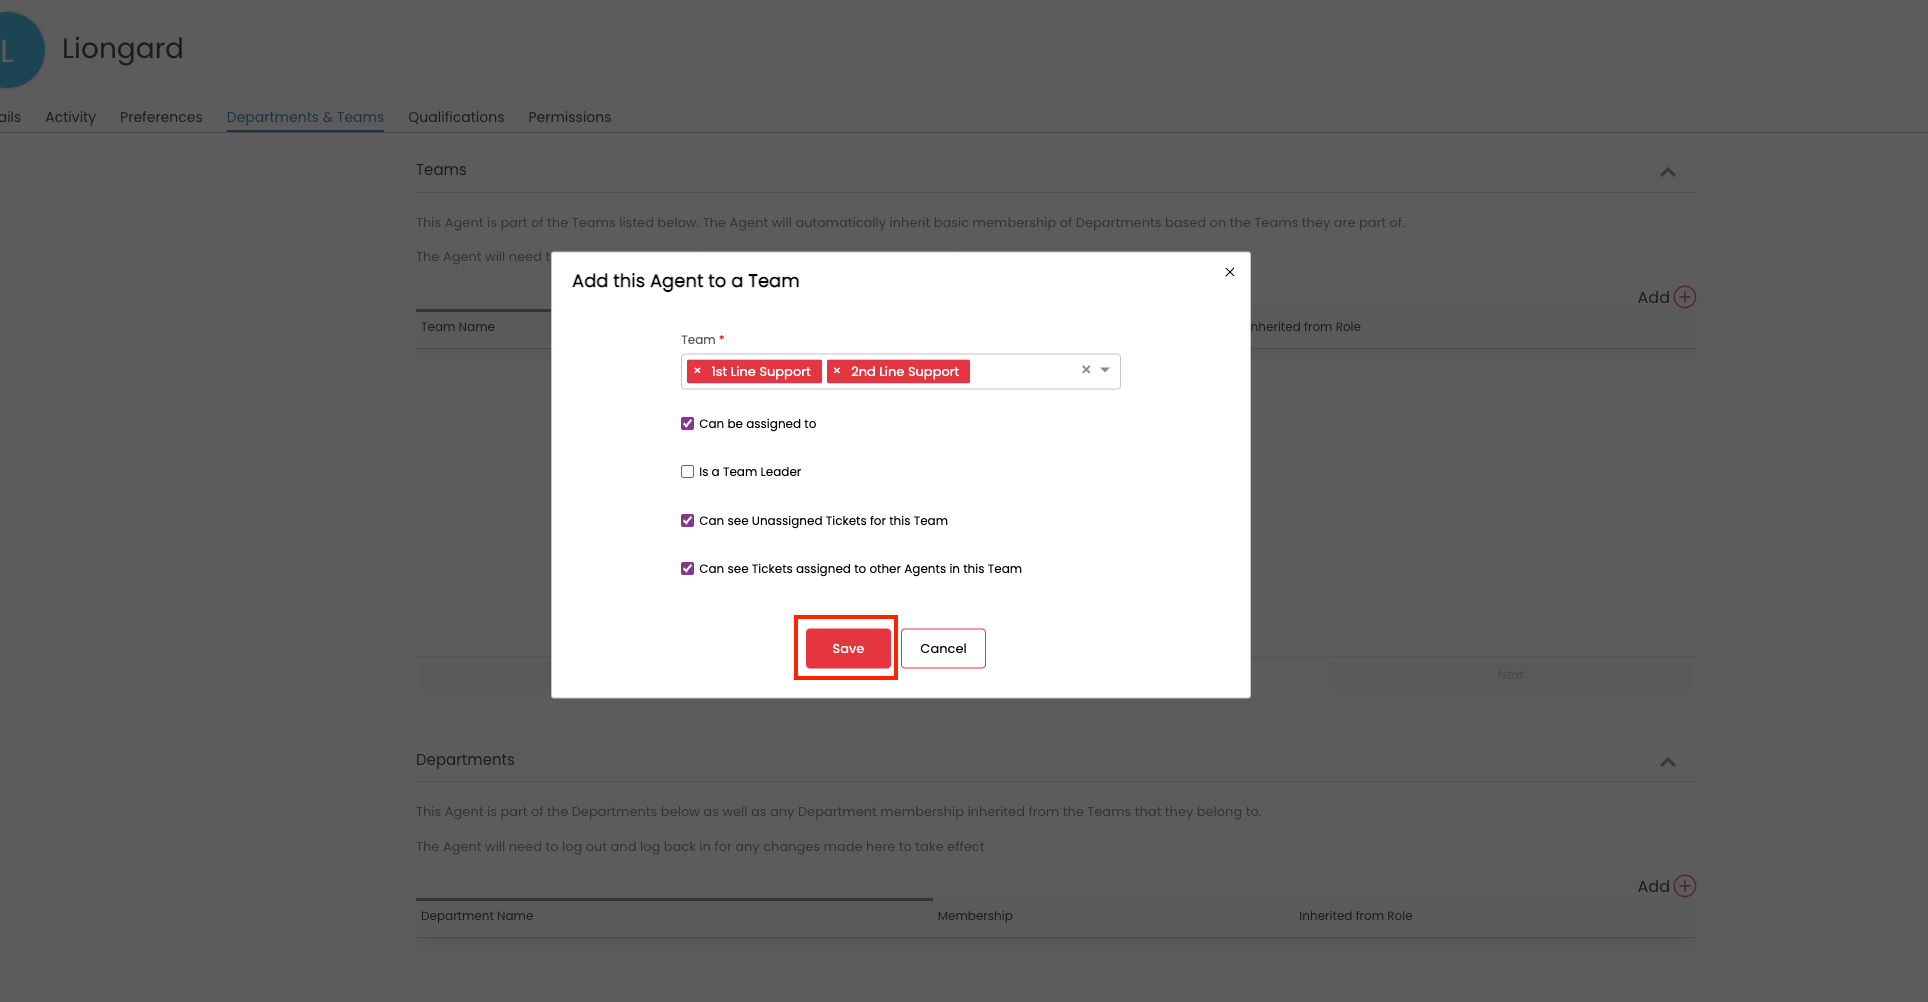
- Select the Team(s) you would like Liongard to have access to send tickets to and select Save.
- You should see a list of the Teams you selected appear. Select Save at the top of the screen.
Step 2: Create an Application
- In the bottom, left menu, click Configurations > Integrations > HaloPSA API
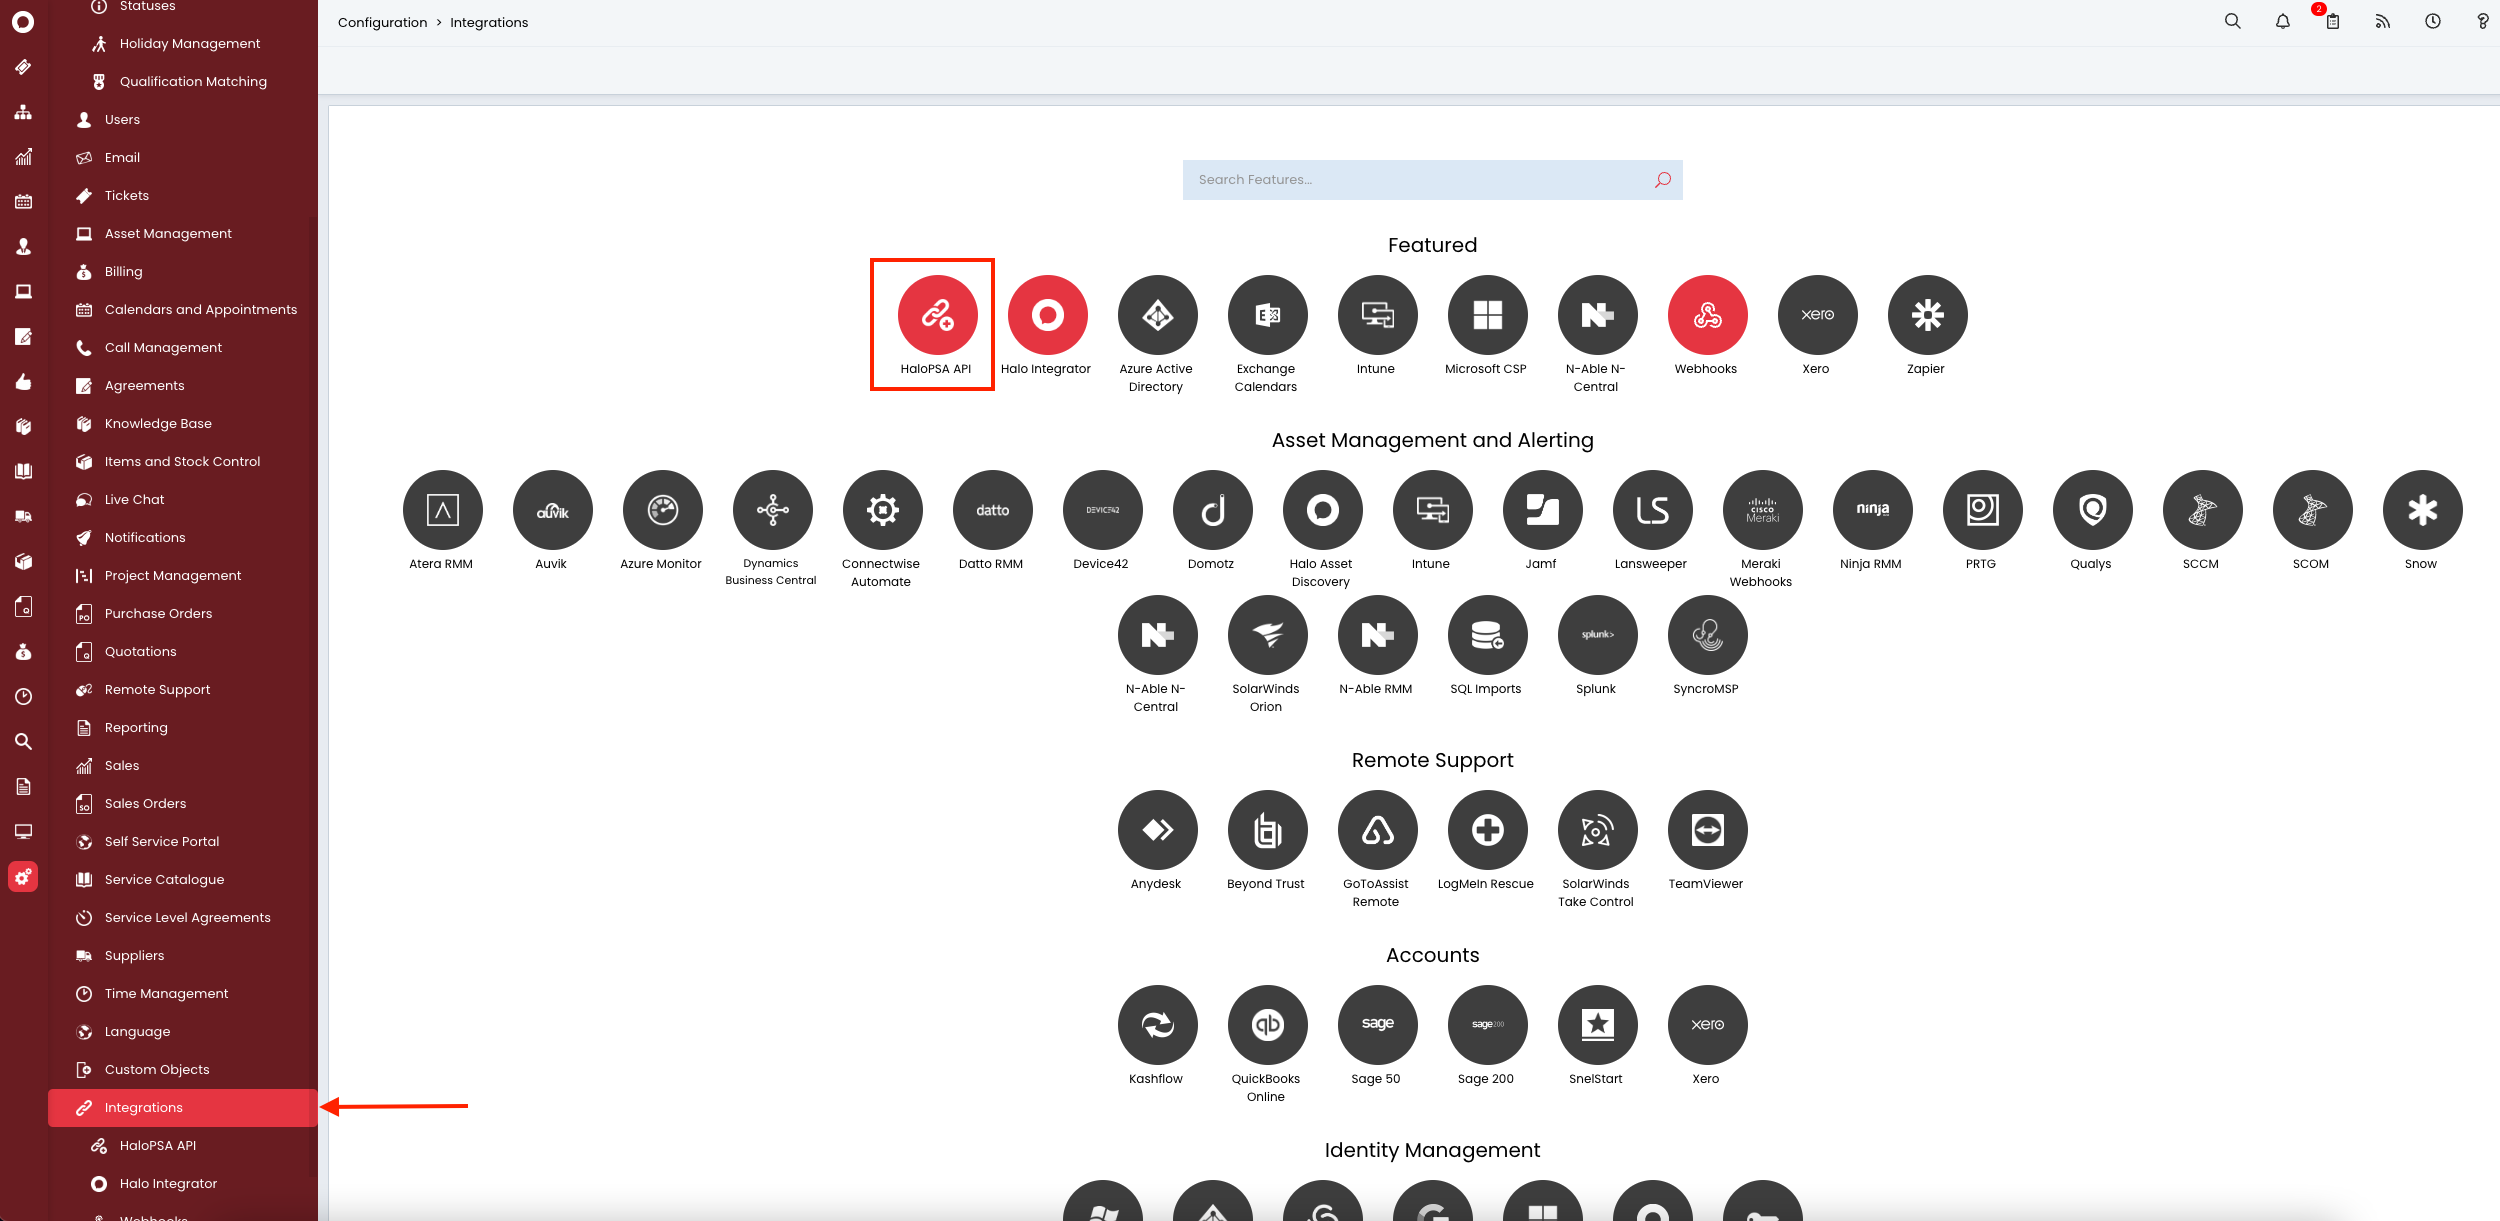
- You will want to document the following information as you will need this for connecting Liongard to HaloPSA:
- Resource Server
- Authorisation Server
- Tenant
After you have documented these details, click View Applications
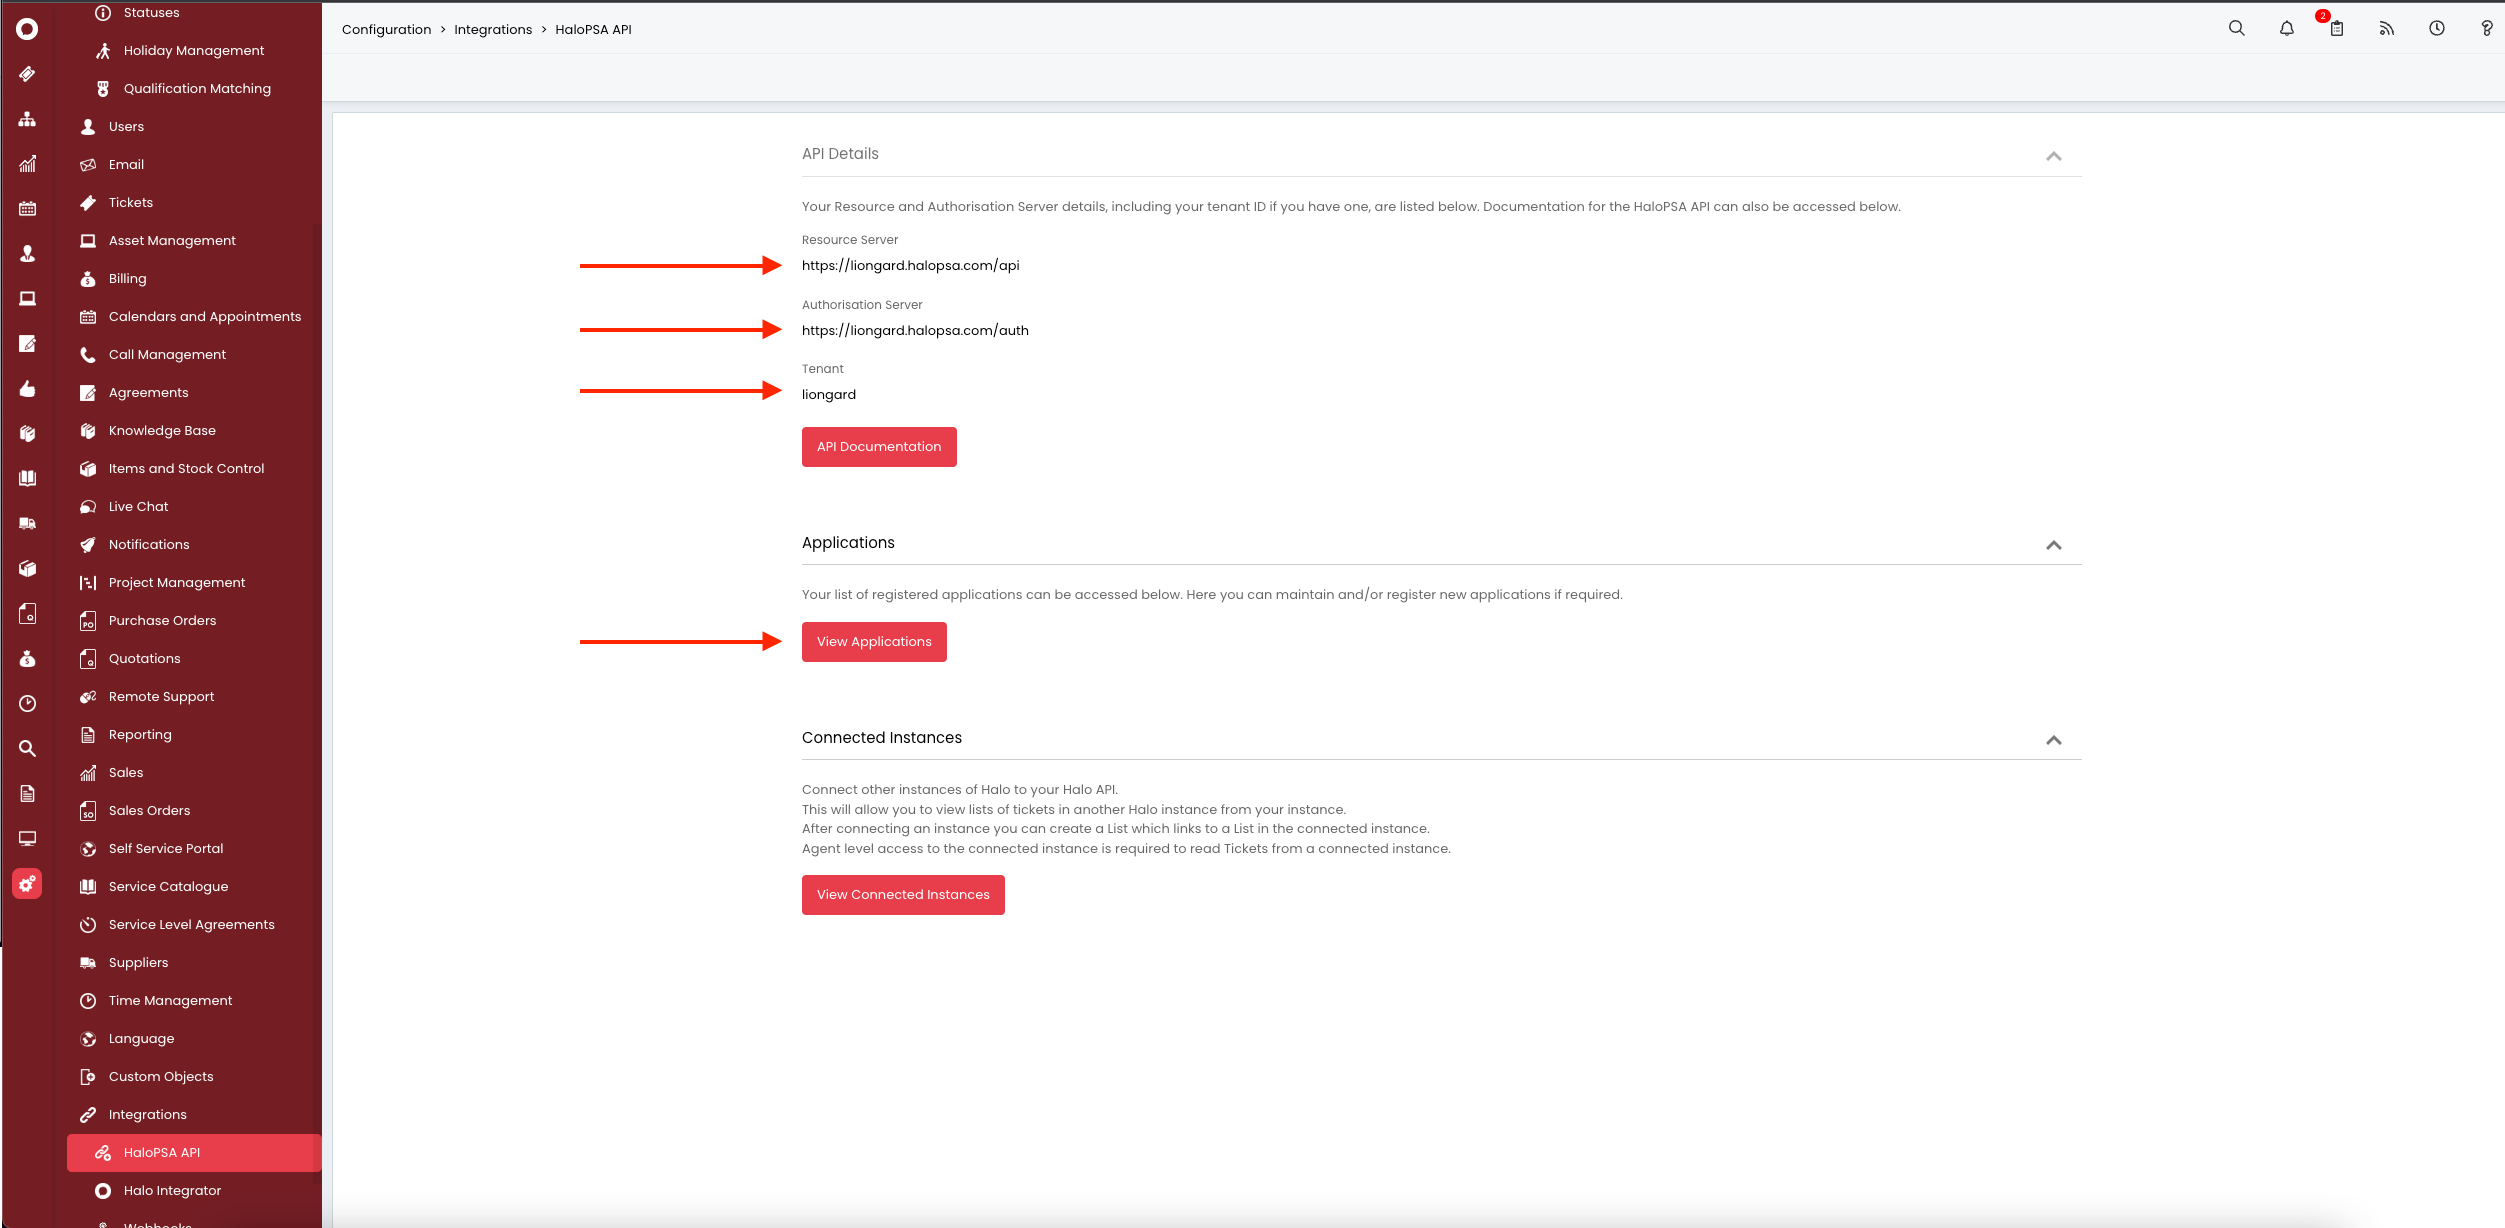
- Create a new Application by clicking New in the top right-hand corner.
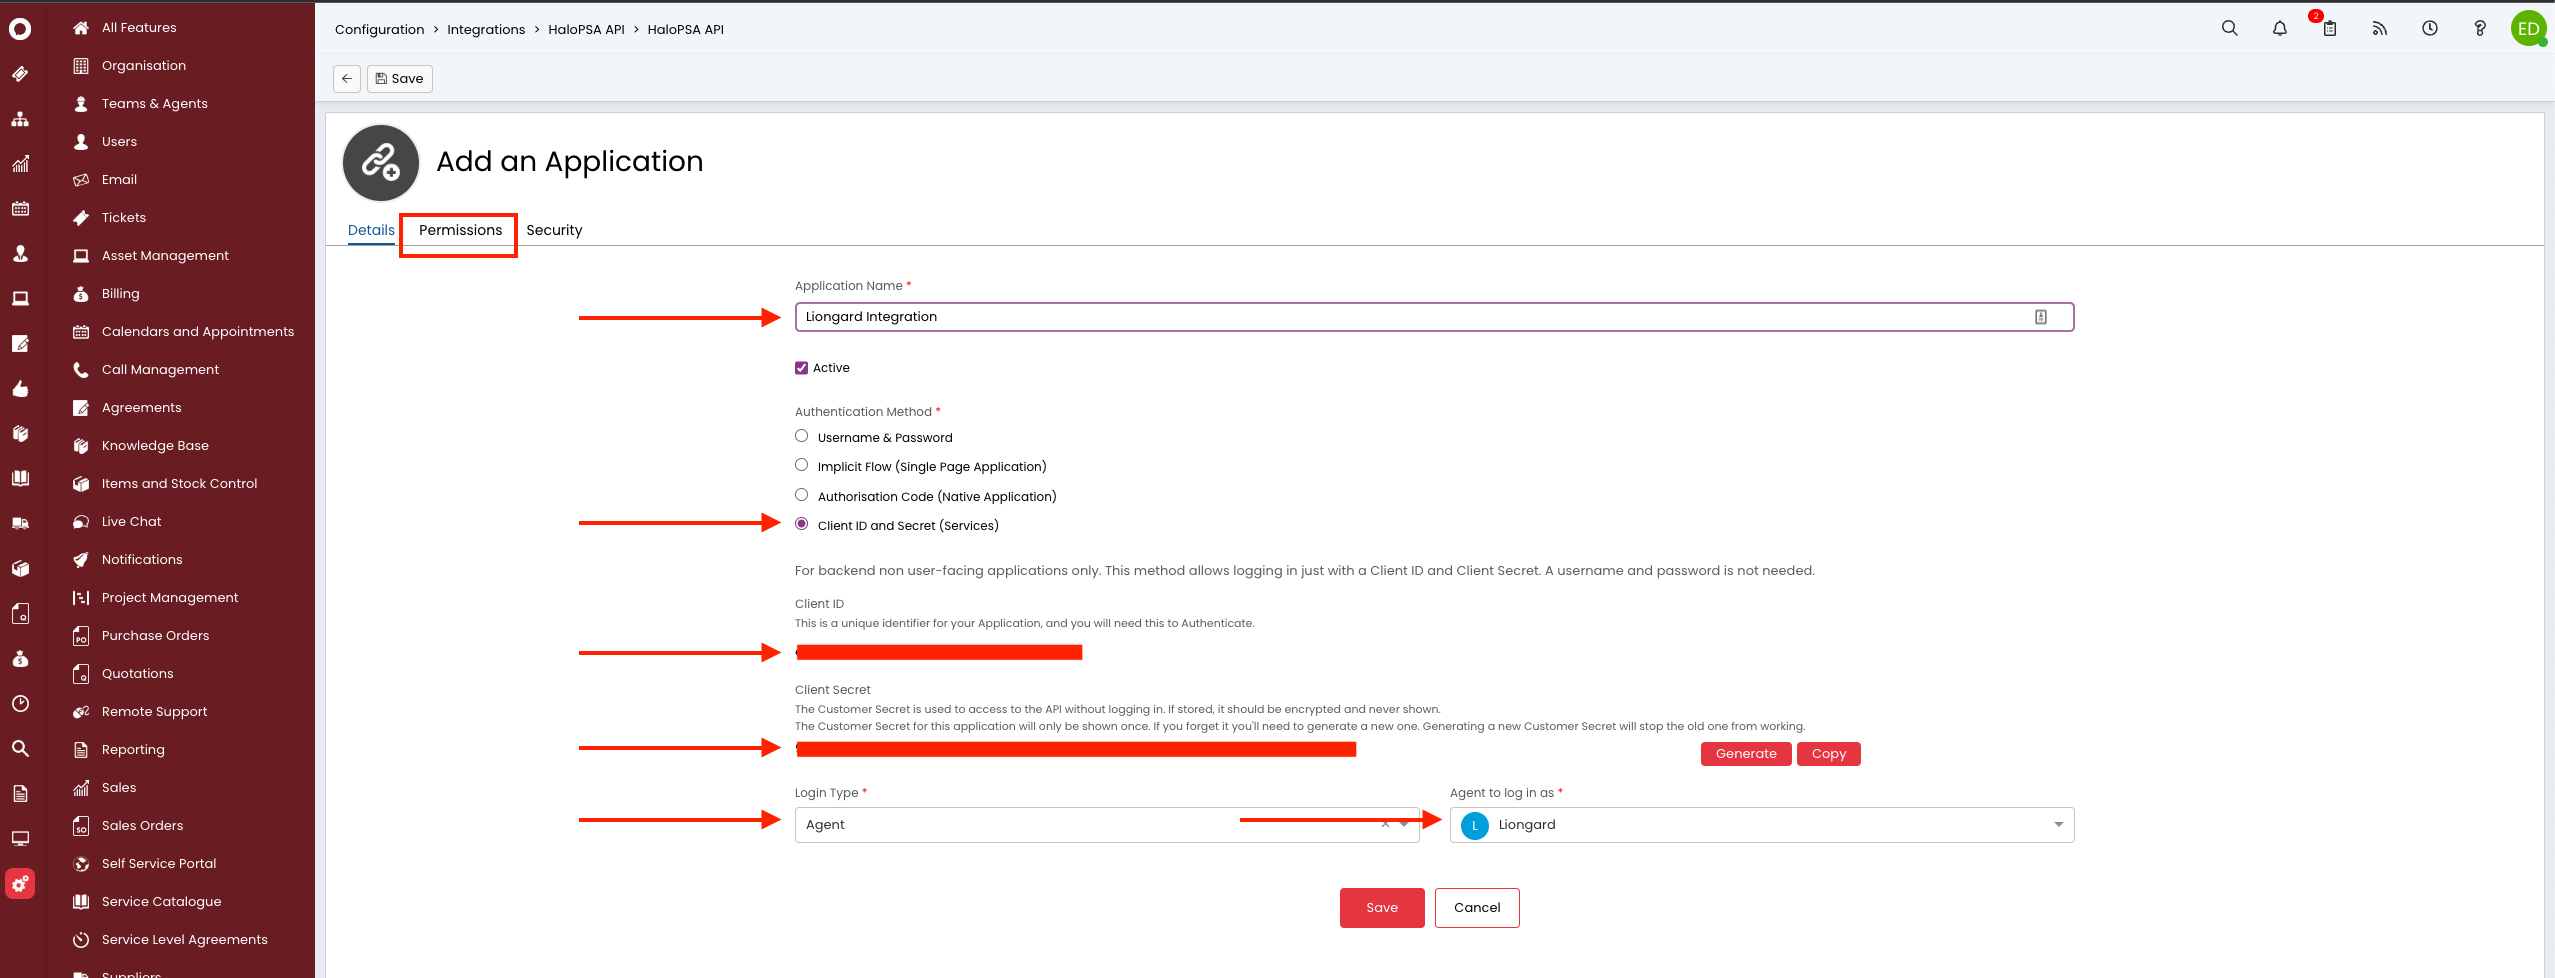
- The following fields need to be filled out:
- Application Name: Liongard
- Authentication Method: Client ID and Secret (Services)
- Login Type: Agent
- Agent to login in as: Use the Agent created in Step 1
Make sure to record your Client ID and Client Secret as they will be needed for connecting Liongard to HaloPSA. Once you are finished, navigate to the Permissions tab.
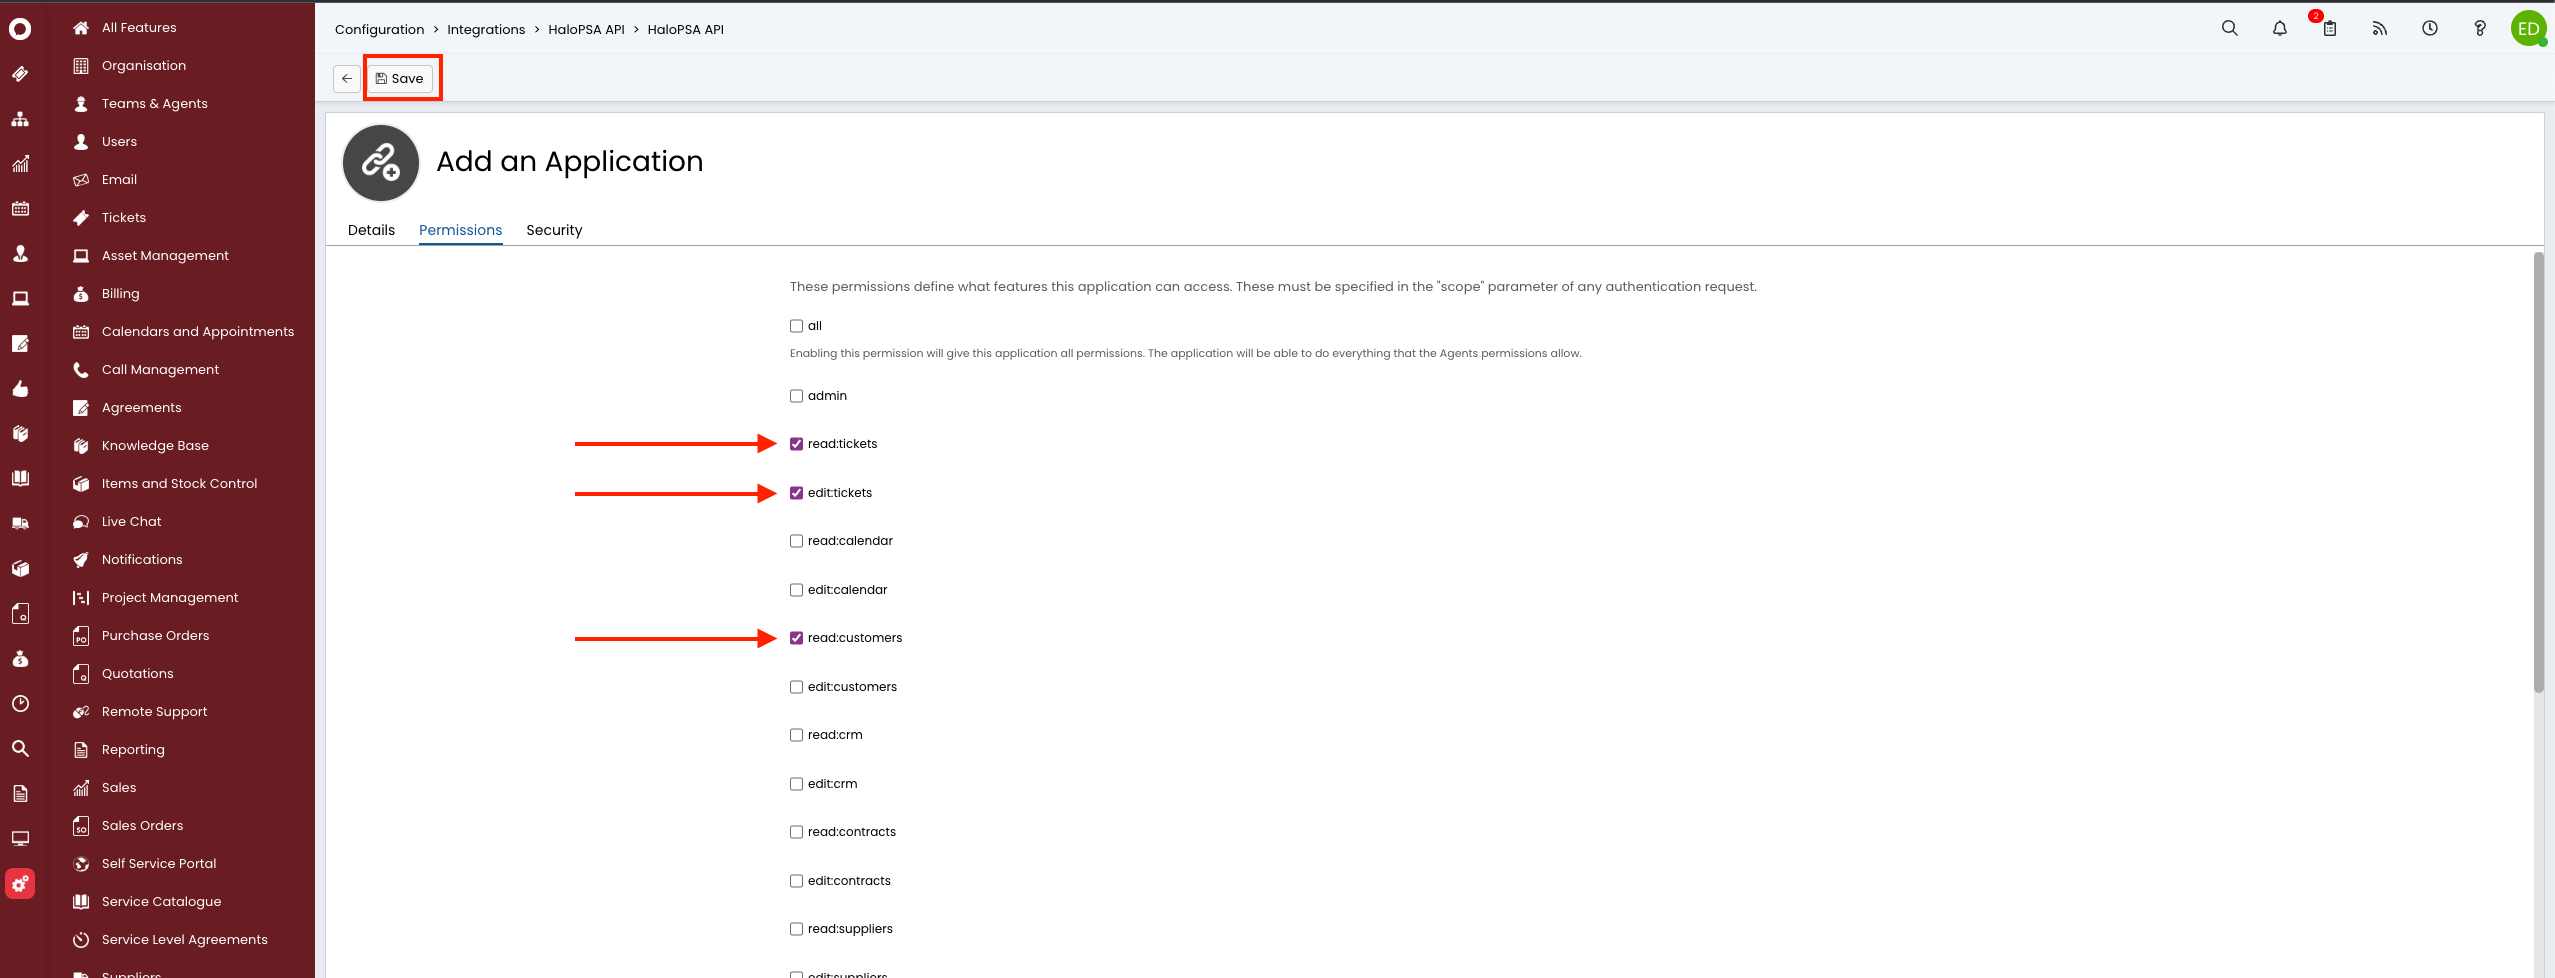
- The following permissions are required at the Application level:
- read:tickets
- edit:tickets
- read:customers
Once you add these permissions, click Save at the top to finish creating the Application.
Next Step
Updated 5 months ago
