Installing a Windows Agent
Agent Deployment via MSI
The following document can be used to install a Self-Managed Agent on a Windows device.
Please review our Agents Overview documentation before proceeding.
Minimum Agent Requirements
Support for Windows Server OS Before 2016Effective October 10, 2023, Microsoft has ended support for Windows Server 2012 and 2012 R2, leading to the discontinuation of security updates and technical support. This change significantly impacts our software, particularly in relation to Node.js, which is no longer supported on these server versions, potentially causing compatibility and performance issues.
In response, on June 1, 2024, Liongard ended its support for Windows Server 2012 on agent versions 4.2.4 and greater.
Liongard agent versions 4.2.4 and greater are now incompatible with Windows Server 2012 and lower, and partners may experience issues with inspections associated with these servers.
For more information, please visit our KB article here.
To run the Windows Agent, the following system resources are required:
- Operating System: Windows Server 2016 or higher or Windows 10 or higher
- Memory: 1 GB of usable RAM
- Disk Space: 1GB of free disk space
- CPU Architecture: x64
To maximize system performance, we recommend the following system requirements:
- Memory: 16 GB
- Disk Space: 32 GB
For Virtual Machines, we recommend a minimum of 2 processors
Step 1: Record a Liongard Access Key ID and Secret
Access TokensLiongard Access Key Tokens and Secrets can be reused when installing Agents, or you can generate a new Access Key Token and Secret every time.
If you do decide to reuse the Access Key and Secret, it should be secured as you would any other sensitive password.
Our Access Tokens are used only to register an Agent. It is not something that the Agent stores, so if a token gets deleted, nothing will happen to Agents that were installed using that token.
Agent Install Token: Required PermissionsTo create an "Agent install token," a user must have one of the following permissions:
- Global Admin
- Global Environment Manager
- Global System Integrators
- Environment Administrators
Permissions Breakdown:
- Global Roles (Global Admin, Global Environment Manager, Global System Integrators):
Can install agents.
Can view and associate all agents.- Environment Administrators:
Can install agents.
Can map installed agents to their assigned environments.
Cannot view agents from other environments.
Cannot view unassigned agents not installed by them.
- In Liongard, navigate to Your Name > Account Settings > Access Tokens
- If you have an existing Access Token, you may use it to deploy the Agent.
- If you need to generate a new token, select Generate New Token then select Agent Install Token.
- Note: Users must be a member of the Global Admin, Global Environment Manager, or Global System Integrators groups to see the Agent Install Token option.
- Record a Liongard Access Key ID and Secret as you will need them in the next steps.

Step 2: Download the MSI

-
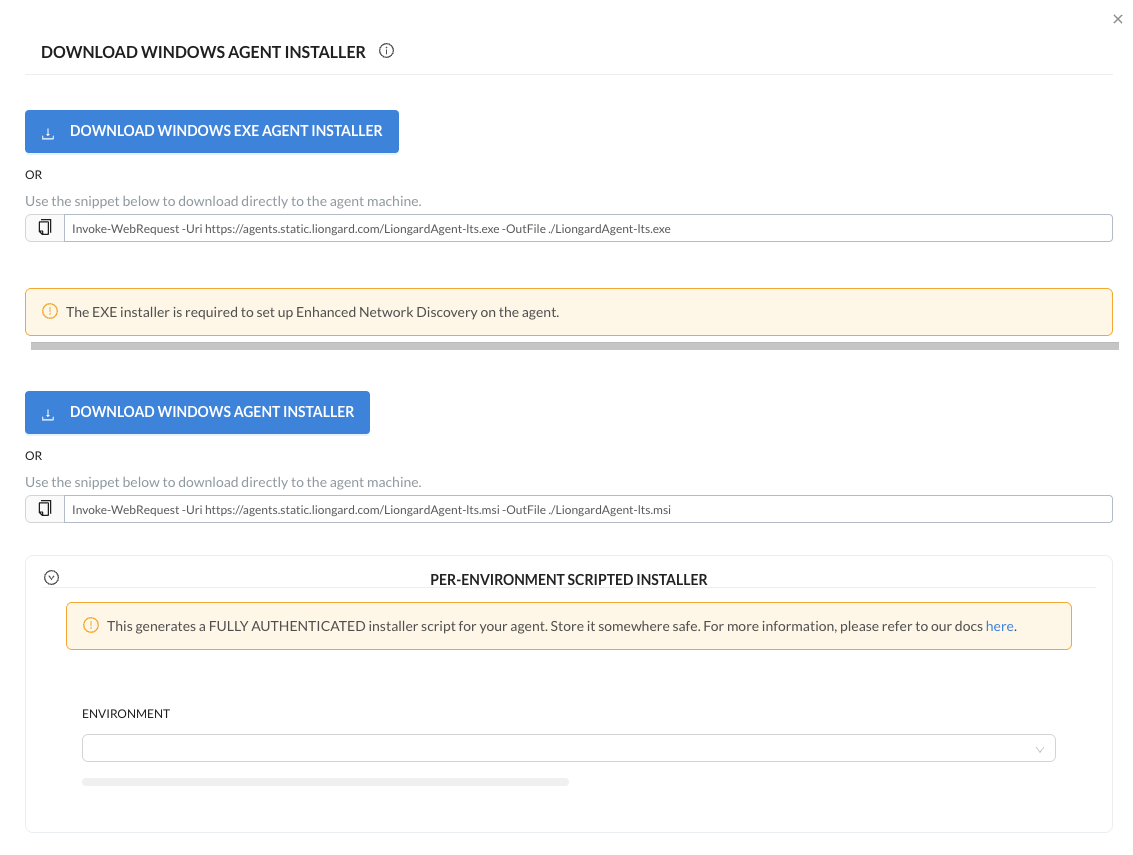
Navigate to Admin > Agents > Hover over "Download Agent Installer" > Select Windows
-
Copy the MSI link or download the MSI (If you choose the EXE installer for the Enhanced Network Discovery, review this documentation)
Step 3: Run the MSI
- Open the MSI > Select Next
- Check "I accept the terms in the License Agreement" > Select Next
- Complete the following fields:
- Your Liongard URL (e.g., "us1.app.liongard.com"): Enter the core of your Liongard URL. Do NOT include "https://". Must also be in lowercase letters.
- Liongard Access Key ID and Secret: Enter the Access Key ID and Secret generated in Liongard from Step 1 above.
- Review the following field:
- Agent Name: Liongard will populate this field using the hostname of the device the Agent is being installed on. If the Agent name already exists, Liongard will auto-concatenate a numerical value (in parenthesis) to the new Agent name
Naming Your AgentAt the moment, the Agent name cannot accept =, <, >, (, ), {, }, [, ] characters. Please avoid using them in the Agent name.
- If desired, complete the following fields:
- Liongard Agent Description: This field is optional, but can be used to give the Agent a description inside of Liongard.
- Liongard Environment: This field is optional, but if skipped the Environment must be assigned in Liongard on the Admin > Agents screen. For more information review our Agent Management documentation.

- Select Next
- For Service Account Type, select SYSTEM

- Select Next > Select Install > Select Finish
The Agent is now successfully installed. Return to Liongard and follow our Agent Management documentation for next steps:
Optional: Use a Per-Environment Agent
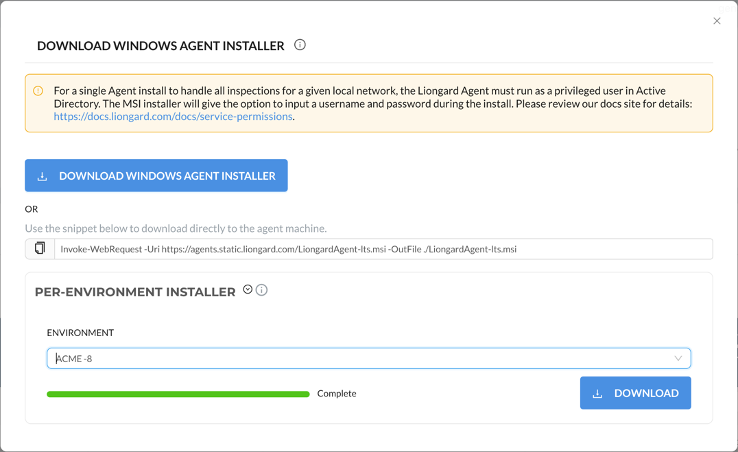
You also have the option to download a Windows, Mac, or Linux agent installer that has been pre-configured for a specific environment. This pre-configured installer can then be used to install the agent without the need for any manual configuration.
To download a per-environment agent installer, navigate to the Admin > Agents page, click Download Agent Installer and select your operating system. In the agent installer modal, click on Per-Environment Installer. In the Environment field, search for the name of the environment you are creating the installer for. After a few seconds, you can download your per-environment agent installer by clicking the Download button.
Inspector Auto-Discovery
In order for Liongard to perform auto-discovery and auto-activation processes, an Environment must be assigned to an Agent. Liongard will determine the Inspectors discovered based on the operating system of the Agent.
When you deploy an Agent to a Windows Server Operating System a Windows Server Inspector will appear in your list of Total Discovered Systems on the Liongard homepage. Once that Windows Server Inspector is activated, it will auto-discover Hyper-V Servers, SQL Servers, and a Network Discovery Inspector.
Keep in mind that Windows Servers are Endpoint Inspectors. Endpoint Inspectors are billed per unit according to your agreement with Liongard. Usage beyond the contracted amount will be charged on your monthly invoices.
If you would like Endpoint Inspectors to auto-activate after auto-discovery, navigate to your Username > Company Settings and turn on the Endpoint Auto-Activation toggle as shown. After this toggle has been enabled, individual Environments can be excluded from the Endpoint auto-activation process by adding them to the list below the toggle. Enabling auto-activation means that Endpoint Inspectors will be automatically Auto-discovered, activated, and billed accordingly.

Please keep in mind that Endpoint Inspectors are billed per unit, and usage beyond your minimum commitment (also found on the Company Settings screen) will incur additional costs.
Additional Resources
Updated about 1 month ago