EnGenius Cloud
This document provides the steps required to configure the EnGenius Cloud Beta Inspector.
Quick DetailsRecommended Agent: On-Demand
Supported Agents: On-Demand and Self-Managed
Is Auto-Discovered By: N/A
Can Auto-Discover: EnGenius child inspectors
Parent/Child Type Inspector: Yes
Inspection via: API
Data Summary: [Here]
Overview
The EnGenius Cloud Beta Inspector integrates with Liongard's platform to automate the management of critical network data from the EnGenius Cloud API. This tool helps Managed Service Providers (MSPs) centralize device inventory, monitor configurations, and gain actionable insights for better network performance and security management. This guide will walk you through the setup and configuration of this inspector.
Inspector Setup Preparation
Generate an API Key
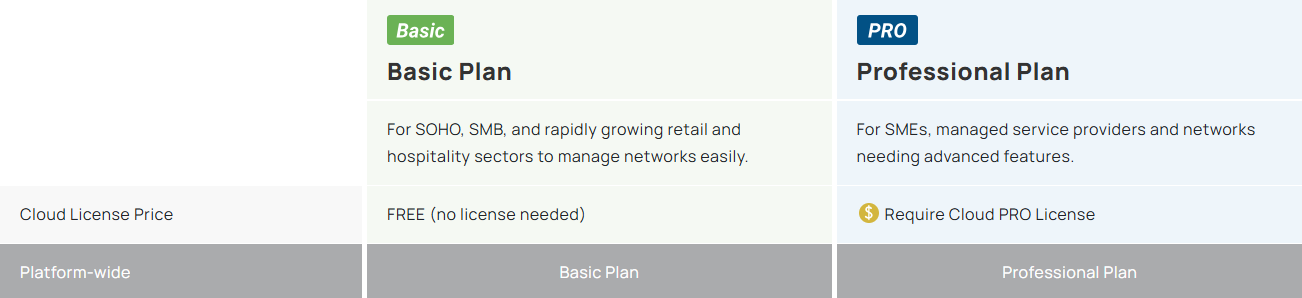
EnGenius Pro Feature PlanTo utilize the EnGenius inspector, the Pro Feature Plan is required for the integration. Without this plan, the API will not function with the EnGenius inspector.

-
Navigate to the upper-right corner of the management interface.
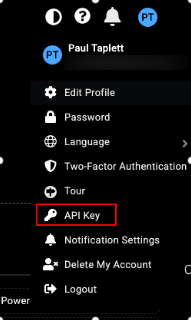
-
Click on your profile icon, and select ‘API Key’ from the dropdown menu.
-
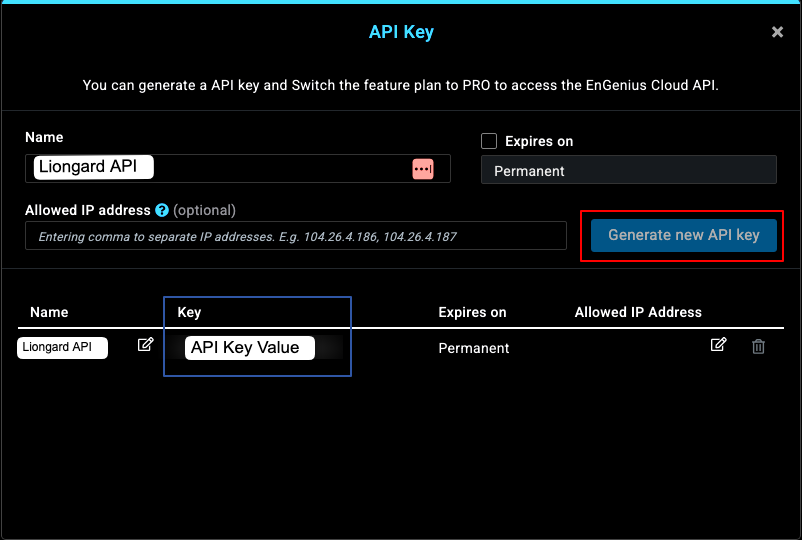
Name your API "Liongard API".
-
Enter your Allowed IP Address (Optional)
-
-
Click "Generate new API key" and copy the API key value.
Liongard Inspector Setup
Step 1: Parent Inspector Setup
Since EnGenius Cloud is a multi-tenant system where a single portal is used to manage multiple environments, we will set up a single Parent Inspector with the API Key that will then auto-discover Child Inspectors for each environment
In Liongard, navigate to Admin > Inspectors > Inspector Types > Navigate to the EnGenius Cloud Inspector > Select Add System.
Fill in the following information:
- Type of Inspector: Parent
- Environment: Select your MSP Environment.
- Friendly Name: Suggested "Liongard [Environment Name]"
- Agent: Select the On-Demand agent.
- Inspector Version: Latest.
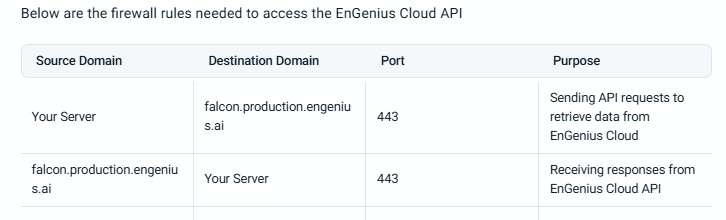
- EnGenius API URL: The URL of the EnGenius API. This is a static URL that is provided by the EnGenius point of contact after requesting access to the API link.
- EnGenius API Key: The API Key that was created from the steps above.
- Scheduling: The Inspector will default to run once a day when the Inspector is set up. Here, you can adjust the schedule
Select Save. The Inspector will now be triggered to run within the minute.
Step 2: Child Inspector Setup
After the first run of the Parent Inspector, your client EnGenius organizations will be Auto-Discovered in the Discovered Systems tab on the Inspectors > EnGenius page.
Navigate to the Discovered Systems tab in your Inspectors > EnGenius page.
- Activate or Archive your Discovered Systems by ensuring they're mapped to the correct Environment. Check the checkbox to the left of Inspector(s), select the Actions drop-down menu and select Activate Launchpoints.
Updated 10 months ago