Getting Started with Liongard Smart Start Onboarding
Let's get you up and running with Liongard!
Introduction to LiongardFound in Liongard Academy, "Introduction to Liongard" is a short course that helps new Liongard users quickly understand the Liongard platform.
Overview
Welcome to your Liongard onboarding guide, designed to help you navigate the setup and deployment of your Liongard instance, inspectors, and agents. This guide provides a comprehensive overview of the initial steps, from importing your customer environments to integrating with other platforms, ensuring you're off to a smooth and efficient start.
Pre-Requisites
To set yourself up for success, be sure to complete the following prerequisites before moving forward with your initial platform configuration:
- Schedule your first Liongard Implementation onboarding session with your assigned Implementation Consultant.
- Once scheduled, an invitation will be sent to your technical and billing contacts to set up your Liongard instance and billing portal access, respectively. The invitation link will expire after seven days.
- Your dedicated Account Manager will be available to assist you with anything you might need during our partnership.
You can always turn on your Onboard Checklist on your Liongard Dashboard under Support > Show Onboard Checklist.
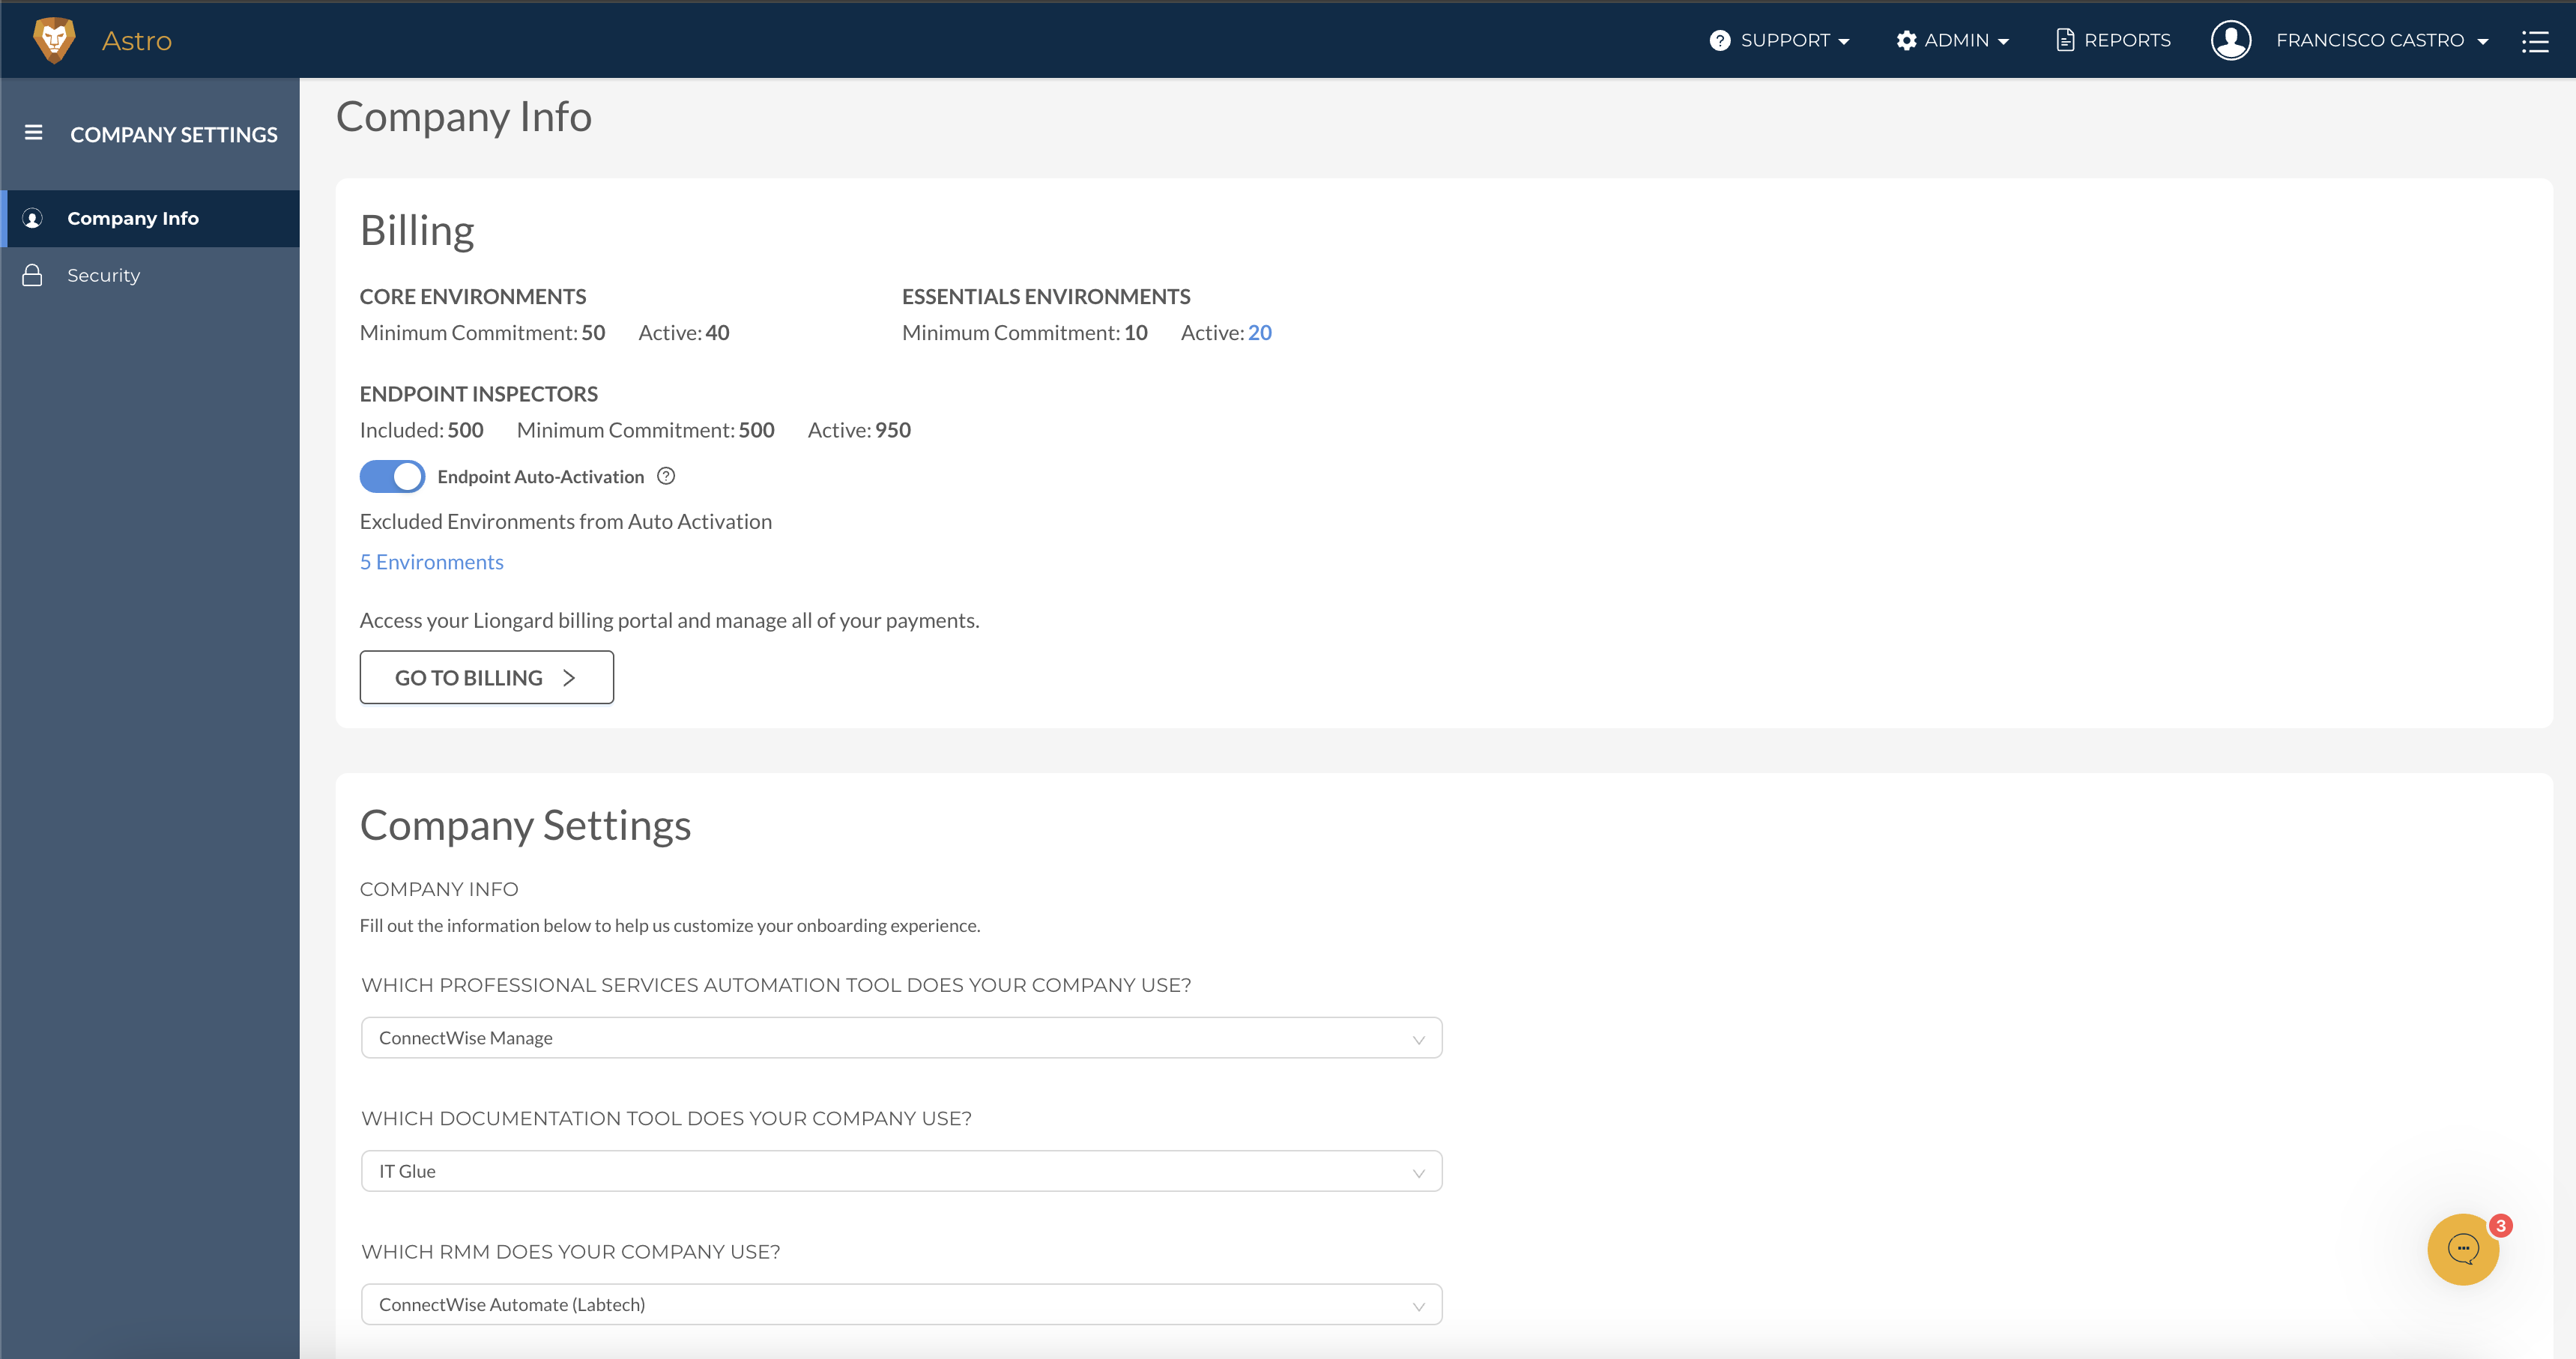
Step 1: Add Company Information
Fill out your company information under your Username > Company Settings.
Step 2: Import and Map Managed Customers
Import customers/companies/accounts into Liongard from one of our platform integrations (Autotask, ConnectWise Manage, IT Glue, etc.), via CSV, or manually one by one.
If you choose to import customers/companies/accounts with one of our platform integrations, in most cases, Liongard will auto-discover the Internet Domain/DNS Inspectors for the selected companies. For more information see our Auto-Discovery documentation.
If you are a ConnectWise or IT Glue user you can also choose to push Liongard's data into those platforms in the form of ConnectWise Configurations and/or IT Glue Flexible Assets. Details and setup instructions can be found on the Integration documentation linked in the table below.
For more information on integrations, please visit our Liongard Integration Best Practices documentation
| System | Integration Documentation | Setup Time |
|---|---|---|
| Autotask | Setup the Autotask Integration | 10 minutes |
| ConnectWise Manage | Setup the ConnectWise Integration | 15 minutes |
| HaloPSA | Setup the HaloPSA Integration | 10 minutes |
| IT Glue | Setup the IT Glue Integration | 10 minutes |
| Kaseya BMS | Setup the Kaseya BMS Integration | 10 minutes |
| ServiceNow | Setup the ServiceNow Integration | 10 minutes |
| Syncro | Setup the Syncro Integration | 10 minutes |
| CSV | Manual Environment Import | 10 minutes |
| Manually | In Liongard, go to, Admin > Environments > Add Environment | 1 minute/customer |
Own your JourneyThe following steps are the recommended path to onboard Liongard; however, the steps below are interchangeable.
Step 3: Deploy Liongard Agents
Install Liongard Agents to inspect systems inside your customers' networks. These systems include Active Directory, firewalls, SQL Server, and Windows Servers. Deploy these Agents out using our MSI Installer.
With systems that require local network access, the most typical deployment strategy is to install one Liongard Agent per Environment. A single Liongard Agent can facilitate inspections across that whole network.
Step 4: Add Additional Users
Create Liongard User Accounts for anyone else on your team who will be deploying Liongard under
Admin > Access Management.

You can also create various Environment Groups based on customized user permissions. Click here for more information.
Step 5: Activate Auto-Discovered Inspectors
Auto-Discovered Systems
Throughout your experience with Liongard, you'll get to take advantage of a feature called Auto-Discovery. In short, our Inspectors can discover other potential Inspectors which saves you a lot of manual setup work.
Here's an example of an Auto-Discovery chain:
| This... | Auto-Discovers... | Which Auto-Discovers... |
|---|---|---|
| ConnectWise Manage, IT Glue, Kaseya BMS, and Autotask Integrations | Internet Domains | TLS/SSL Certificate |
Note: In Liongard, you can see which Inspectors auto-discover other Inspectors and which Inspectors are Parent/Child Type Inspectors by navigating to Admin > Inspectors > Inspector Types > Discovers column.

As a best practice, activate the Inspectors for Internet Domains and TLS/SSL Certificates first.
Parent/Child Inspectors
For multi-tenant systems, Liongard uses a concept called Parent/Child relationships. This is a version of Auto-Discovery that allows Liongard to use one global parent Inspector to Auto-Discover all the companies in your multi-tenant systems.
We recommend you start by rolling out your Microsoft 365 Inspector and Azure Active Directory Inspectors.
Set up the following Parent/Child Inspectors in Liongard next:
| Inspector | Time to Setup |
|---|---|
| Acronis Cyber Protect Cloud | 5 minutes |
| Addigy | 10 minutes |
| Auvik | 10 minutes |
| Azure Active Directory | 15 minutes |
| Bitdefender GravityZone | 10 minutes |
| Cisco Meraki | 10 minutes |
| Cisco Umbrella | 5 minutes |
| Cloudflare | 5 minutes |
| ConnectWise Automate | 5 minutes |
| Continuum RMM | 5 minutes |
| Datto BCDR | 5 minutes |
| Datto Networking | 5 minutes |
| Datto RMM | 10 minutes |
| Domotz | 5 minutes |
| Duo Security | 5 minutes |
| ESET Licensing | 10 minutes |
| Google Drive | 10 minutes |
| Google Workspace | 10 minutes |
| JumpCloud | 5 minutes |
| Kaseya VSA | 5 minutes |
| Microsoft 365 | 15 minutes |
| Microsoft OneDrive | 10 minutes |
| Microsoft SharePoint | 10 minutes |
| Microsoft Teams | 10 minutes |
| N-able Backup | 5 minutes |
| N-able N-central | 10 minutes |
| N-able RMM | 15 minutes |
| NinjaOne | 5 minutes |
| SentinelOne | 5 minutes |
| Syncro | 15 minutes |
| Sophos Central | 10 minutes |
| Ubiquiti UniFi | 10 minutes |
| Vade | 5 minutes |
| Veeam Availability Console | 5 minutes |
| Veeam Service Provider Console | 5 minutes |
| Webroot Secure Anywhere GSM | 10 minutes |
These Inspectors all run via On-Demand Agents which are already in your instance and ready to go!
Step 6: Set Up Your Ticketing Integration to take advantage of Actionable Alerts
To take advantage of Liongard's Actionable Alerts, set up your Ticketing Integration.
Step 7: Deploy Additional System Inspectors
Now you're ready to roll out additional Inspectors. We recommend considering setting up the following Inspectors:
- RMM Inspectors
- Network Inspectors
- Server Inspectors
- Data Protection Inspectors
- Security Inspectors
- Endpoint Inspectors
Review our System Inspector Overview for more information on System Inspectors.
Step 8: Review and Edit Liongard's Example Actionable Alert Template
Once Inspectors have been rolled out, Liongard’s Example Actionable Alert Template is activated. Review and edit this template to get proactive alerts sent to Liongard, and then, your PSA or email.
Learn more about Actionable Alerts
Step 9: Leverage Metrics for Reporting
Get to data faster by leveraging Liongard’s Metrics and Reports.
Step 10: Take Advantage of Liongard's Automated Documentation
Familiarize yourself with the benefits of Liongard’s Automated Documentation
Earn your Liongard Administrator Certification at Liongard Academy
Register for Liongard’s Continuing Education Sessions
Getting Support
You can access support right from your Liongard Instance! In the bottom right corner, there is a chat icon.
Updated 10 months ago