Microsoft Copilot Studio
Liongard MCP for Microsoft Copilot Studio
This guide walks you through connecting the Liongard Model Context Protocol (MCP) gateway to Microsoft Copilot Studio and deploying a Microsoft Teams agent that can answer questions about your Liongard environments and systems.
Why Use Liongard with Microsoft Copilot?
Liongard transforms the systems, configurations, and changes across your managed environments into structured, queryable data. Microsoft Copilot Studio turns that data into a conversational agent that your team can access directly from Microsoft Teams and Microsoft Copilot.
By connecting Liongard and Copilot Studio, you create a natural-language interface for your Liongard data. Instead of navigating dashboards, building filters, or exporting reports, your team can simply ask questions and receive answers based on live Liongard data.
Common use cases include:
- Technicians troubleshooting customer issues
- Account managers preparing for QBRs
- Security analysts investigating risks
- Leadership teams seeking operational insights
Benefits include:
- Faster access to information
- Reduced context switching between tools
- Improved knowledge sharing across teams
- Consistent access to a single source of truth
What This Guide Covers
This guide helps you:
- Connect Liongard MCP to Microsoft Copilot Studio
- Configure authentication and permissions
- Test connectivity to Liongard
- Publish a Copilot agent
- Deploy the agent to Microsoft Teams
Note:
Liongard provides guidance for integrating with Microsoft Copilot Studio and Teams. For platform-specific support, contact Microsoft.
Access, Permissions, and Security
Before publishing an agent, review how access to Liongard data will be managed.
Understand Access Scope
Providing maker-level access can expose Liongard data broadly. Anyone who can access the published agent may be able to query the Liongard data available through the configured connection.
Option 1: Use Per-User Tokens
For the most granular access control:
- Each user creates their own Liongard Bearer token.
- The agent uses the user's token when making requests.
- Users can only access the Liongard data they are authorized to view.
Option 2: Scope Access by Channel
Create separate agents for different teams or channels and configure each agent with a token that grants access only to the required data.
SharePoint-Based Knowledge Sources
If your agent uses SharePoint knowledge sources, access follows your existing Microsoft permissions model. Verify that SharePoint permissions align with who should be able to access Liongard-related information.
Recommendation:
Treat your Copilot agent like any other access path into customer environment data and ensure only authorized users can access it.
Licensing Requirements
Microsoft licensing changes frequently. Always verify current licensing requirements using the Microsoft Copilot Studio Licensing Guide.
Building an Agent
To create and test an agent, you need one of the following:
- Copilot Studio user license
- Microsoft 365 Copilot license
- Copilot Studio for Teams plan
A trial license can be used for testing, but cannot be used to publish agents.
Publishing an Agent
Publishing requires a paid license, such as:
- Copilot Studio subscription
- Copilot Studio for Teams plan
- Microsoft 365 Copilot license
To publish directly to Teams, you need both:
- Microsoft Teams licensing
- Copilot Studio for Teams plan
Using a Published Agent
End users generally do not need a special license to interact with a published agent. However, usage and consumption may vary depending on your Microsoft licensing model.
Integration Steps
Prerequisites
Before you begin, ensure you have:
- An active Liongard account with a Bearer token (Access ID and Secret Key — found in Liongard under Admin → Integrations → API Access)
- Microsoft 365 tenant with Copilot Studio access.
- Your Liongard subdomain (for example,
us1.app.liongard.com)
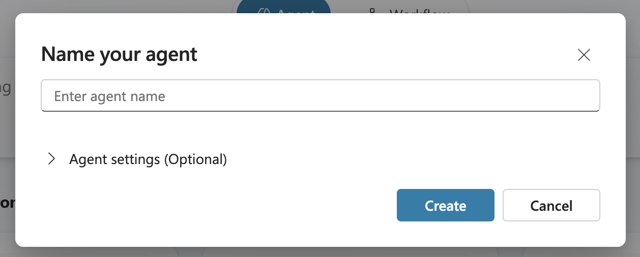
Step 1: Create a New Agent
- Navigate to copilotstudio.microsoft.com.
- Click Create to start a new agent.
Step 2: Name the Agent and Select a Model
-
Enter a name for the agent (for example, Liongard Assistant).
-
Select the language model you want the agent to use.
-
Click Create.
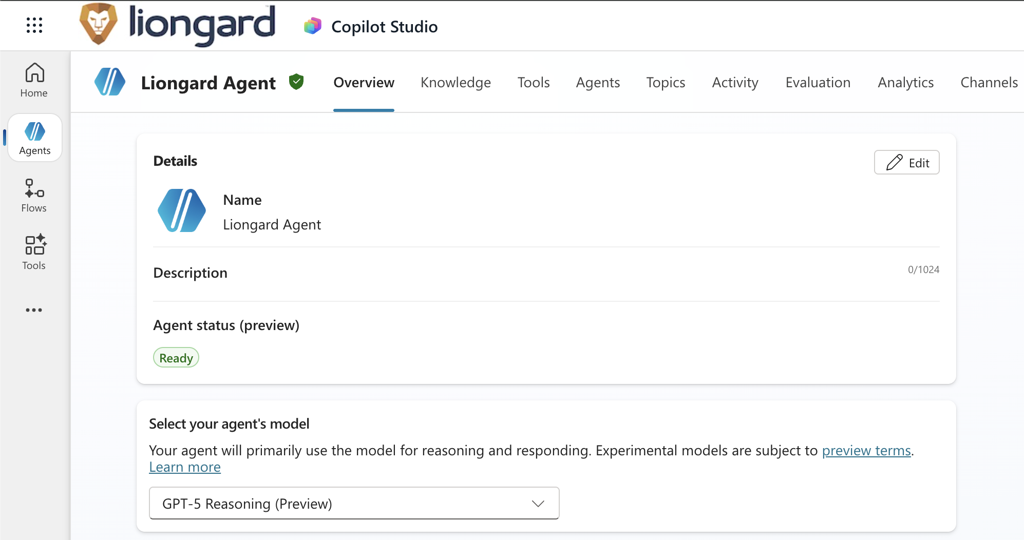
Step 3: Configure Agent Options
Review and configure:
- Agent name
- Description
- General behavior settings
Adjust these settings as needed before continuing.
Step 4: Add Instructions and Knowledge (Optional)
Expand the Instructions section to define how the agent should respond.
You can also add knowledge sources such as:
-
Uploaded documentation
-
Internal reference materials
-
Bing web search
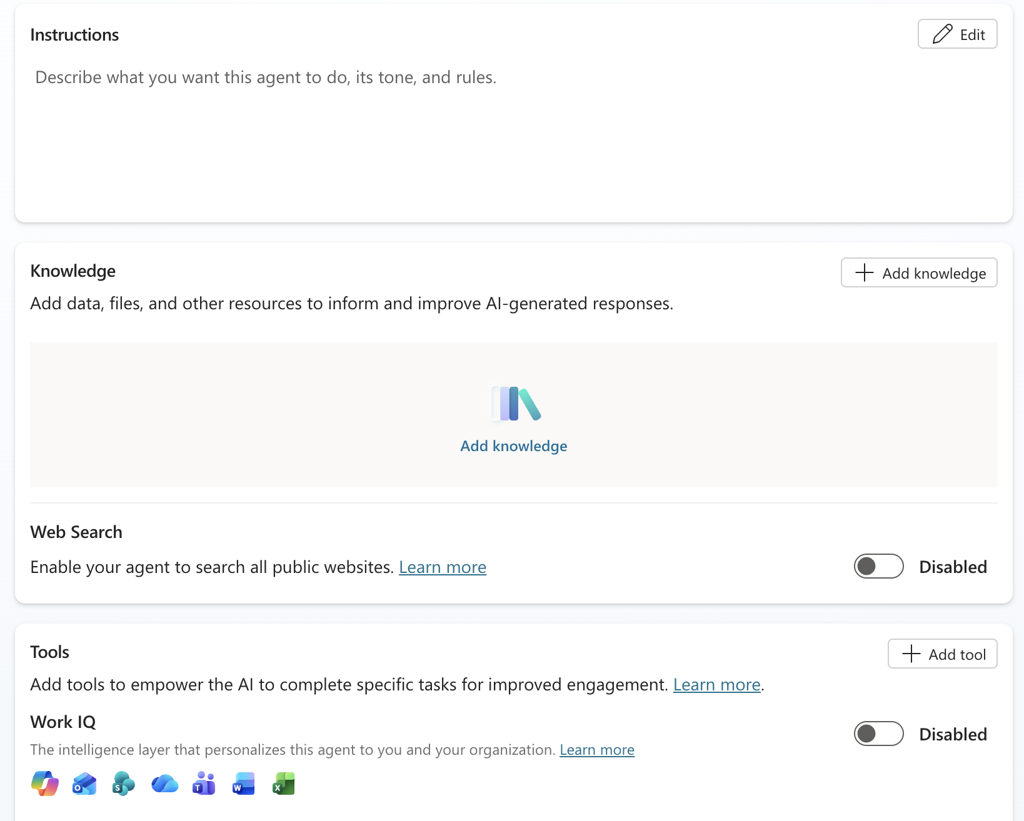
The Liongard MCP tool provides live access to Liongard data. Additional knowledge sources are optional.
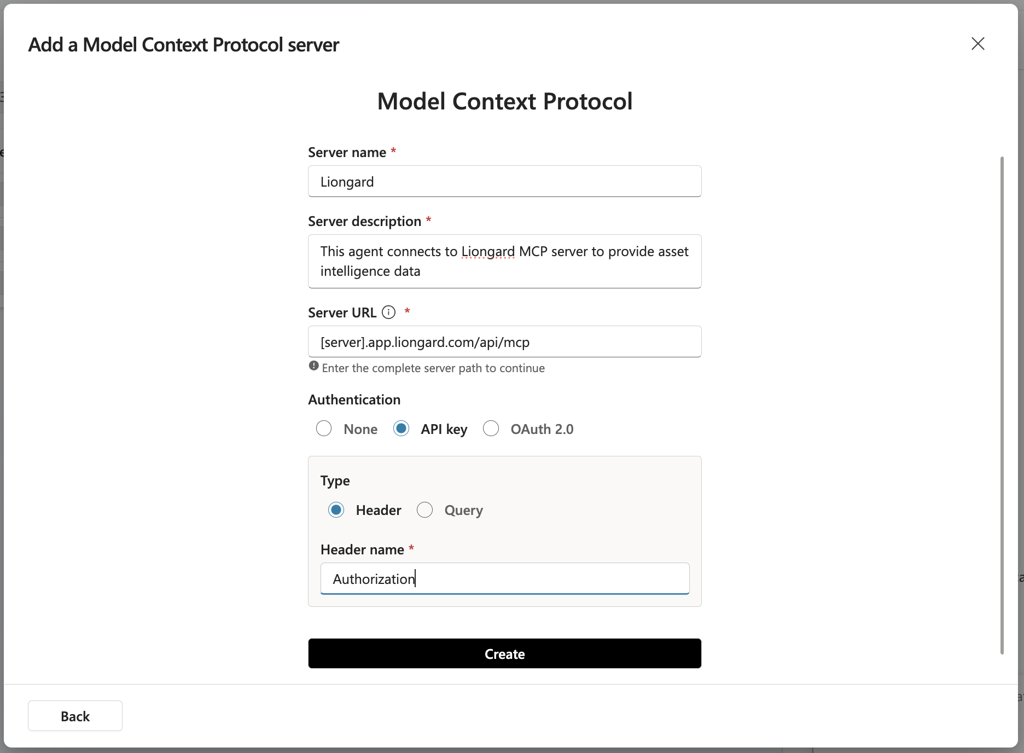
Step 5: Add the Liongard MCP Tool
-
Click + Add a tool.
-
Select Model Context Protocol (MCP).
Configure the following fields:
| Field | Value |
|---|---|
| Server Name: | A display name for the tool, e.g., Liongard MCP |
| Server Description: | A brief description, e.g., Liongard MCP Gateway |
| Server URL: | your Liongard instance URL:[server].app.liongard.com/api/mcp (Replace [server] with your Liongard subdomain (for example, us1). |
Configure Authentication
-
Select API Key authentication.
-
Set the Header name to: Authorization.
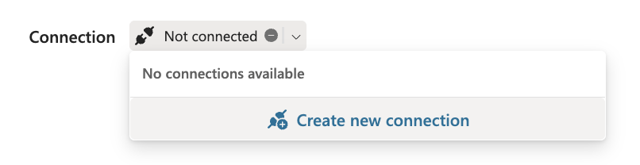
Step 6: Create a Connection
After saving the MCP tool, Copilot Studio will prompt you to create a connection for it.
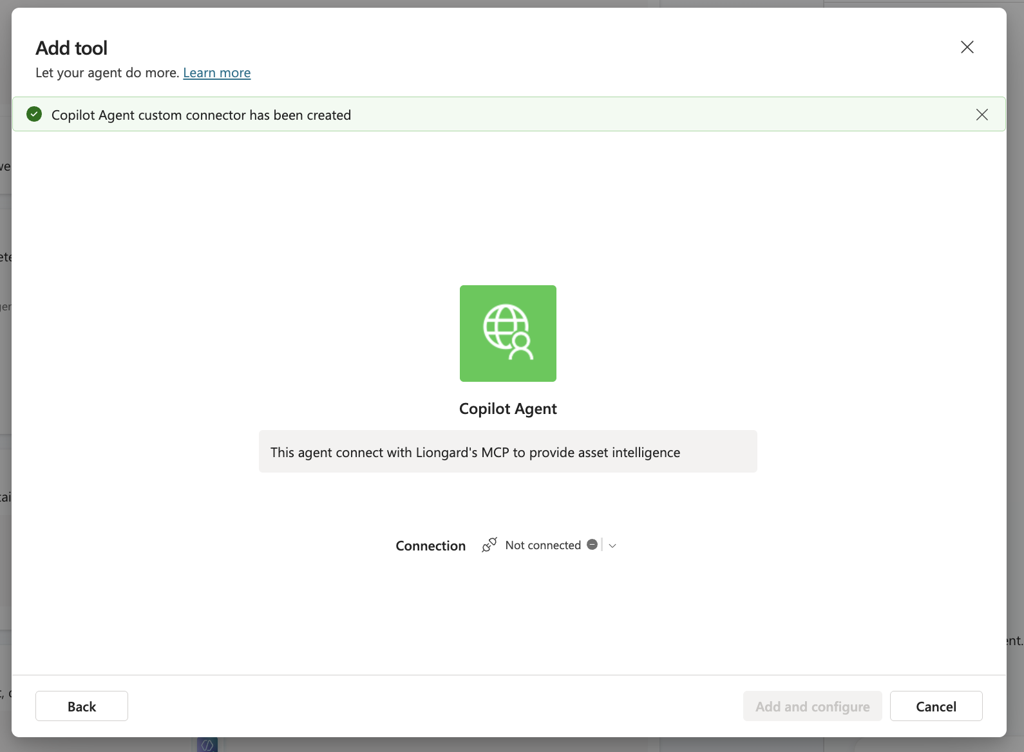
-
Click Create New Connection.
-
When prompted for credentials, enter your Liongard Bearer token:
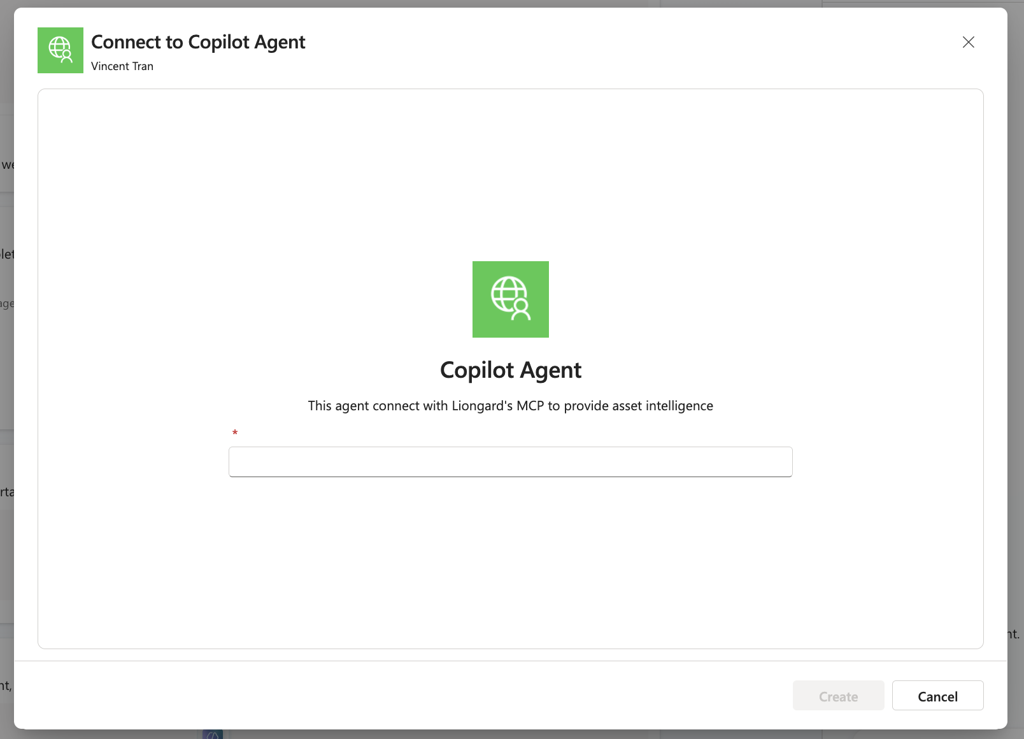
Bearer token format:
Your full token string should look like Bearer lg_mcpabc123xyz:secretkey456. Include the word Bearer followed by a space, then your Access ID and Secret Key separated by a colon, excluding brackets. You can find these values in Liongard under Admin → Integrations → API Access.
-
Click Add and Configure.
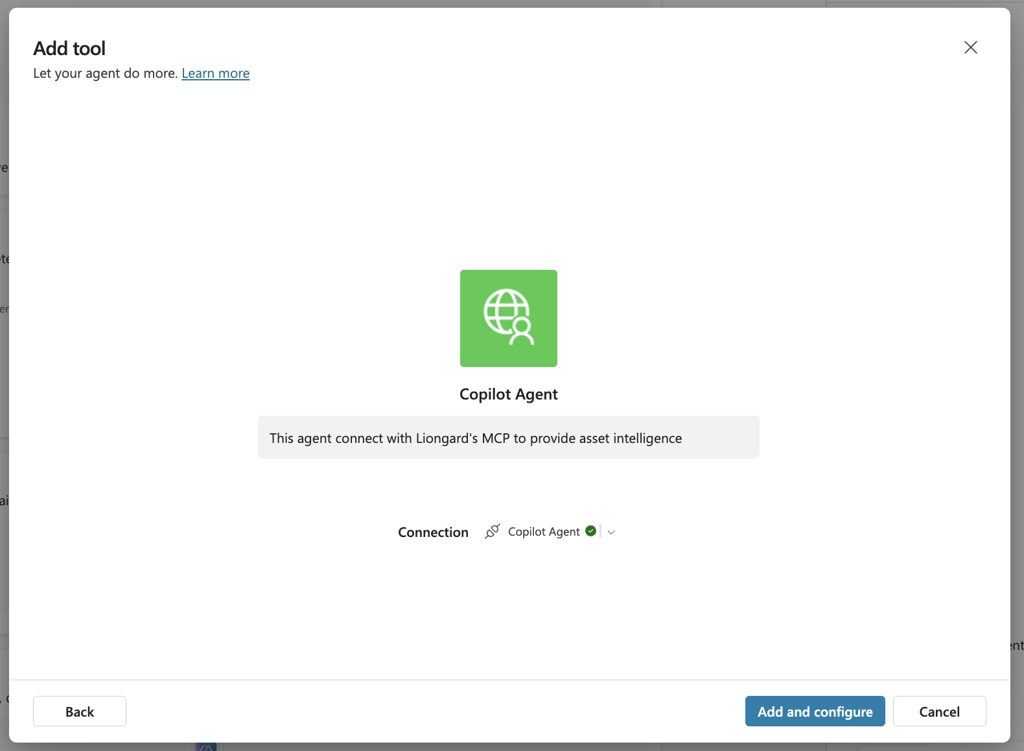
The connection may initially appear complete but require reconnection later. This behavior is expected.
Step 7: Review the Custom Connector
- Open the left navigation menu.
- Select Tools.
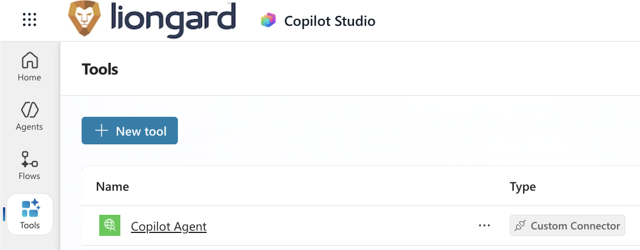
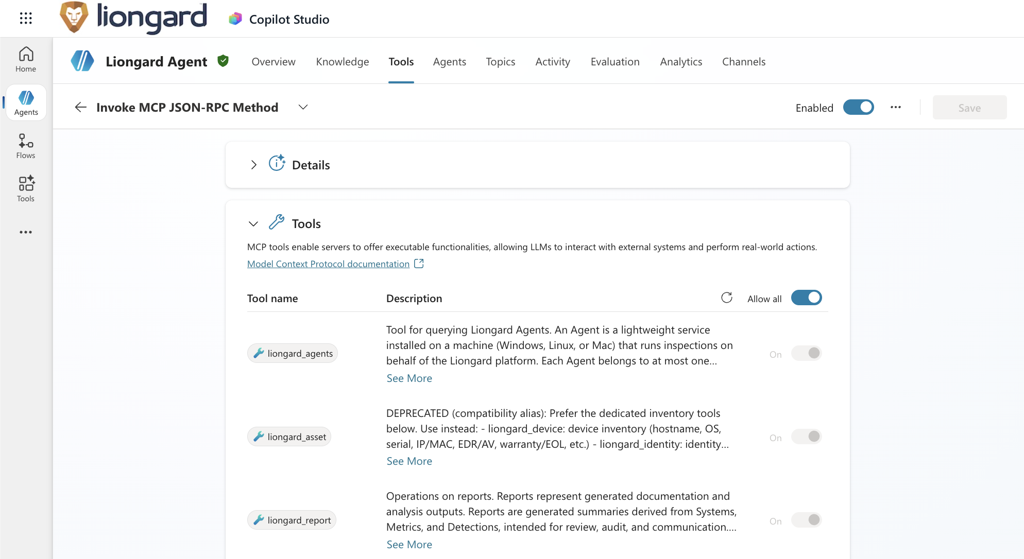
Step 8: Verify the MCP Tool
Return to:
Agents → Tools
Verify that the Liongard MCP tool displays available operations without errors.
This confirms the connector is functioning correctly.
Step 9: Test the Agent
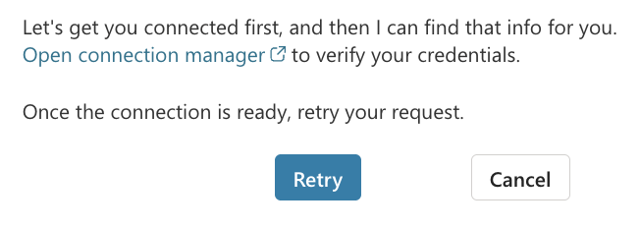
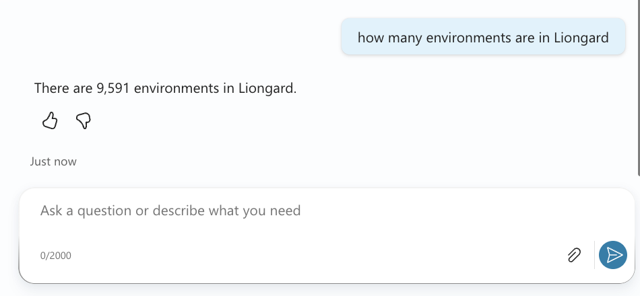
Open the Copilot Studio testing panel and submit a query such as How many Environments are in Liongard to verify the agent can reach your Liongard data.
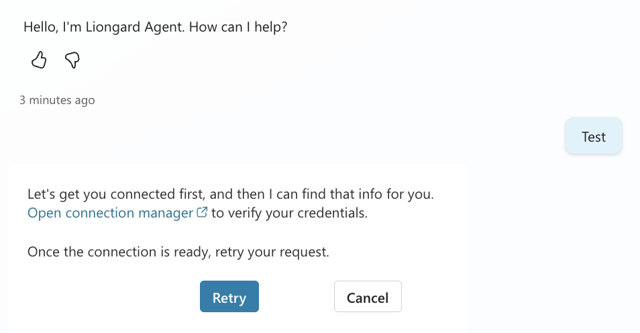
If you receive the above "error" message.
Click on the "Open Connection Manager" link.
If the Tool Shows "Not Connected."

-
Click Connect.
-
Submit the request again.
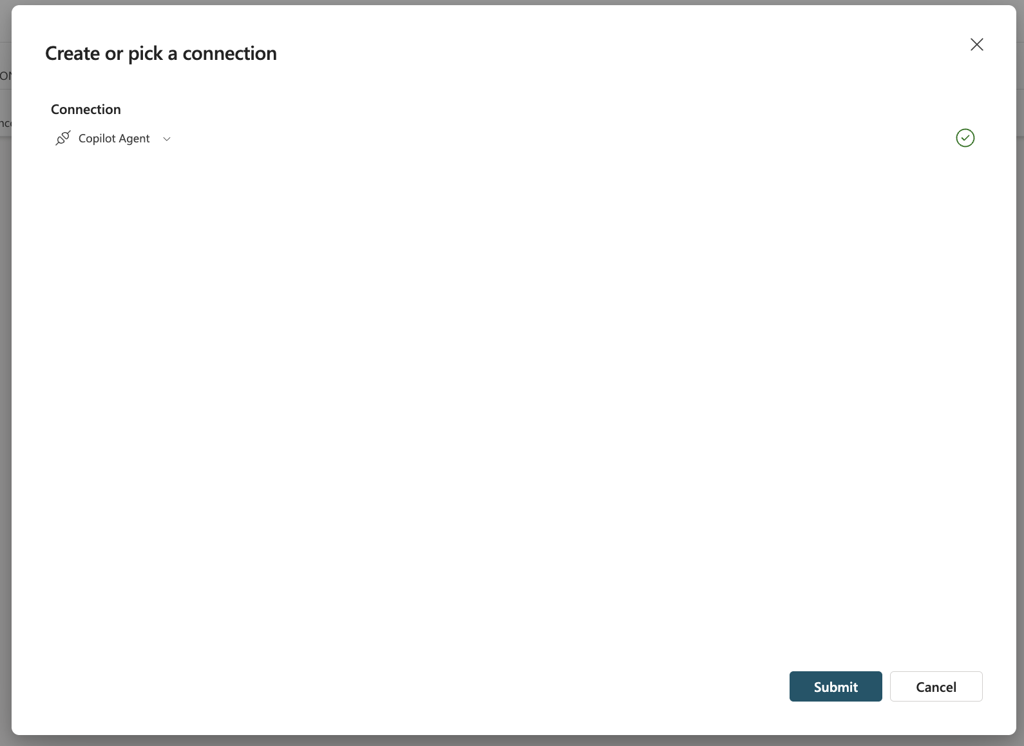
-
Wait for the tool status to show Connected.

-
Retry the prompt.
The agent should return live data from your Liongard environment.
Step 10: Configure User Authentication
Before publishing, configure how end users will authenticate with the agent.
-
Open Settings in the top-right corner (next to the Publish button).
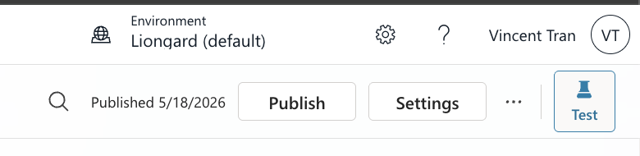
-
Navigate to Security → Authentication.

-
Select Authenticate with Microsoft.
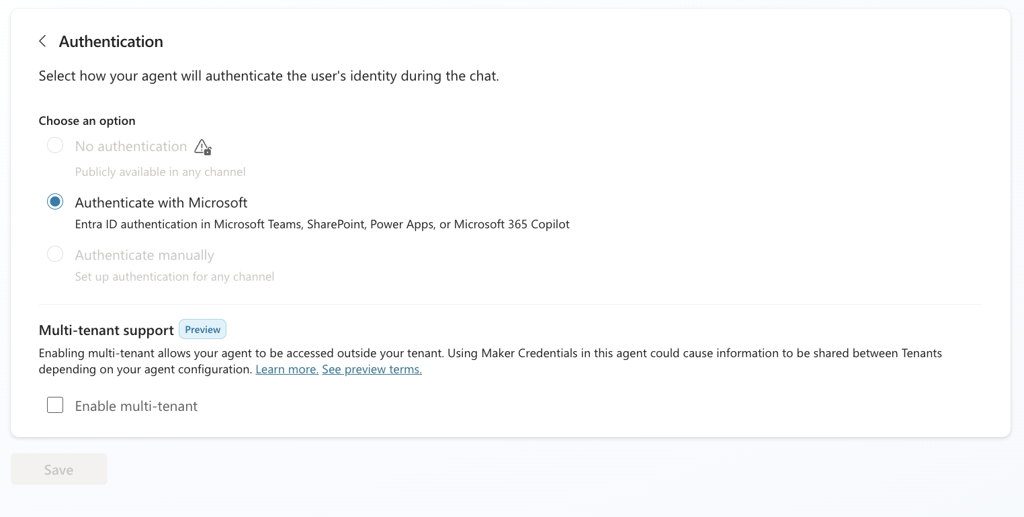
Important: Understand Credential BehaviorIf the MCP tool uses Maker-provided credentials, all users access Liongard using the maker's Bearer token.
This means:
- Users do not need their own Liongard credentials.
- Users inherit the same Liongard access level as the configured token.
Review the token scope carefully before publishing.

Verify that your Liongard connector appears under Connection Settings.

Step 11: Publish the Agent
Once testing is successful:
- Click Publish.
- Wait for publishing to complete.
Your agent is now available for deployment.
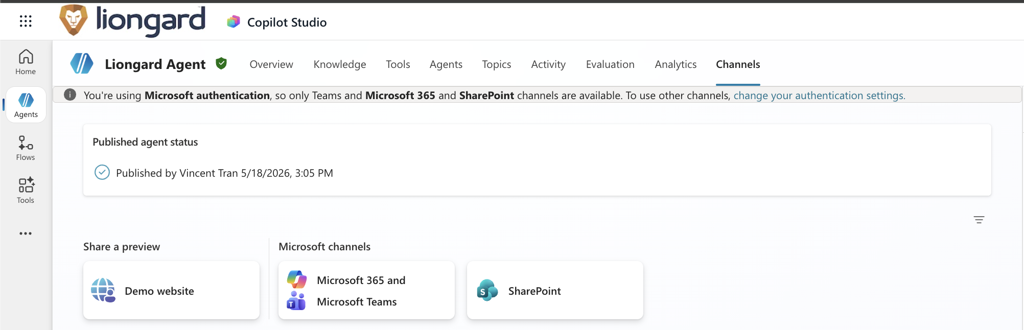
Step 12: Deploy to Microsoft Teams
After publishing:
-
Navigate to Channels.
-
Select Microsoft Teams to configure deployment settings.
-
It’s suggested that you update the description and logo by clicking “Edit details” in the tray dialog.
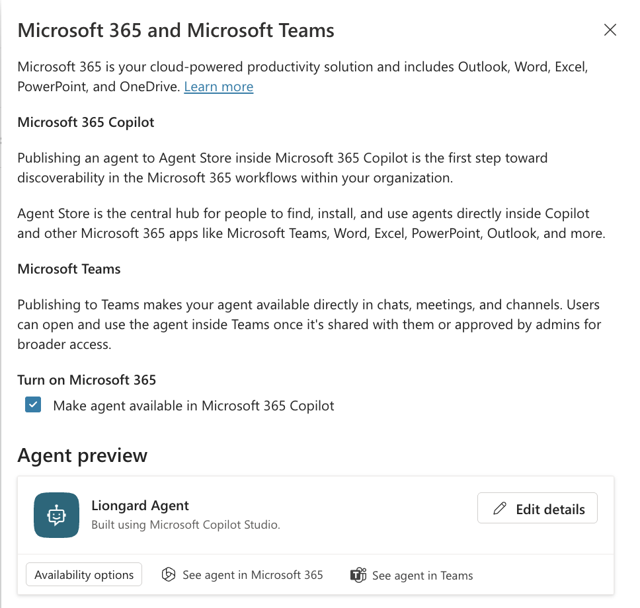
Here is our logo if you would like to use it for your Teams or Copilot agent:
You can then:
- Click See agent in Teams to install the agent in Teams
- Share a direct link with users
- Add the agent to a Teams channel
- Access it through Microsoft 365 Copilot
REMINDER: First-Time User ExperienceDepending on your authentication configuration:
User-Provided Credentials - Users will be prompted to authenticate using their own Liongard Bearer token.
Maker-Provided Credentials - Users can begin interacting immediately using the permissions associated with the maker's connection.
Updated about 1 month ago