Synology NAS
This document provides the steps required to configure the Synology Inspector
Quick DetailsRecommended Agent: Self-Managed
Supported Agents: Self-Managed
Is Auto-Discovered By: Network Discovery Inspector
Can Auto-Discover: N/A
Parent/Child Type Inspector: No
Inspection via: API
Data Summary: Here
Overview
Liongard's Synology Inspector pulls various details about a Synology System, including storage information, network information, system health, and NAS share information.
See it in Action
Inspector Setup Preparation
Firmware VersionsThe Synology NAS Inspector was developed using firmware version 6.2.x. If you deploy the Inspector on an older version and it fails, updating to 6.2.x or higher will likely resolve the issue.
User Account Permissions
Liongard's Synoloy NAS Inspector requires Admin Permissions so it can return the richest data. Liongard's Synology NAS Inspector is only going to return data based on the level of permissions granted.
Additionally, Synology does not offer a way currently to programmatically access their API with a user that has MFA enabled. Thus, the Inspector will not properly authenticate with a user that has MFA enabled. A very strong password is recommended for this user instead.
Existing Admin UserIf you already have an existing Admin user you would like to use, proceed to Steps 5 and 6 in this section to ensure the Admin user has proper share access to obtain File Station information.
Create an Admin User
- Log in to your Synology Web Interface
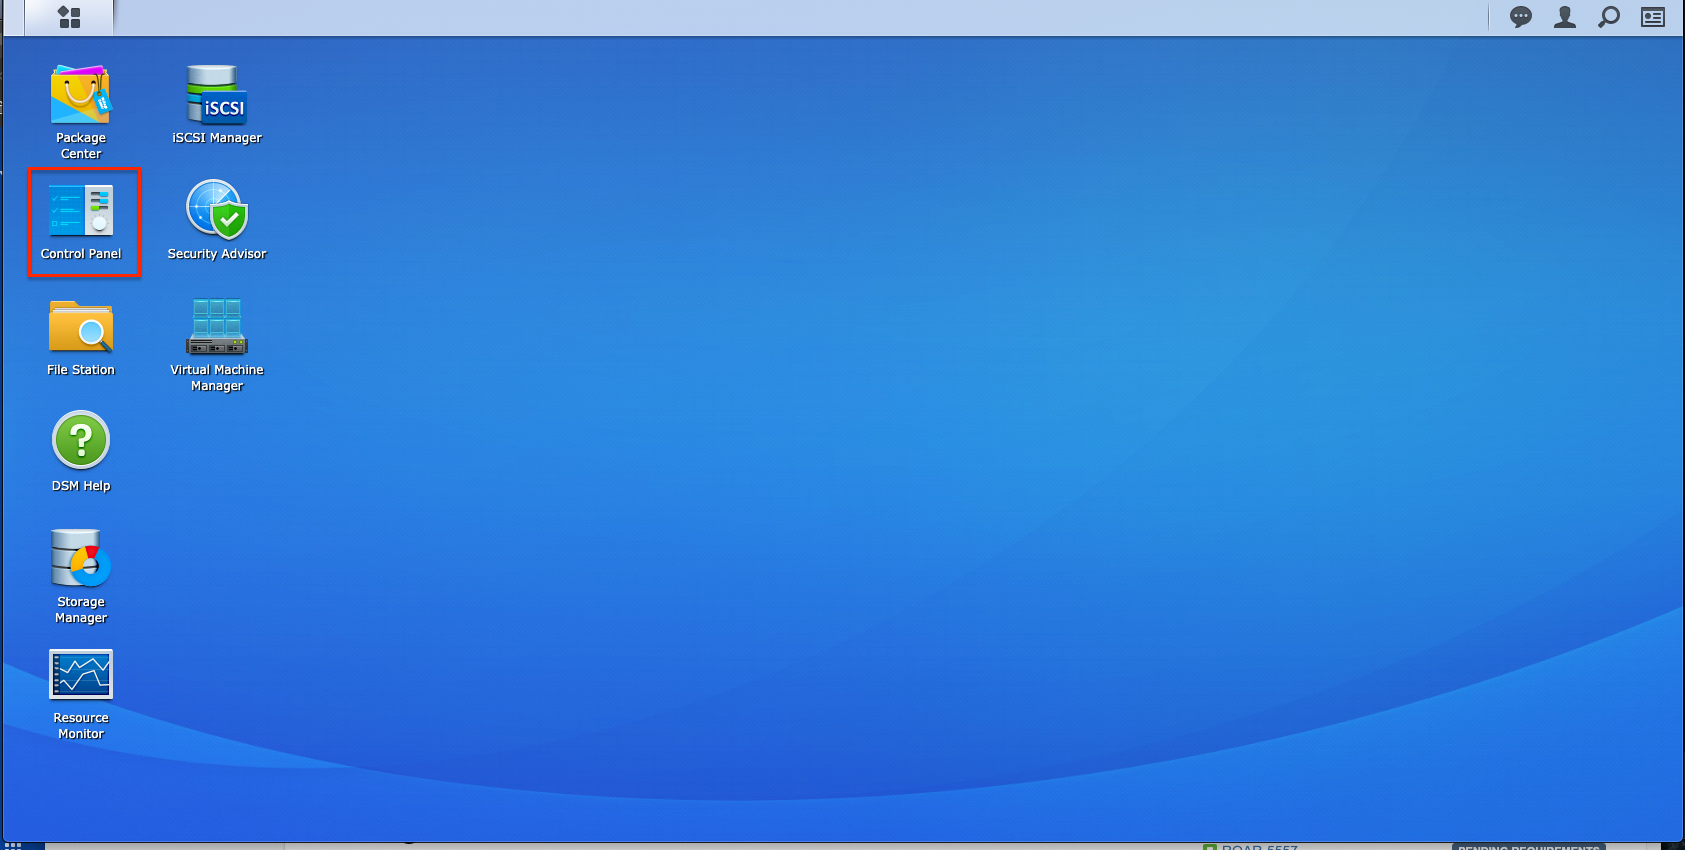
- Open the Control Panel from the Home screen
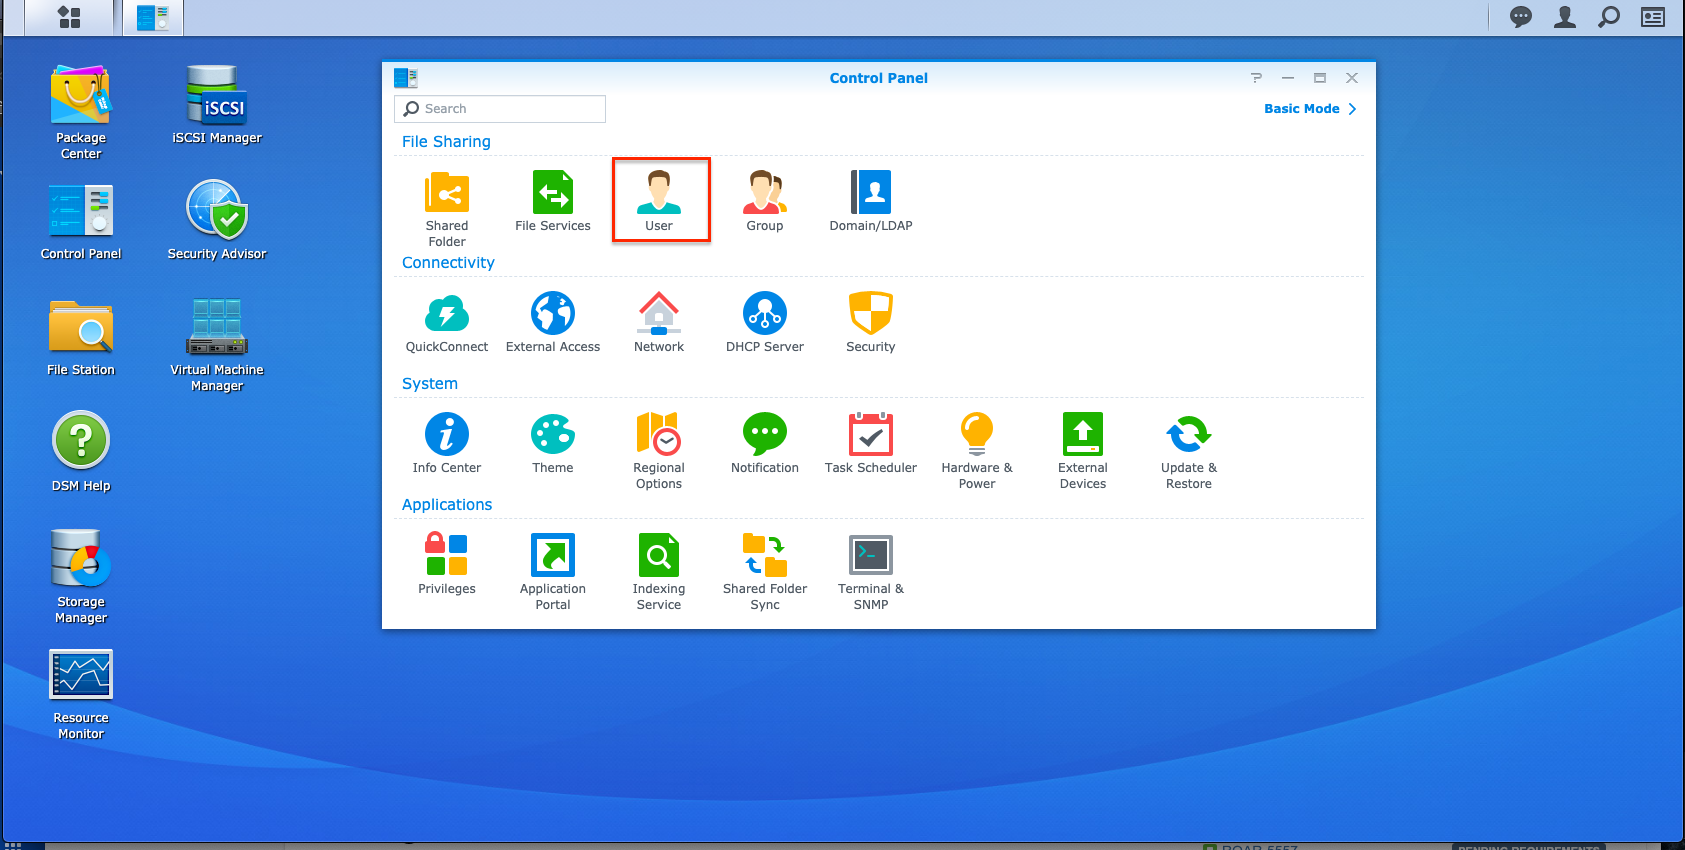
- Access the Users section of the Control Panel
- From here, create a new Admin user for Inspector setup or you use an existing Admin user account.
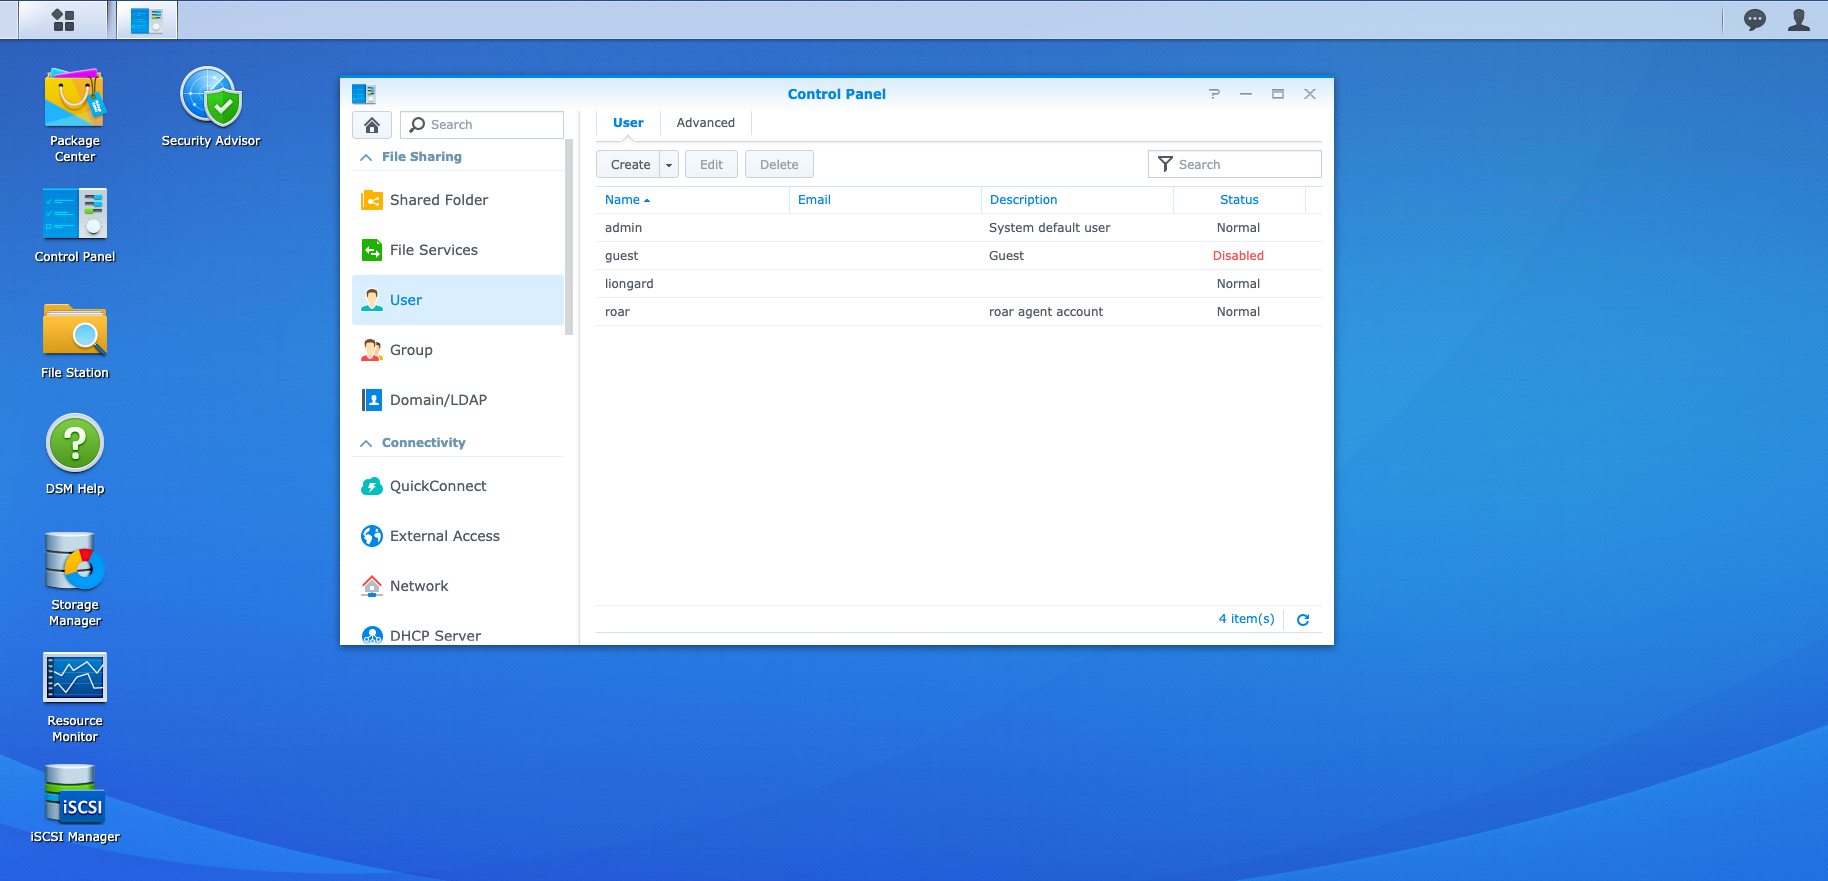
a. If you are creating a new user, use the create button. b. If you are using an existing user select Edit over the user you want to use.
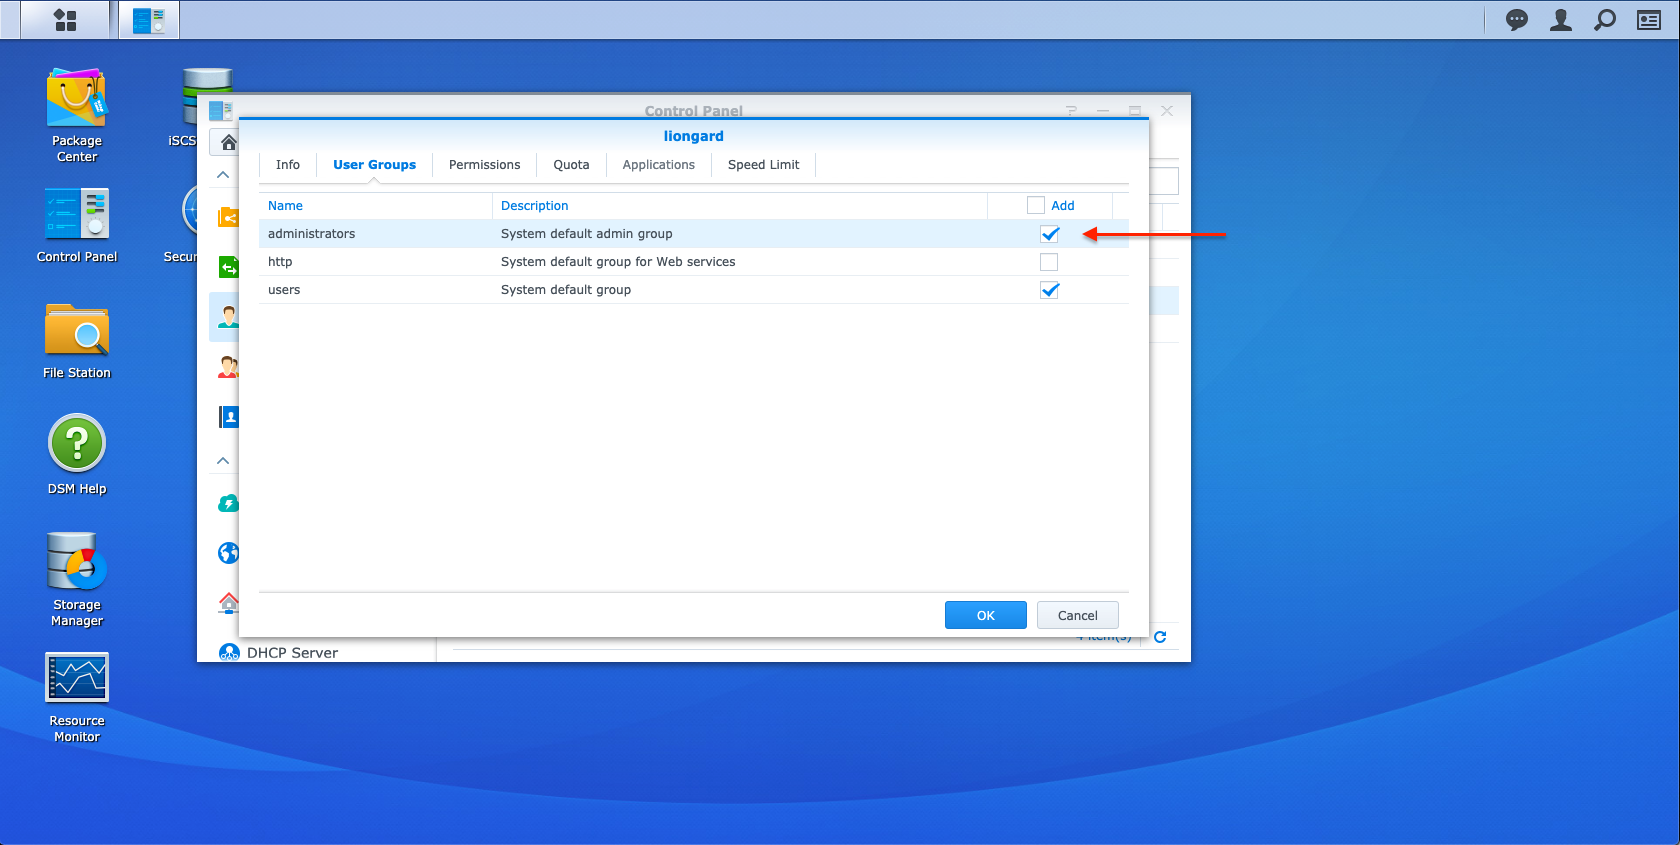
- Assign the User Read/Write access to all shares
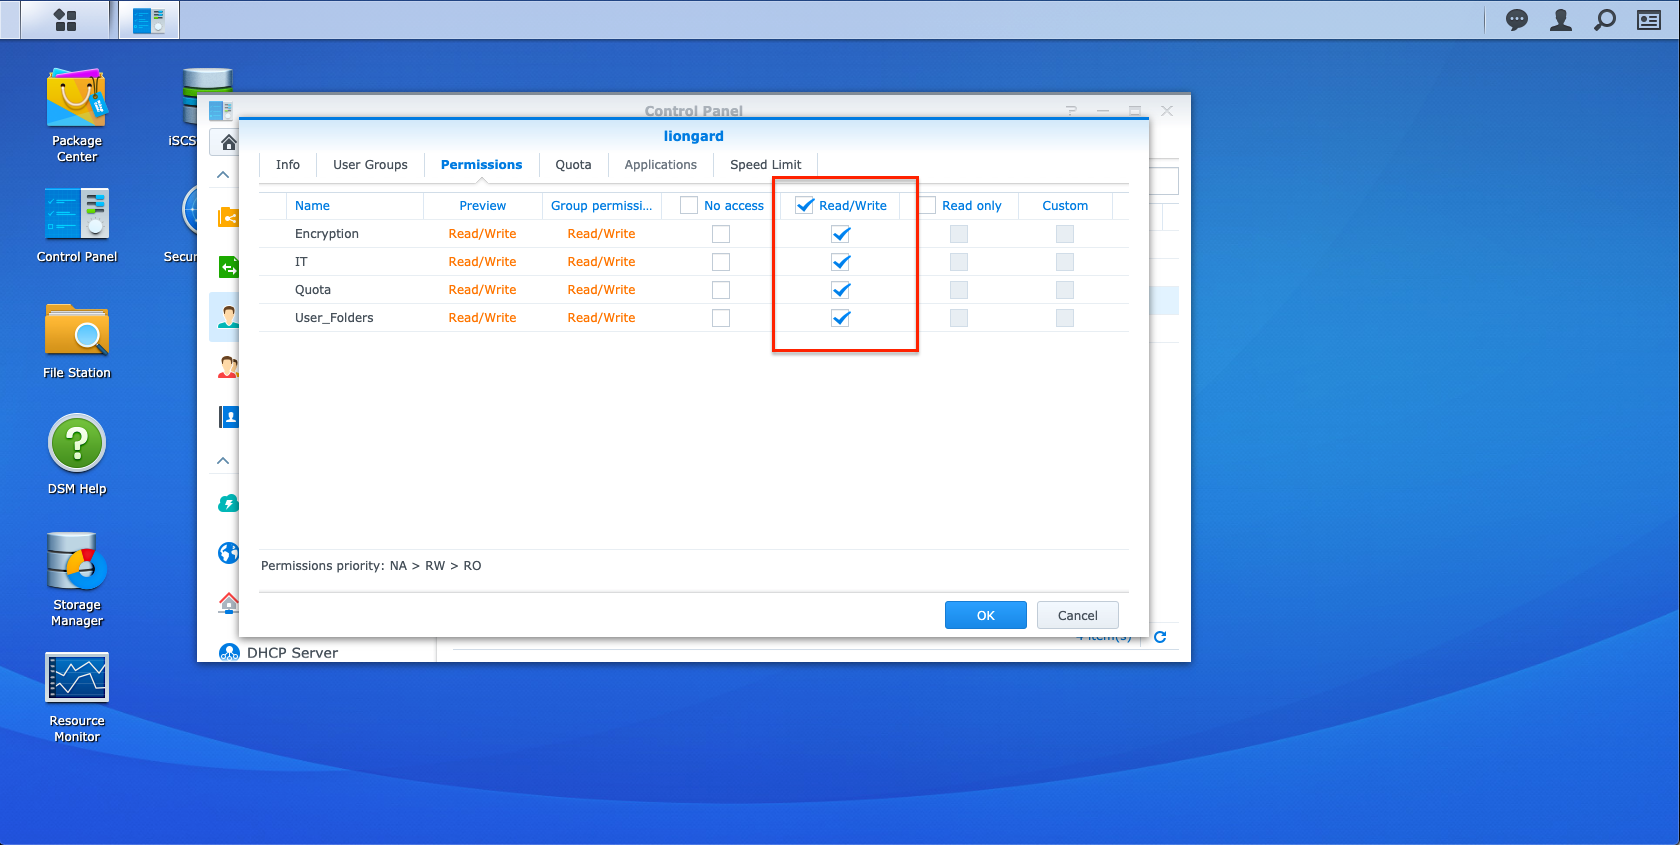
Placing the user in the system default administration group should accomplish this.
- Assign the User to the Administration Group. All other user setup options can be left at default or changed.
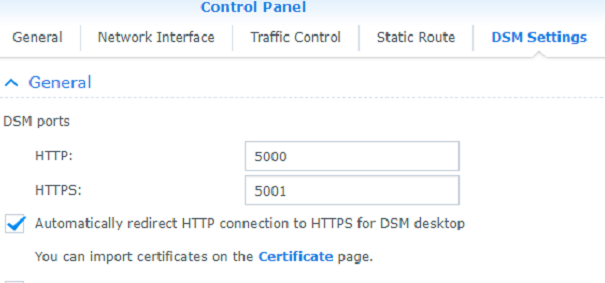
- In DSM Settings, go to Control Panel > Login Portal > DSM tab > Web Services section we recommend automatically redirecting HTTP connection to HTTPS for DSM desktop. Also make a note of the DSM port (HTTPS) value as you will need this port number to complete the setup of the Synology Inspector.
Liongard Inspector Setup
Incorrect CredentialsIf incorrect credentials are input into the Inspector configuration in Liongard, the Inspector will make multiple attempts to authenticate which will result in an account lockout.
If the credentials are incorrect, the Inspector will return an authorization error.
Individual Inspector Setup
In Liongard, navigate to Admin > Inspectors > Inspector Types > Navigate to the Synology NAS Inspector > Select Add System.
Fill in the following information:
- Environment: Select the Environment this System should be associated to
- Friendly Name: Suggested "Synology NAS onment Name]"
- **"
- Agent: Select the On-Premises Agent installed for this Environment
- Inspector Version: Latest
- IP Hostname: The IP address of the Synology Device
- HTTPS Port: The default Port of 5001 will be used if none is set
- Admin Username: Username for the Admin user account
- Admin Password: Password for the Admin user
- Scheduling: The Inspector will default to run once a day at the time the Inspector is set up. Here you can adjust the schedule
Select Save. The Inspector will now be triggered to run within the minute.
Optional: Turn on Flexible Asset/Configuration Auto-Updating
If you would like this Inspector's data to be sent to ConnectWise and/or IT Glue, turn on Flexible Assets/Configurations for this Inspector:
- ConnectWise: Admin > Integrations > ConnectWise > Configuration Types > Confirm the "Configuration Auto-Updating" toggle is enabled
- IT Glue: Admin > Integrations > IT Glue > Flexible Assets > Confirm the "Flexible Asset Auto-Updating" toggle is enabled
Roll out Inspectors at Mass via CSV Import
For more information, please visit our documentation.
To import Synology NAS Inspectors via CSV Import, navigate to Admin > Inspectors > Synology NAS > Select the down arrow icon in the top right-hand to Download CSV Import Template.
In the CSV Template, each row, starting on row three, will represent an Inspector. Fill in the following information for each Inspector you want to roll out:
- Agent.Name: This column is case sensitive. Copy and paste the associated Agent name from the Admin > Agents screen
- Inspector.Name: Enter "synology-nas-inspector"
- Environment.Name: This column is case sensitive. Copy and paste the associated Environment name from the Dashboard screen
- Alias: Enter the Desired Friendly Name
- Config.HOSTNAME: Enter the internal IP address or the fully qualified domain name for the Synology Device.
- If you are using a Cloud Agent, the public IP address or name that will allow access to the API port is appropriate
- Config.PORT: The default HTTPS port will is "5001", but if you changed the port when setting up access in Synology, enter that port number here
- Config.USERNAME: Enter a username that is in the Administrators group on the Synology Device
- SecureConfig.PASSWORD: Enter the password for the above User
- FreqType: Enter "days"
- FreqInterval: Enter "1"
When ready to Import the CSV Template of Inspectors, navigate to Admin > Inspectors > Synology NAS > Select the up arrow icon in the top right-hand to Import CSV > Select your saved template.
After the successful import notification, reload your browser to find your imported Inspectors.
These Inspectors will automatically trigger themselves to run within a minute.
Activating Auto-Discovered Inspectors
If you have set up a Network Discovery Inspector, it can auto-discover your Synology NAS Inspectors. After completing the setup preparation above, follow the steps below:
Navigate to Admin > Inspectors > Select Synology NAS Inspector > Select the Discovered Systems tab
Here you can Activate your Discovered Synology NAS Inspector(s):
- Individually select the three dots Action menu to the left of the Discovered Synology NAS Inspector(s)
- Edit the Synology NAS Inspector(s) to include the following credentials gathered in the Inspector Setup Preparation
- Admin Username: Username for the Admin user account
- Admin Password: Password for the Admin user
- Save the Inspector(s)
- Select the checkbox to the left of the Inspector(s) that you would like to Activate
- Select the Actions drop-down menu above the Discovered Systems table
- Select Activate Launchpoints
Serverless EnvironmentWe recommend deploying the Synology NAS Inspector using an On-Premises Agent. However, if a client network is serverless, you can deploy and allowlist a Self-Hosted Agent and use that Agent to run the Inspector. Please review this documentation for more information.
This Inspector runs on Port 5001.
Synology NAS Quick Tips/FAQs
Updated 4 months ago
