Fortinet FortiGate
This document provides the steps required to configure the Fortinet FortiGate Inspector.
Quick DetailsRecommended Agent: Self-Managed
Supported Agents: Self-Managed
Is Auto-Discovered By: Network Discovery Inspector
Can Auto-Discover: N/A
Parent/Child Type Inspector: No
Inspection via: API
Data Summary: Here
Overview
See it in Action
Inspector Setup Preparation
Fortinet ForitGate Firmware VersionLiongard supports Fortinet FortiGate firmware version 6.2 and later. We will support versions less than 6.2 on a best-effort basis
Support for VDOMsThe Liongard Fortinet Fortigate Inspector does not currently support devices that are configured with VDOMs. If you would like to see this functionality added, please share your feedback using the in-app feedback form found in the Support dropdown in your Liongard.
Create a Read-Only API Account
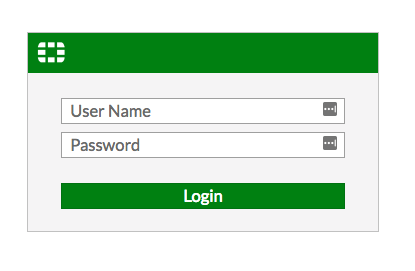
- Log in to the FortiOS web interface
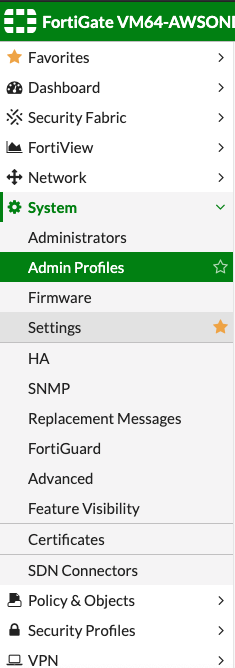
- Navigate to System > Admin Profiles using the left-hand menu
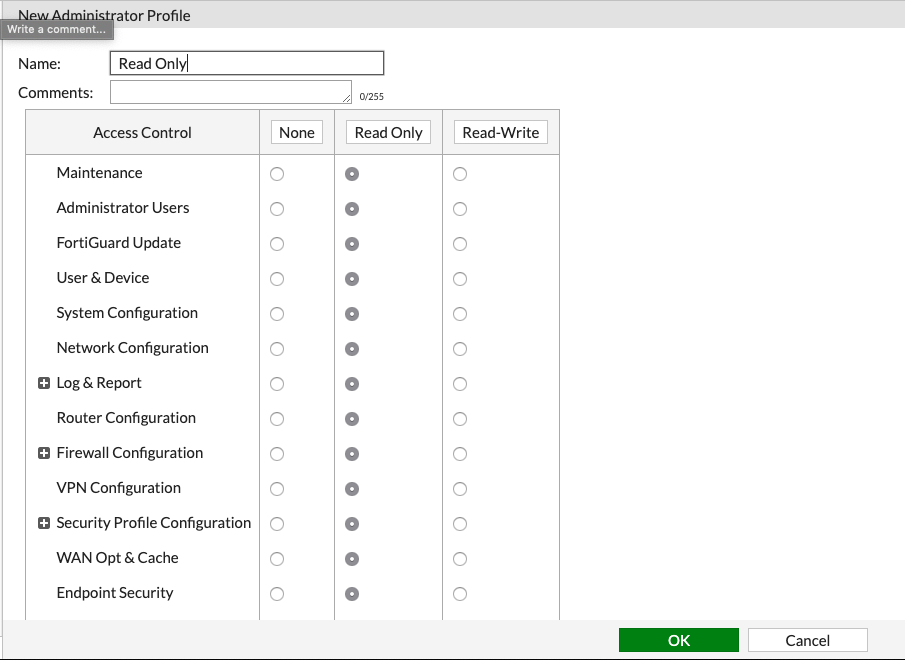
- Create a new Administrator Profile called Read Only_,_ and select all items in the Read Only** column. Save the profile.
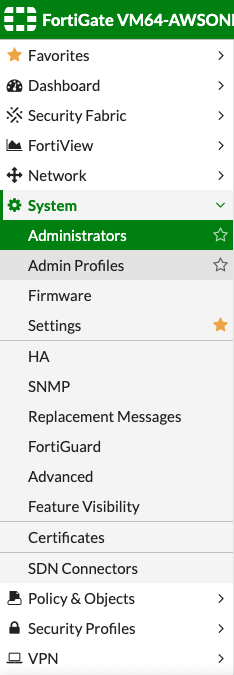
- Navigate to System > Administrators using the left-hand menu.
- Select Create New > REST API Admin
- Create a new REST API Admin with the following information:
- User Name: Liongard_api (or name of your choosing)
- Administrator Profile: Select the Read-Only profile created above
- PKI Group: Toggled Off
- CORS Allow Origin: Toggled Off
- Trusted Hosts: If inspecting via Liongard's On-Premises Agent, enter the Internal IP Address of the server where the Liongard Agent is installed. If inspecting via Liongard's Self-Hosted Agent, enter the IP Address of the Self-Hosted Agent in your datacenter.
Allowlisting the IP Address of the Agent for the Trusted Hosted FieldIf the IP address of the Fortinet Fortigate Inspector is not correctly allowlisted on the Fortinet device, then the server will return a 401 status denying access.
If the Inspector runs in a non-allowlisted state several times, then the Fortinet user that owns the API key the Inspector is using will be locked out, and the Fortinet server will return a status of 429.
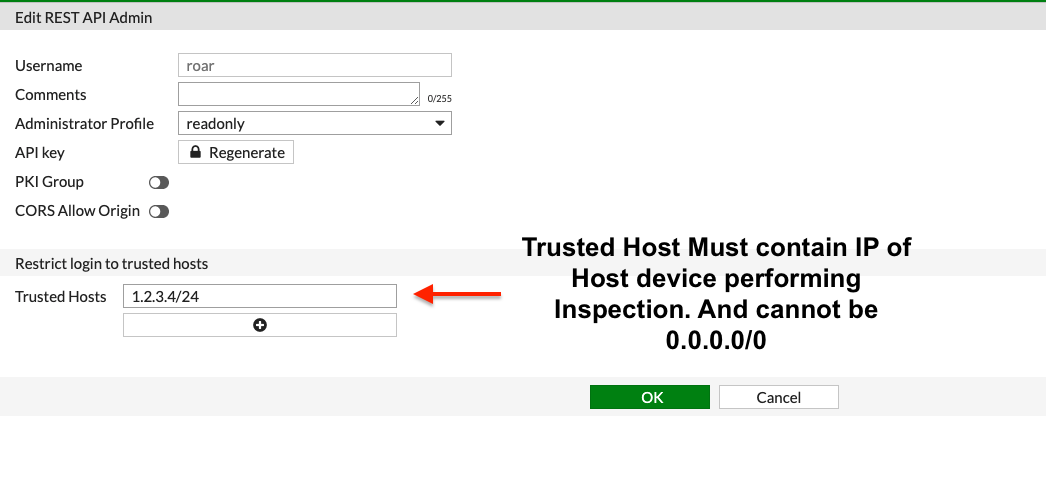
- Click the OK button.
- Document the API key that you are given. It will only appear once, and you will need it to configure the Liongard Inspector.
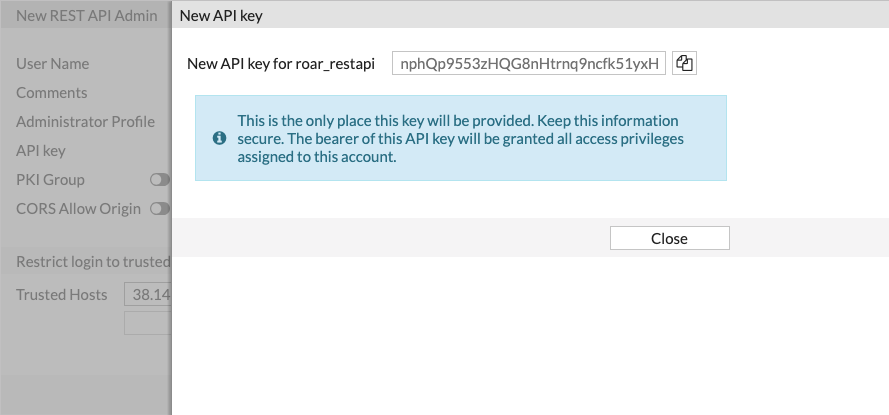
Upgrading to FortiOS 7.4.xPlease follow the steps below after upgrading to FortiOS 7.4.x
- Navigate to System > Settings or Administrator Settings (depending on your FortiOS version).
- Locate the "Permit usage of CLI commands" setting.
- Change this setting to Enabled if it is set to Custom.
- Temporarily toggle the Trusted Hosts configuration:
- Disable Trusted Hosts, save the configuration, and then enable it again.
- Save the changes and test the connection.
Liongard Inspector Setup
Serverless EnvironmentWe recommend deploying the Fortinet FortiGate Inspector using an On-Premises Agent. However, if a client network is serverless, you can deploy and allowlist Liongard's Self-Hosted Agent and use that Agent to run the Inspector. Please review this documentation for more information.
Individual Inspector Setup
In Liongard, navigate to Admin > Inspectors > Inspector Types > Navigate to the Fortinet FortiGate Inspector > Select Add System.
Fill in the following information:
- Environment: Select the Environment this System should be associated to
- Friendly Name: Suggested "Fortinet FortiGate nvironment Name]" "
- Agent: Select the On-premises Agent installed for this Environment
- Inspector Version: Latest
- IP Hostname: The IP address or FQDN of your Fortinet FortiGate device. Do not include the protocol (ex: https://) If you're using a custom port to access your device (i.e. not :443), specify it in this field. For example: 192.168.0.1:4444
- Token: The API Key for the Read-Only API user generated above
- Scheduling: The Inspector will default to run once a day at the time the Inspector is set up. Here you can adjust the schedule
Select Save. The Inspector will now be triggered to run within the minute.
Optional: Turn on Flexible Asset/Configuration Auto-Updating
If you would like this Inspector's data to be sent to ConnectWise and/or IT Glue, turn on Flexible Assets/Configurations for this Inspector:
- ConnectWise: Admin > Integrations > ConnectWise > Configuration Types > Confirm the "Configuration Auto-Updating" toggle is enabled
- IT Glue: Admin > Integrations > IT Glue > Flexible Assets > Confirm the "Flexible Asset Auto-Updating" toggle is enabled
Roll out Inspectors at Mass via CSV Import
For more information, please visit our documentation.
To import Fortinet FortiGate Inspectors via CSV Import, navigate to Admin > Inspectors > Fortinet FortiGate > Select the down arrow icon in the top right-hand to Download CSV Import Template.
In the CSV Template, each row, starting on row three, will represent an Inspector. Fill in the following information for each Inspector you want to roll out:
- Agent.Name: This column is case sensitive. Copy and paste the associated Agent name from the Admin > Agents screen
- Inspector.Name: Enter "fortinet-fortigate-inspector"
- Environment.Name: This column is case sensitive. Copy and paste the associated Environment name from the Dashboard screen
- Alias: Enter the Desired Friendly Name
- Config.IP: Enter the IP address or FQDN of your Fortinet FortiGate device. If you're using a custom port to access your device (i.e. not: 443), you'll need to specify it in this field, for example: 192.168.0.1:4444
- SecureConfig.Token: Enter the API Key for the read-only API user-generated in the Inspector Setup Preparation
- FreqType: Enter "days"
- FreqInterval: Enter "1"
When ready to Import the CSV Template of Inspectors, navigate to Admin > Inspectors > Fortinet FortiGate > Select the up arrow icon in the top right-hand to Import CSV > Select your saved template.
After the successful import notification, reload your browser to find your imported Inspectors.
These Inspectors will automatically trigger themselves to run within a minute.
Activating Auto-Discovered Inspectors
If you have set up a Network Discovery Inspector, it can auto-discover your Fortinet Fortigate Inspectors. After completing the setup preparation above, follow the steps below:
Navigate to Admin > Inspectors > Select Fortinet Fortigate Inspector > Select the Discovered Systems tab
Here you can Activate your Discovered Fortinet Fortigate Inspector(s):
- Individually select the three dots Action menu to the left of the Discovered Fortinet Fortigate Inspector(s)
- Edit the Fortinet Fortigate Inspector(s) to include the following credentials gathered in the Inspector Setup Preparation
- Token: The API Key for the Read-Only API user generated above
- Save the Inspector(s)
- Select the checkbox to the left of the Inspector(s) that you would like to Activate
- Select the Actions drop-down menu above the Discovered Systems table
- Select Activate Launchpoints
Inspector FailureIf the Inspector is failing, try putting the Liongard Agent's IP address into the Trusted Hosts field. You can find the IP address of the Agent under the Admin > Agents page.
Updated 4 months ago
