Environment Groups
Overview
Environment Groups in Liongard allow you to customize access control into logical groups, streamlining access management. You may create different Environment Groups based on departments, projects, or geographical locations and assign users to these groups accordingly. For example, your service desk team may be segmented into different territories, and you want each team to see only their respective customers in Liongard. Environment groups allow you this granular access.
The Manager and Reader roles in Liongard can leverage granular access through Environment Group assignments.
Default Environment Groups
By default, each Liongard instance comes with two default Environment Groups that can be used to help you get started.
- All Environments
- All Managed Environments
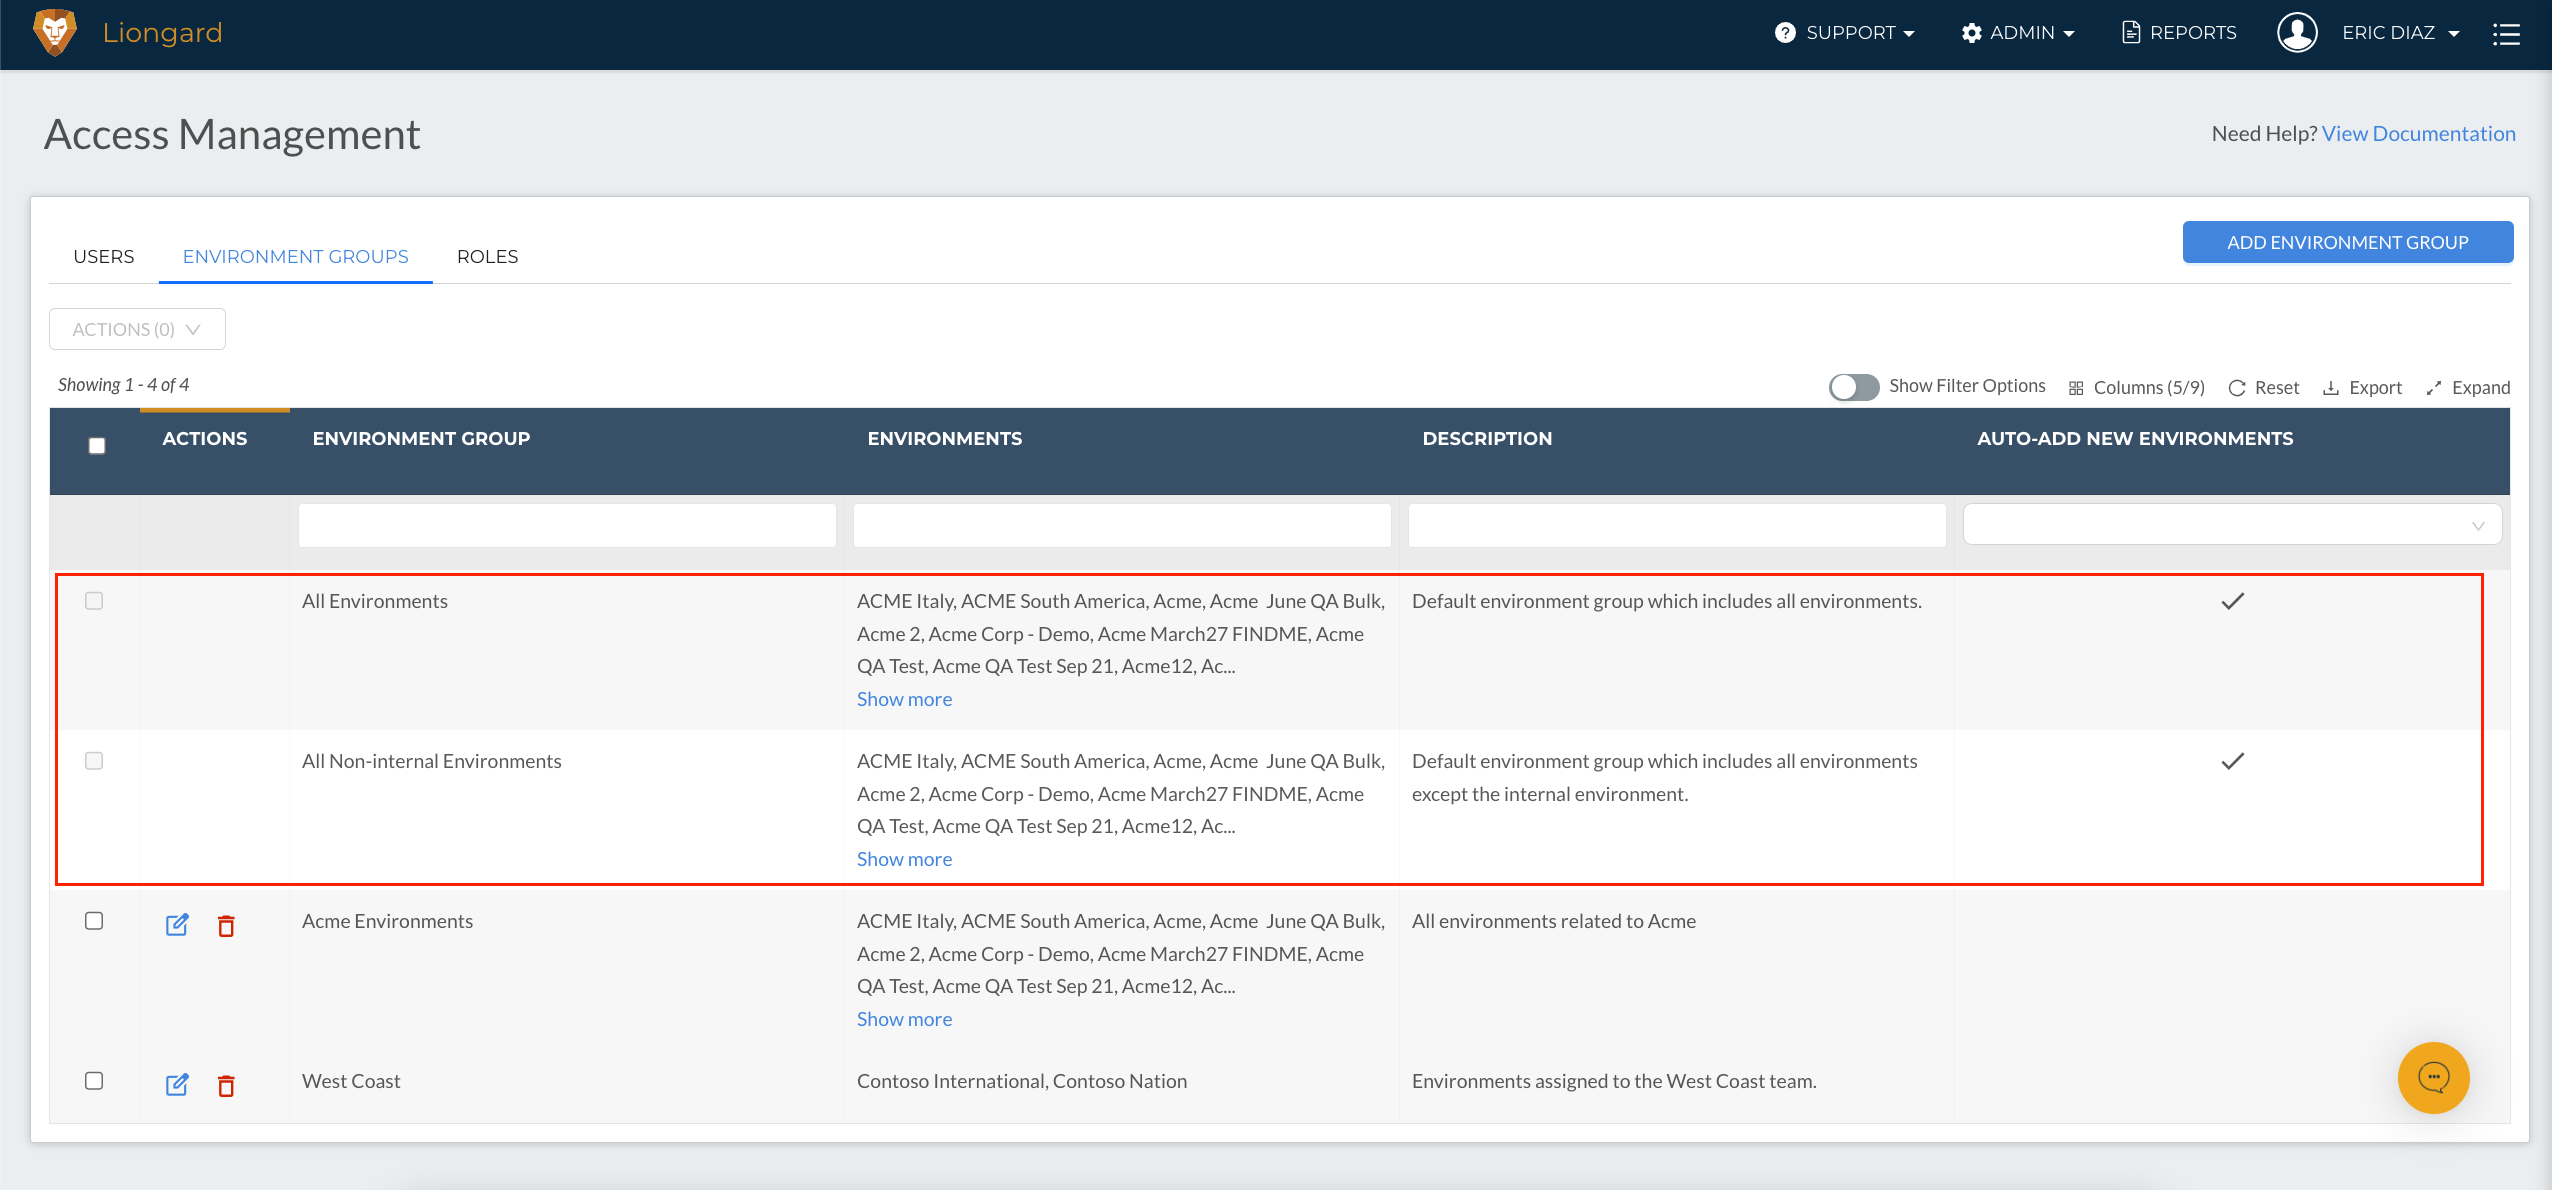
All Environments
This group is used to give users global access. Members of this group will be able to perform actions that require global scope. Any members of this group will have Reader/Manager access to all current and future Environments of Liongard
All Managed Environments
This group is used to give users access to all Environments except the Internal Environment (the first Environment provisioned) in your Liongard instance. All future Environments added to the instance will be automatically added to this group.
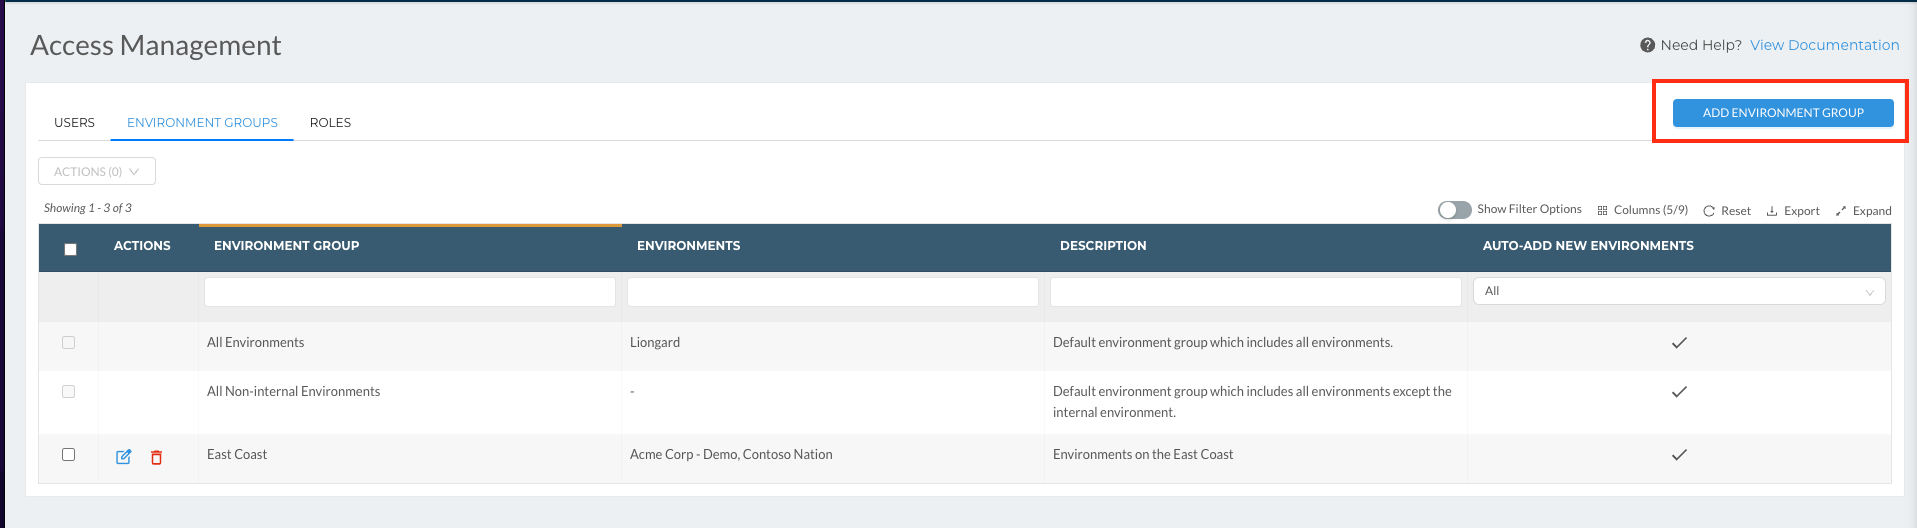
Create an Environment Group
Follow the steps below to create an Environment Group. Environment Groups can be used to create groups of environments for easier access management.
- Navigate to the Environment Group page by going to Admin > Environment Groups
- Click the Add Environment Group button in the top right-hand of the page.
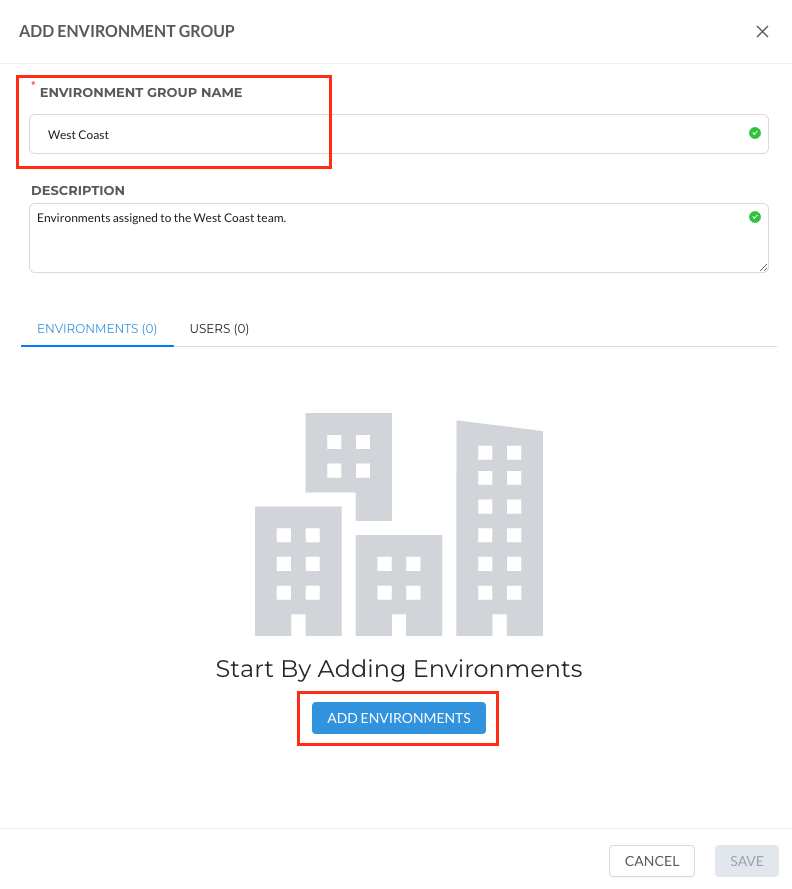
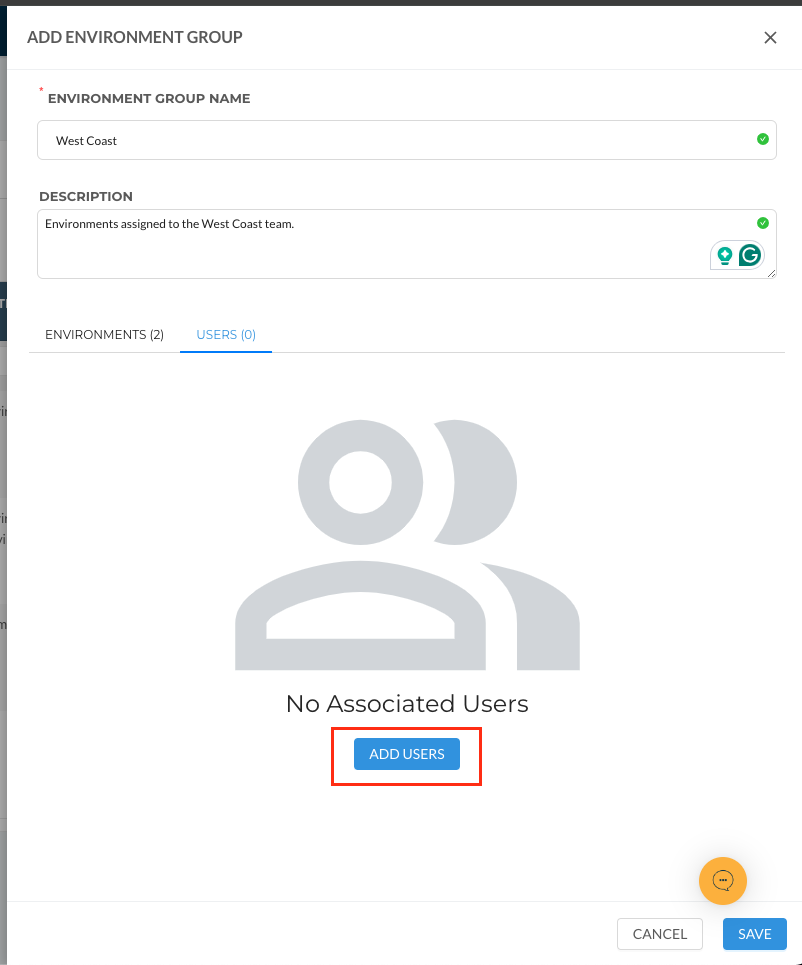
- Fill in the name for the Environment group and give a description that will help you better identify the group later when assigning.
- Select Add Environments to start adding Environments to the group.
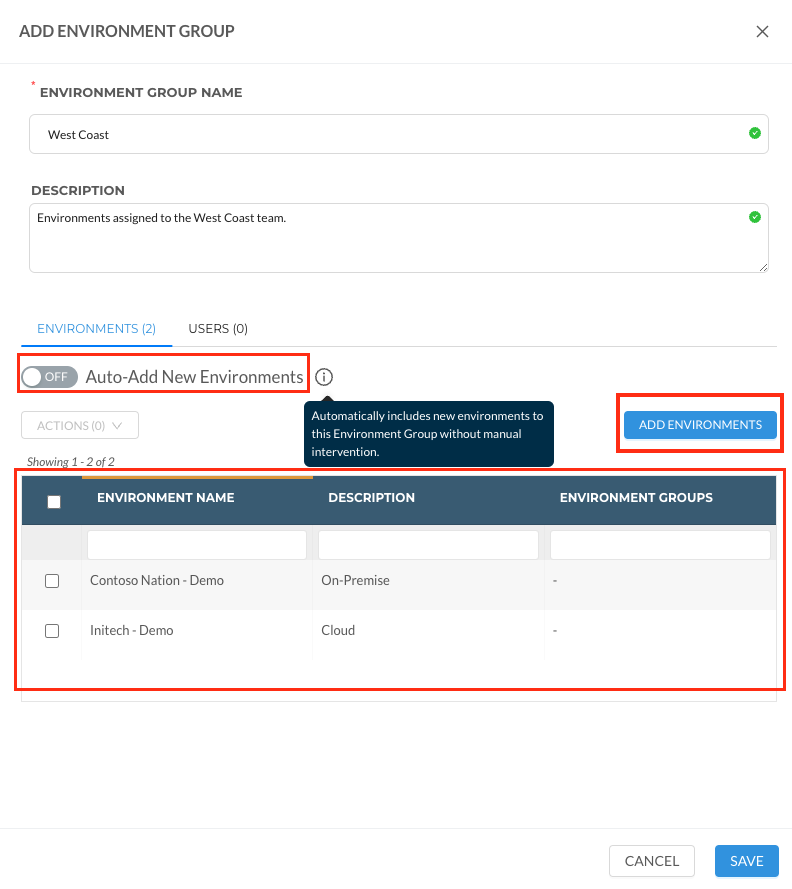
- Using the selectors on the left side, select the environments to be added to the group.
- You can use the Environments Group column to see which groups an environment is already a part of.

- The selected Environments are shown in the table below. Using the Add Environments button, you can add more environments.
- Optionally, the "Auto-Add New Environments" toggle can be selected to ensure newly imported or added Environments are automatically a part of the group.
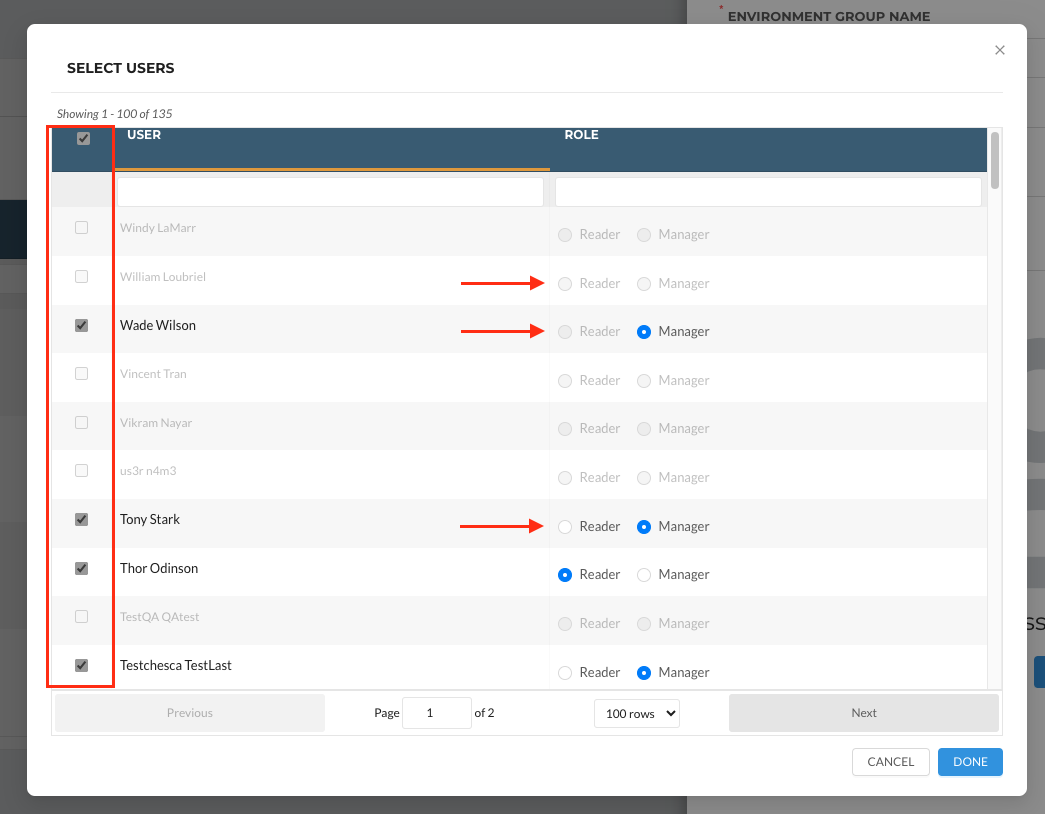
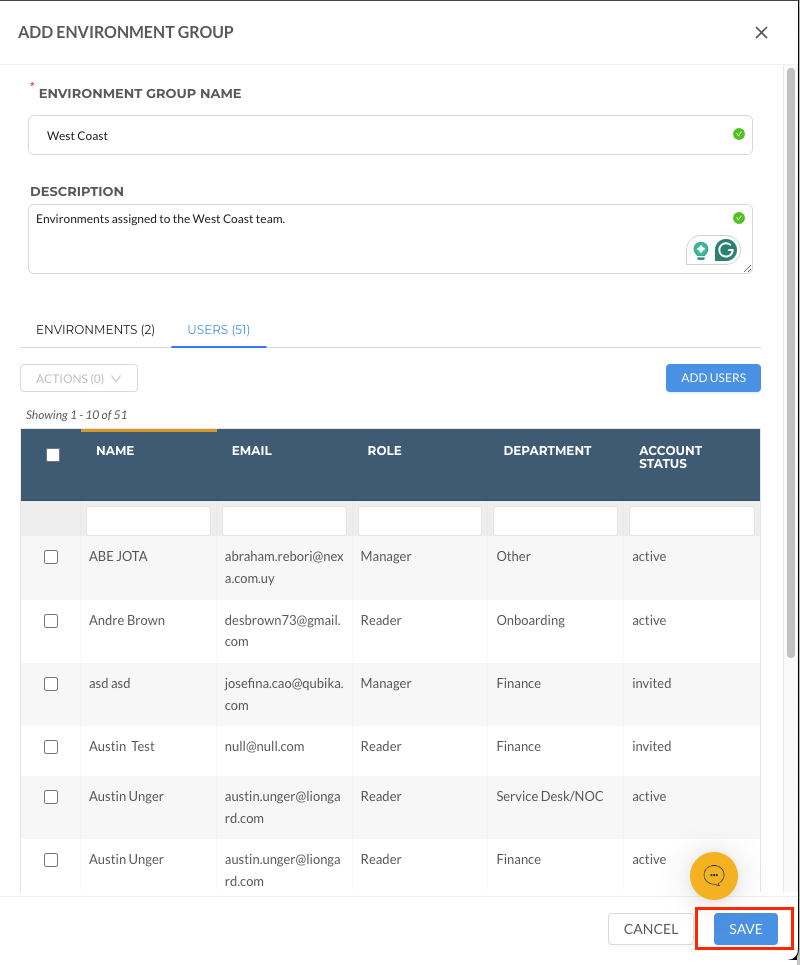
- Next, select the users you wish to be a part of the Environment Group and what role each user should have for all the environments in the group.
- Using the selectors on the left side, select each user and Manager or Reader permissions for each Environment in the Environment Group. Select Done when finished.
- If an existing User is assigned the Admin role, they will be greyed out as they, by default have access to all Environments.
- If an existing User is assigned the System Integrator role, the option for Reader will be greyed out as they by default, have read access to all Environments.
- When you are finished adding Environments and Users, select Save in the bottom right-hand corner of the panel to create the Environment Group
Updated 10 months ago