N-able N-Central
Quick DetailsRecommended Agent: On-Demand
Supported Agents: On-Demand or Self-Managed
Is Auto-Discovered By: N/A
Can Auto-Discover: N-able N-central Child Inspectors
Parent/Child Type Inspector: Yes
Parent Inspector Returns Data: Yes
Inspection via: API
Data Summary: Here
Overview
See it in Action
Inspector Description
The N-able N-central Inspector is a dedicated Inspector for the N-able N-central platform. This Inspector will bring back data such as:
- Roles
- Groups
- Devices
- Jobs
Multi-Service Organization Tenant SystemsIf your N-able N-central instance uses multiple Service Organizations, then create a user that only has access to the SO you would like to use to setup the Liongard Inspector.
Inspector Setup Preparation
The N-able N-central Inspector requires a username and token to complete the setup. In the steps below, we will go over creating a new user, using the least amount of privileges needed to complete the integration setup, as well as creating a Read-Only role to assign to said user for setup.
Step 1: Create a Read-only Role
- Create a Read-Only User Role. Under the SO level, navigate to Administrator > User Management > Roles > Create Role
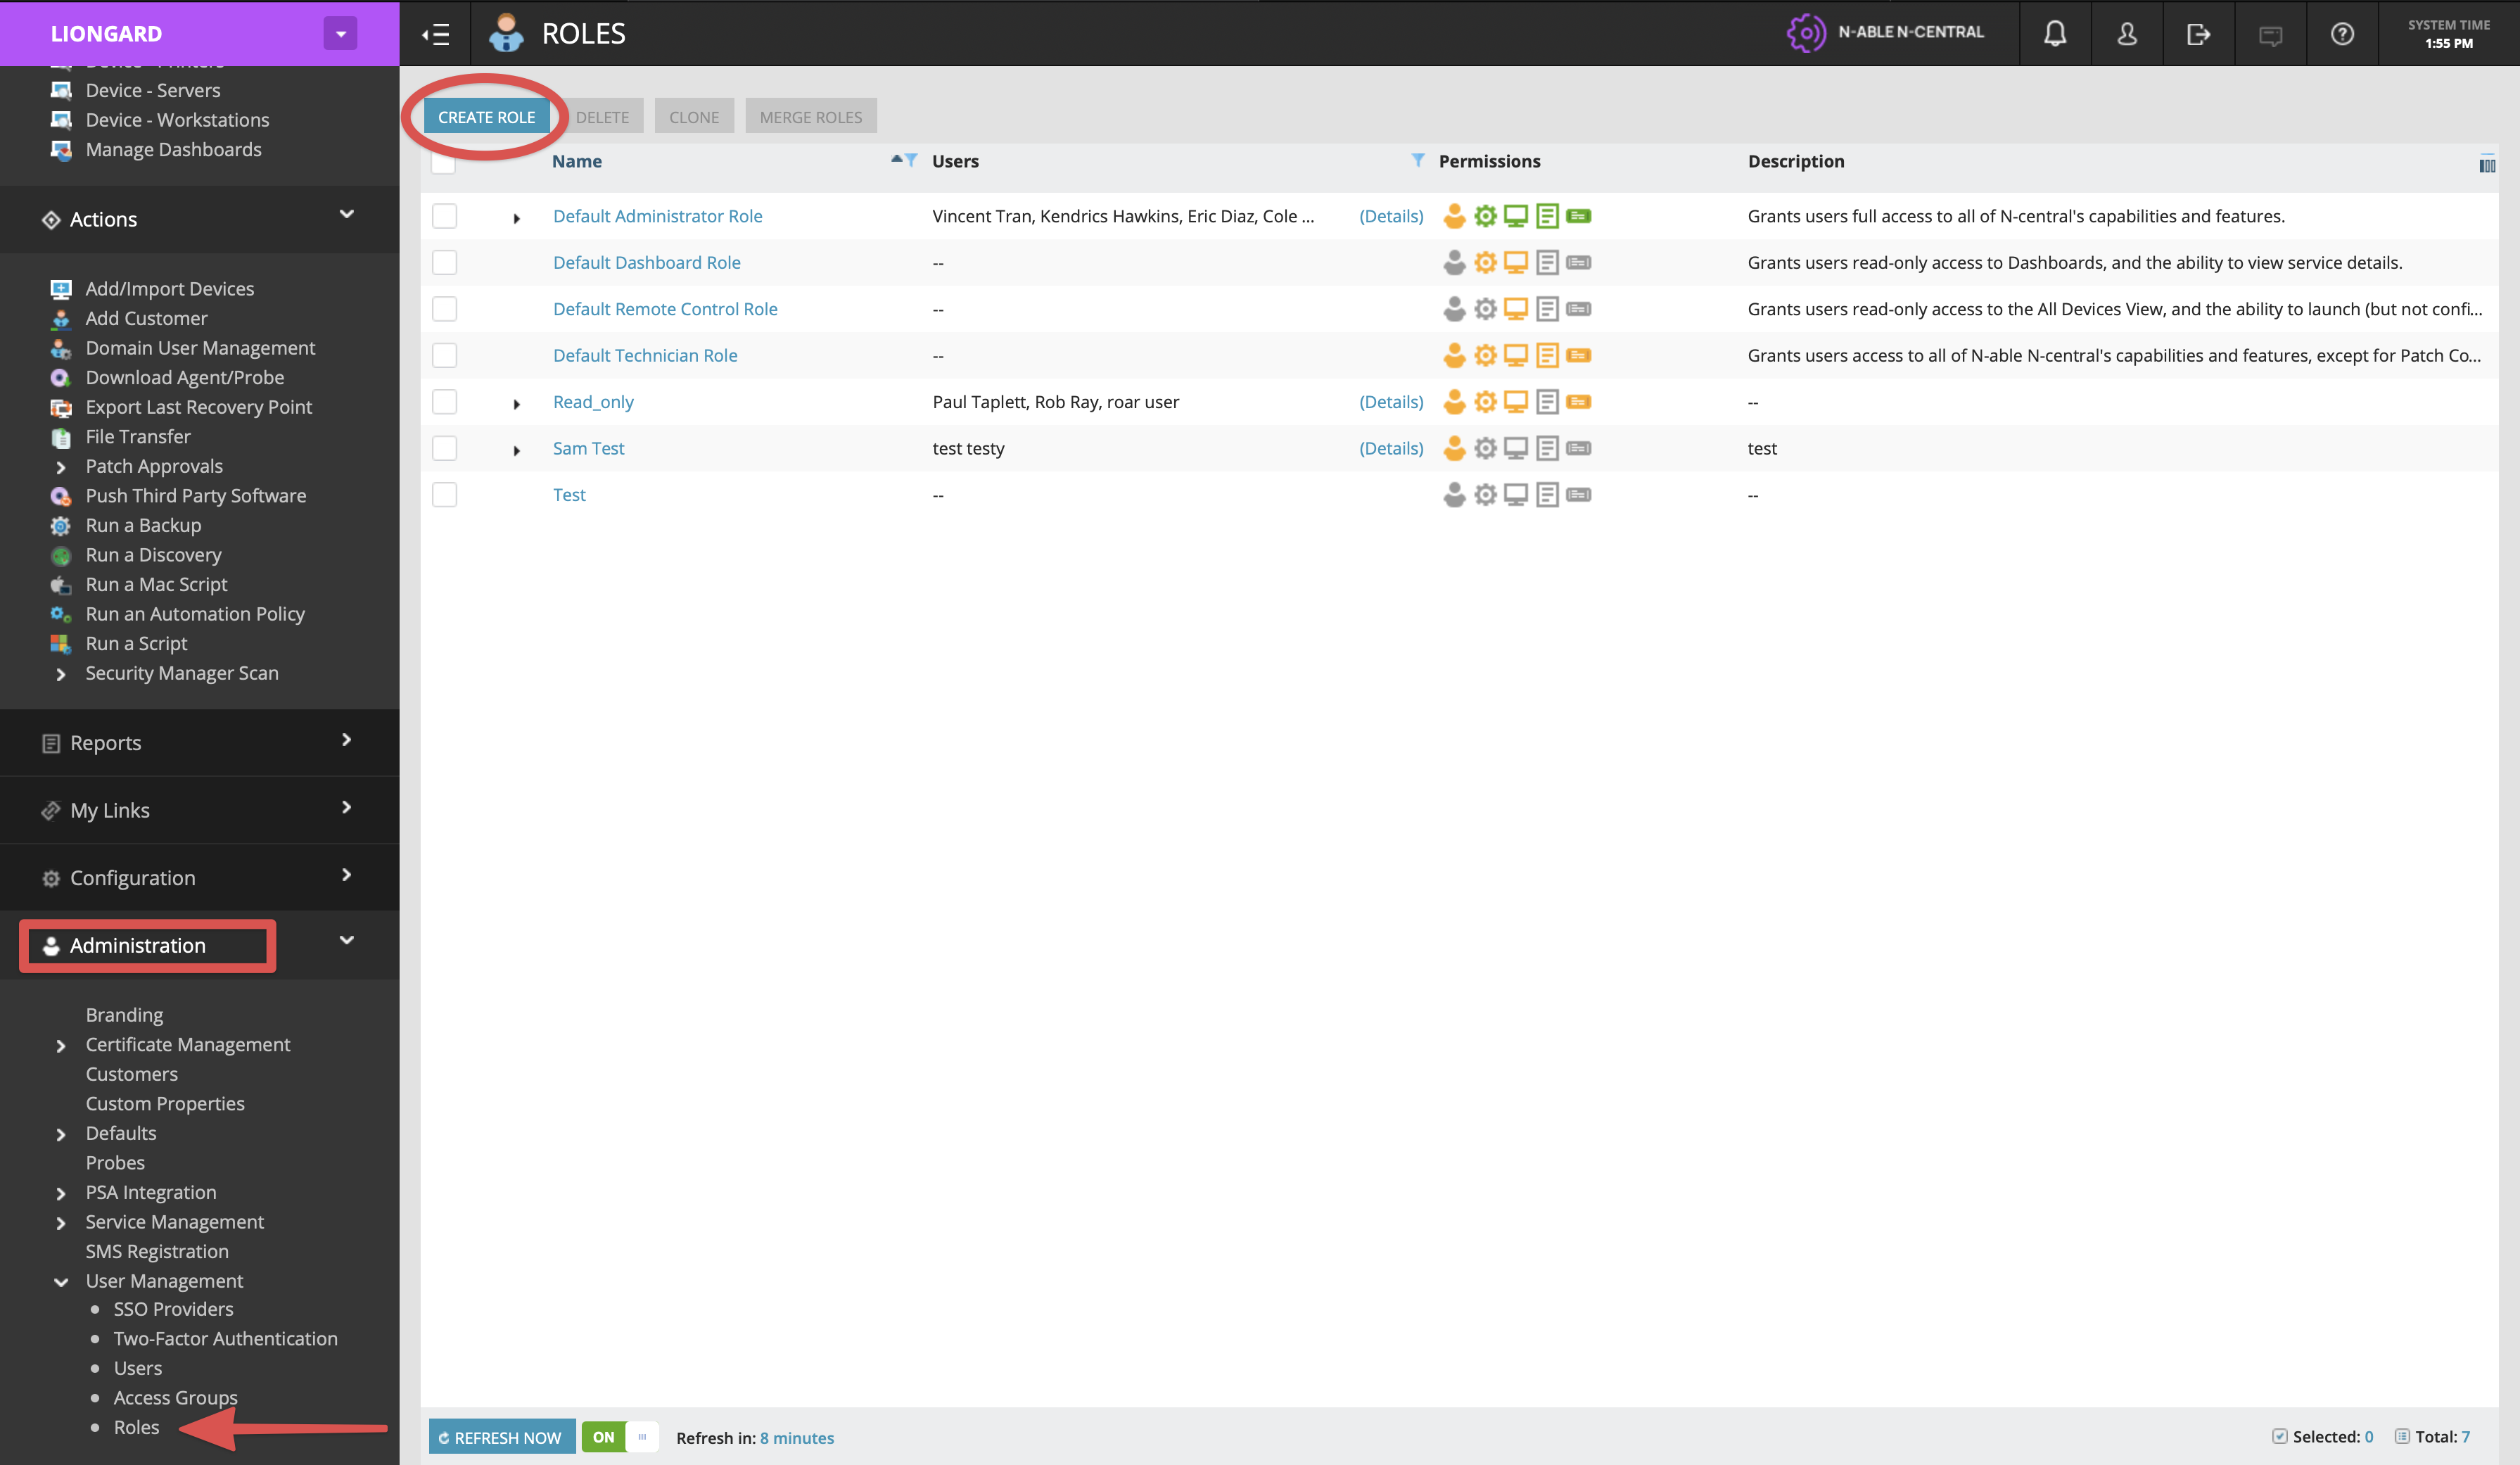
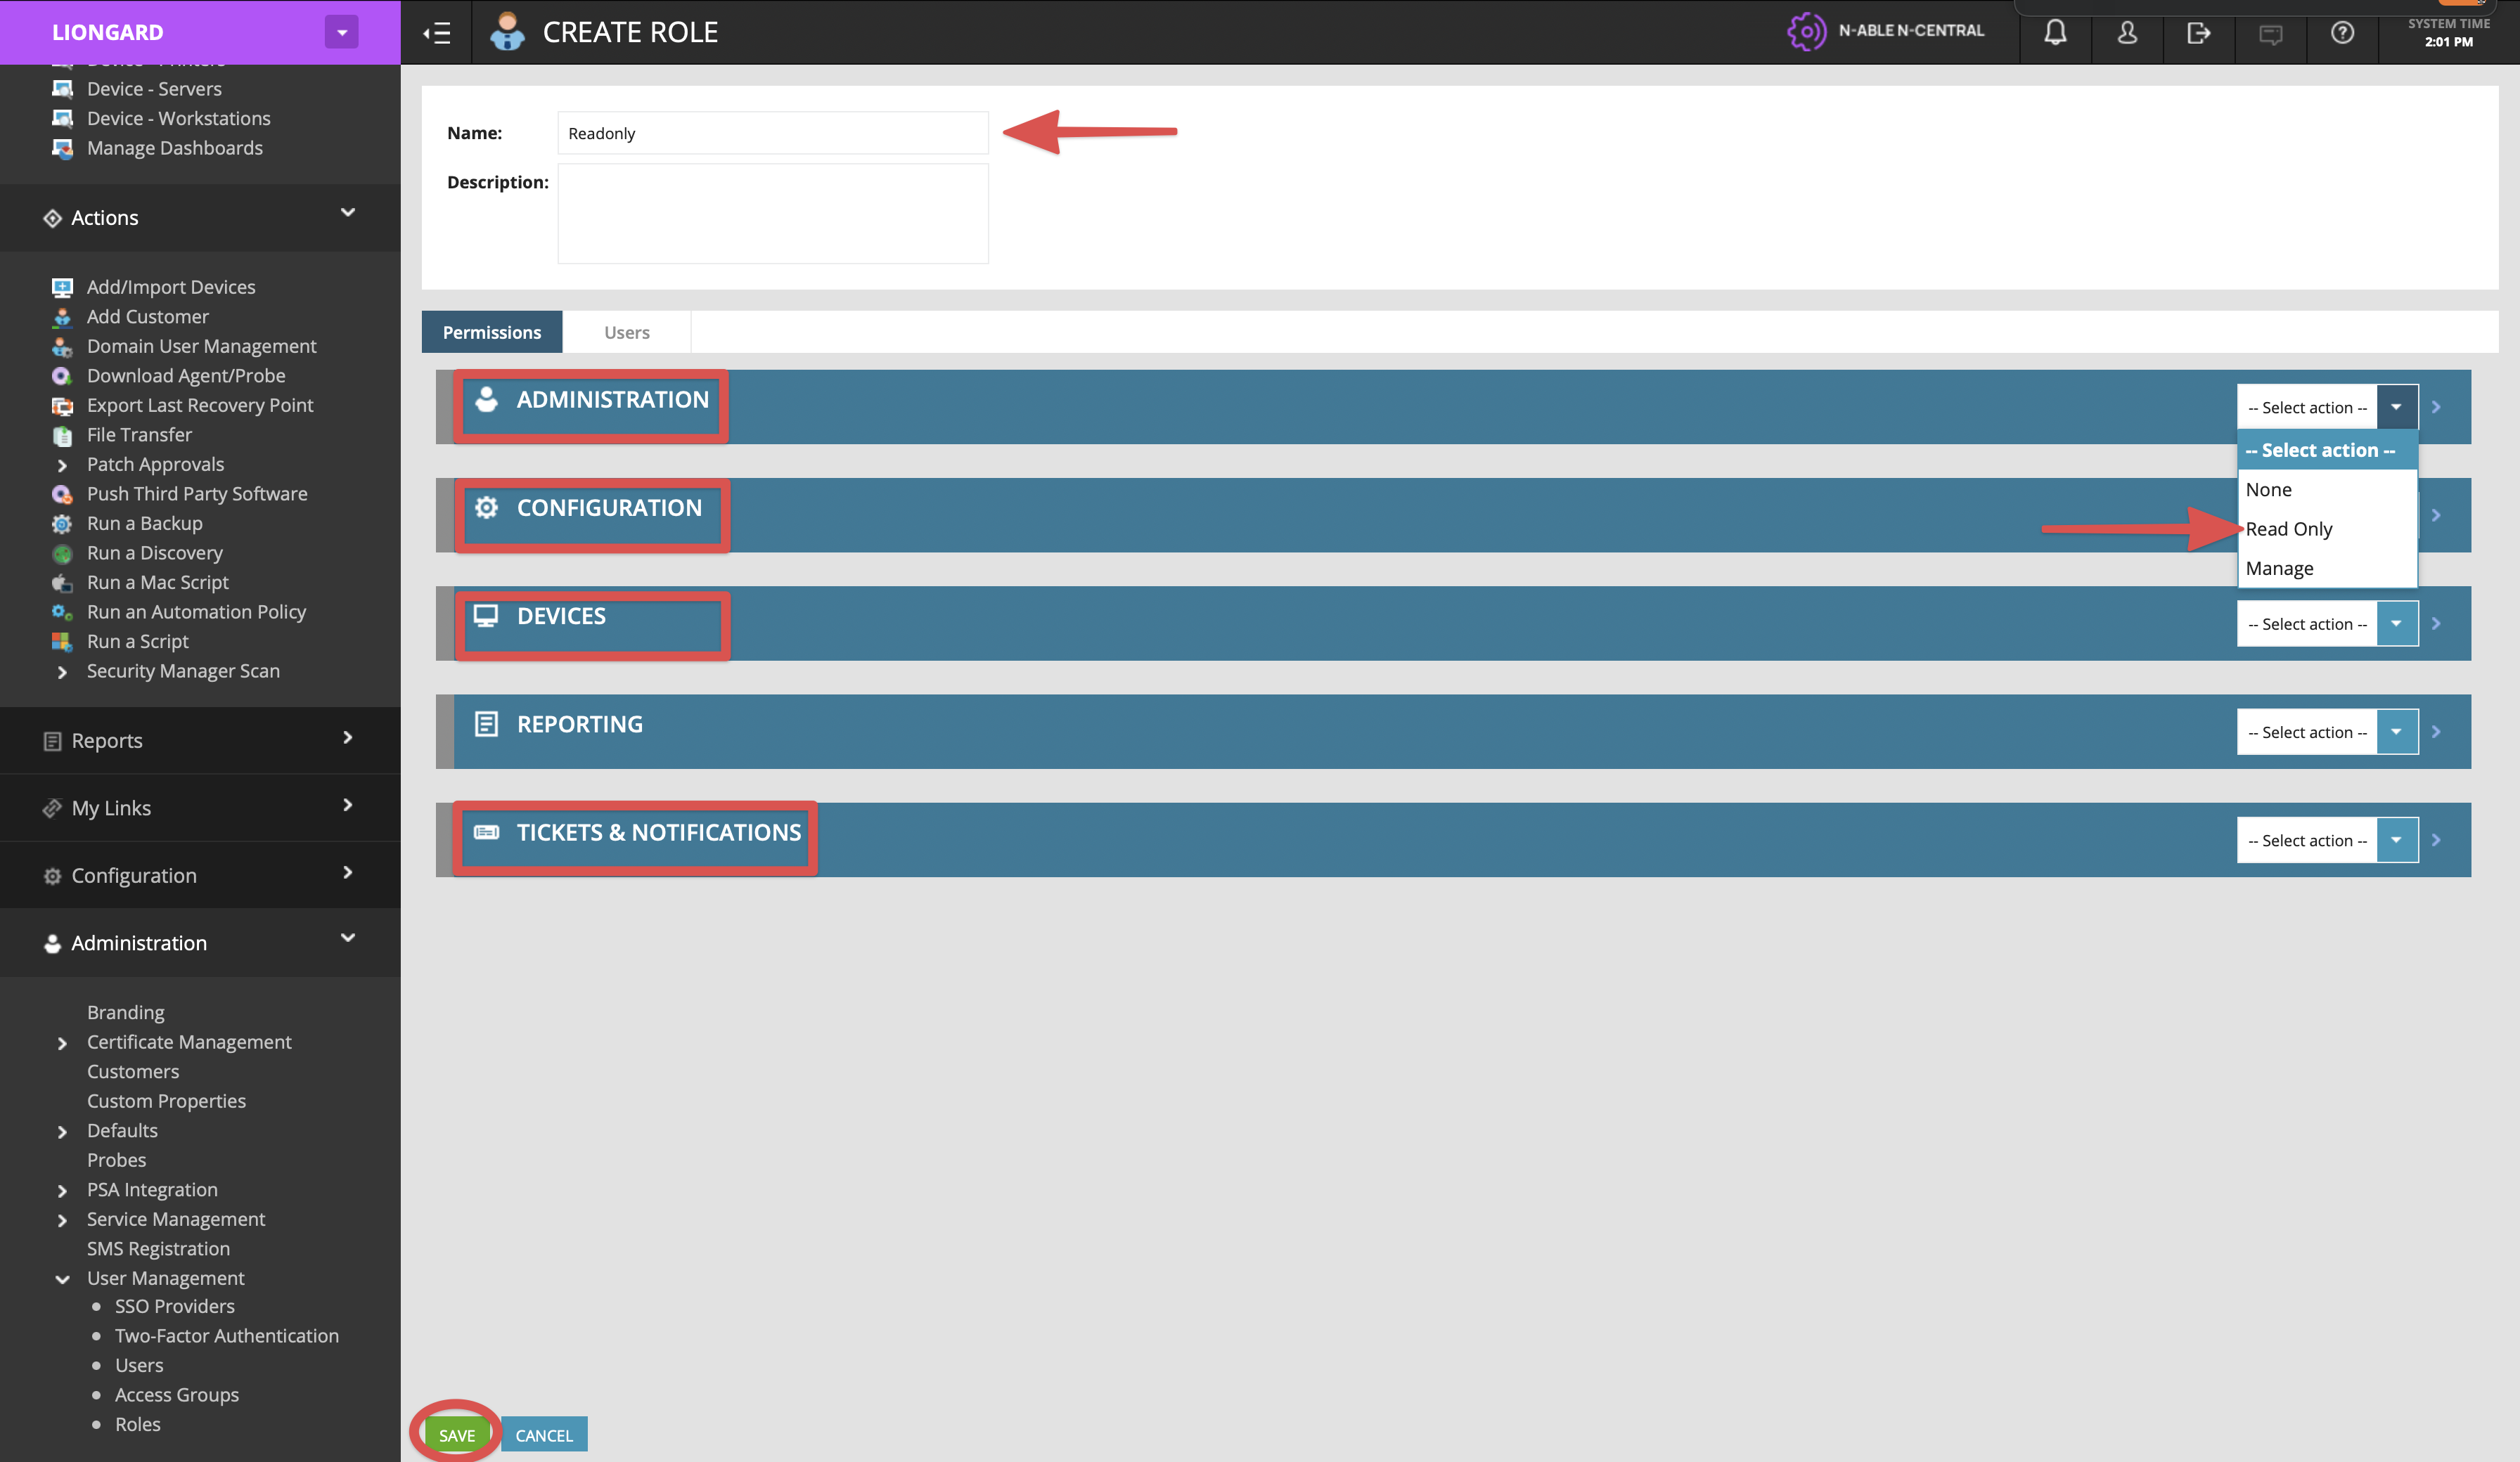
- Assign your role a name and, if desired, a description. Use the drop-down on the right-hand side to set the following permissions as "Read Only":
- Administration
- Configuration
- Devices
- Tickets & Notifications
Save your changes at the bottom.
Step 2: Create a New User
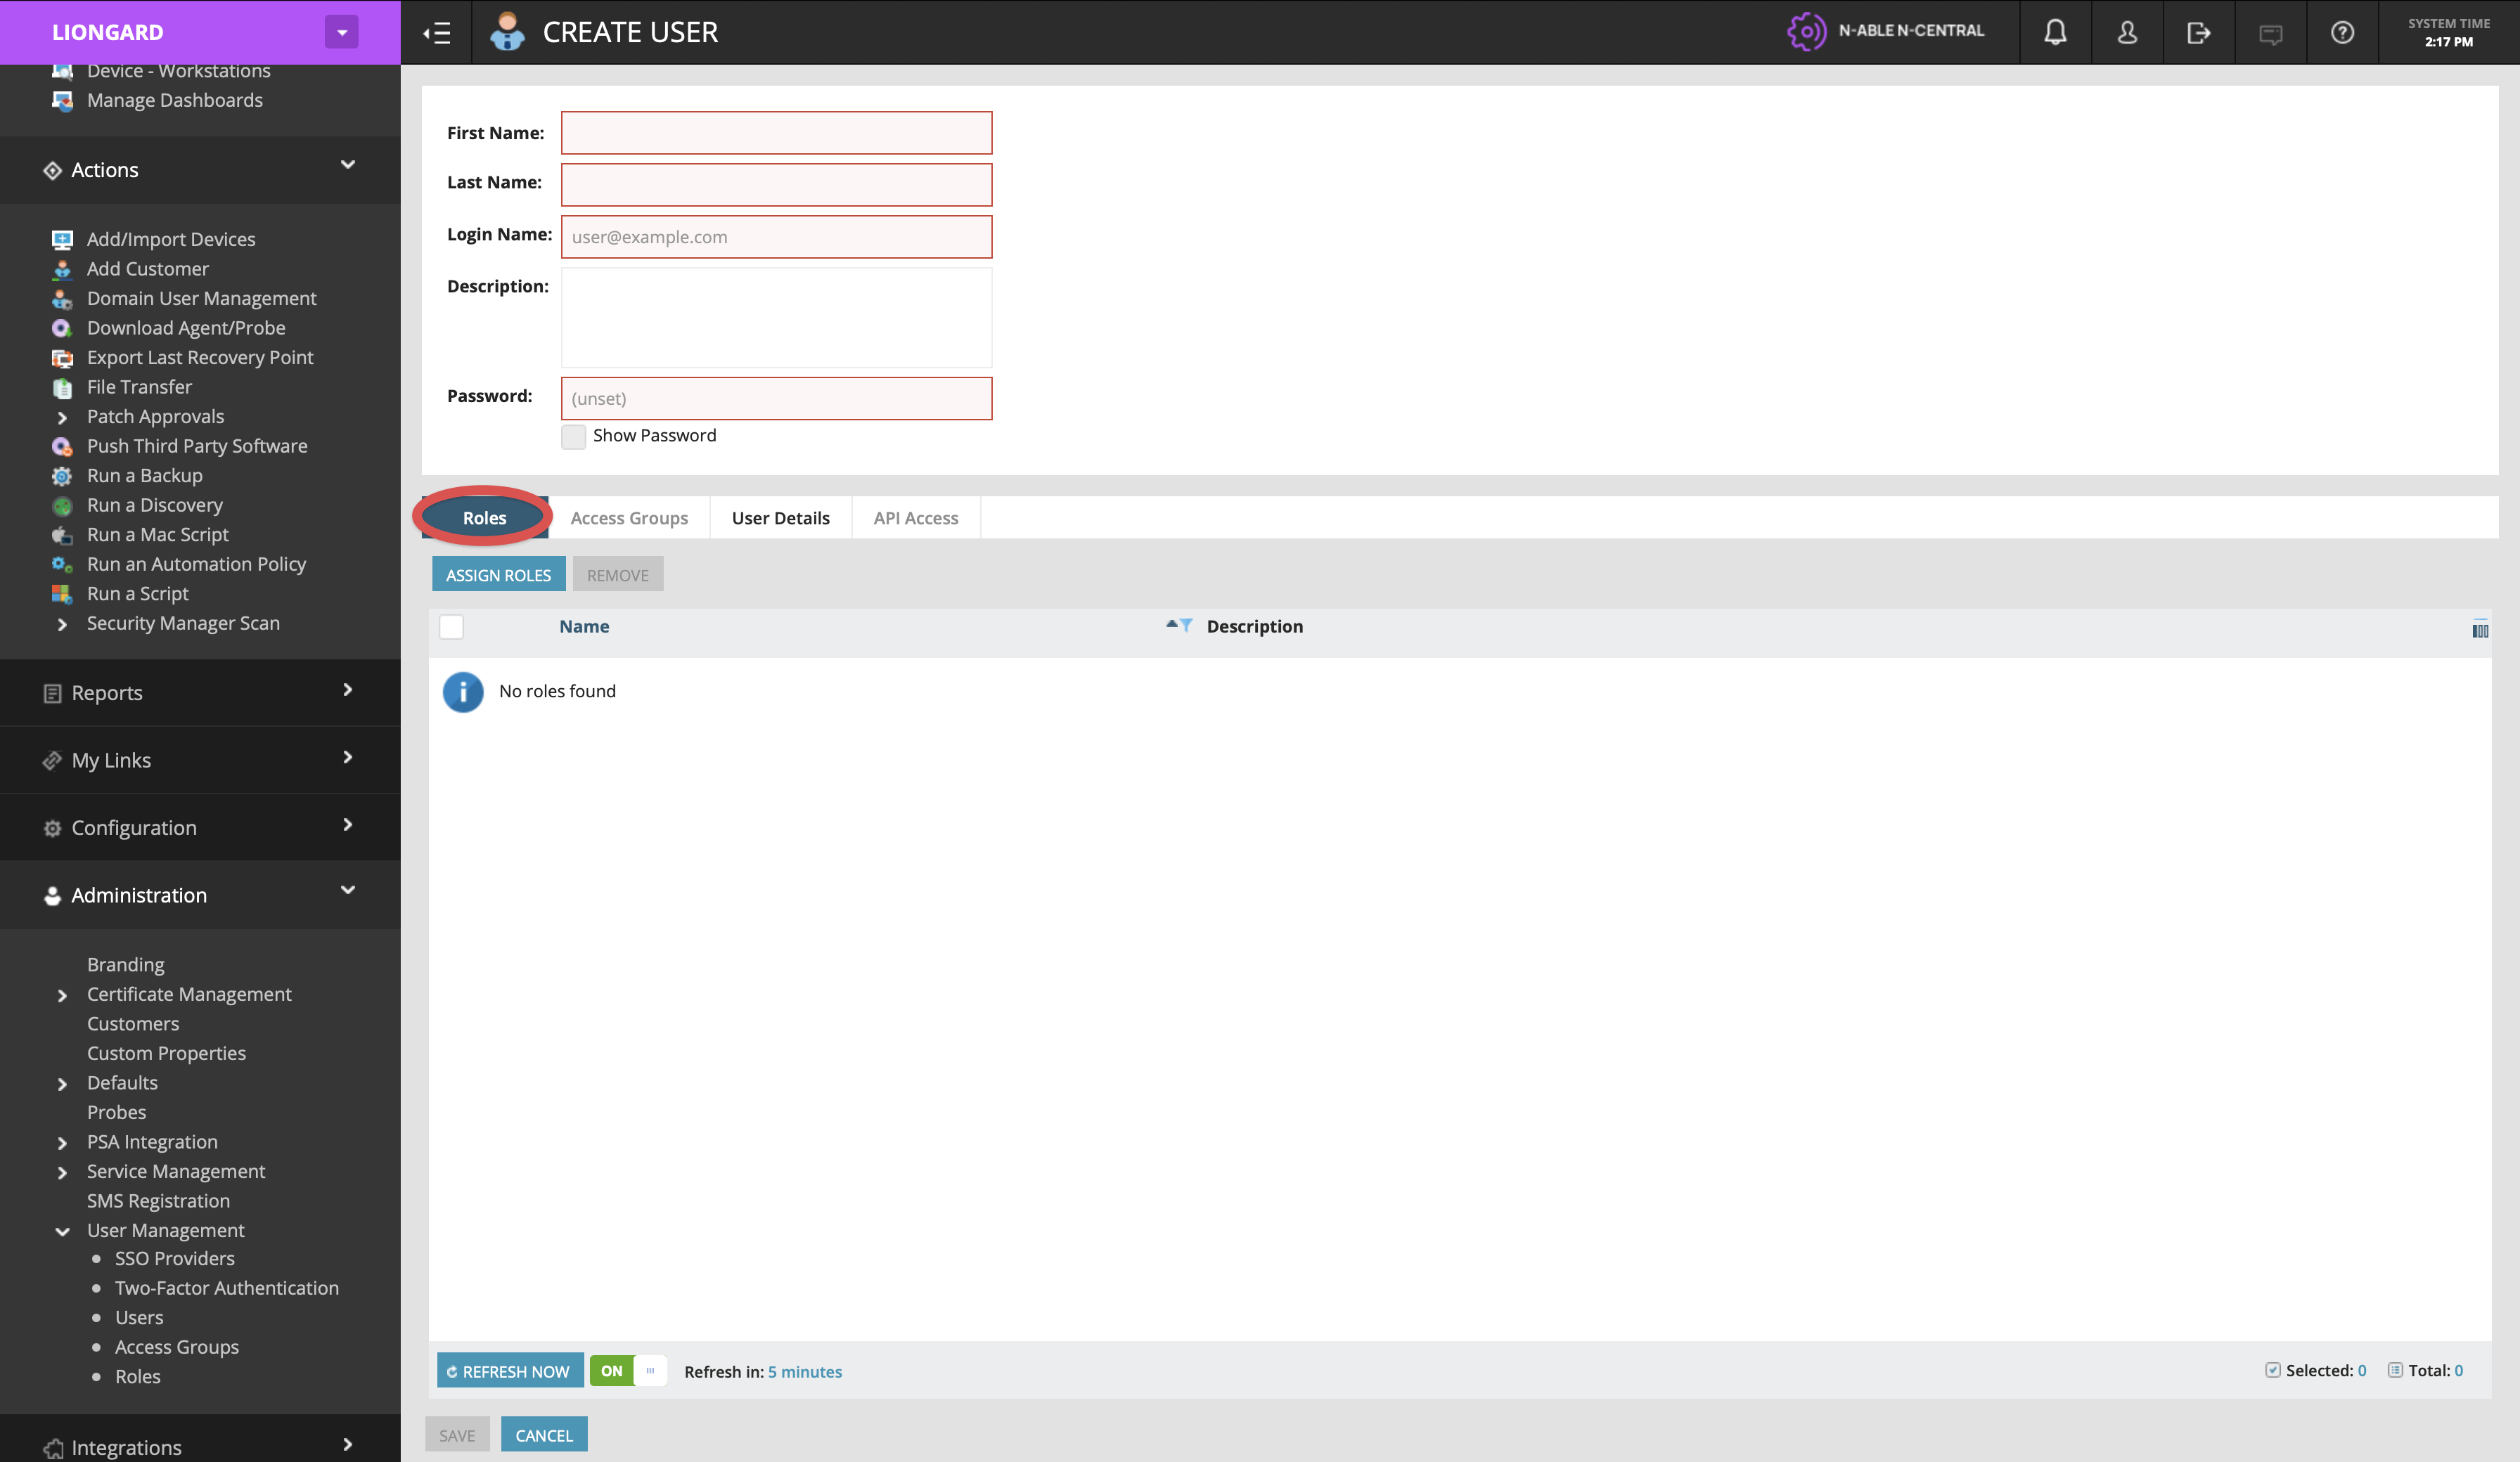
- Next, we will create or use an existing user to apply the Read-only role we created above. Navigate to Administration > User Management > Users. Select the Create User button in the top left.
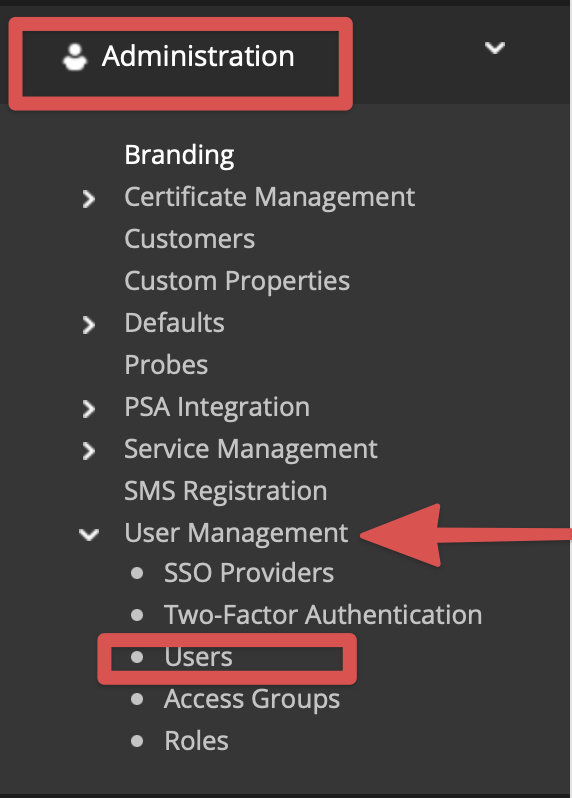
Multi Service Organizations tenantIf your instance utilizes multiple SO levels, then it is recommended that you create the user at the SO level so that it only accesses companies and sites under that SO.
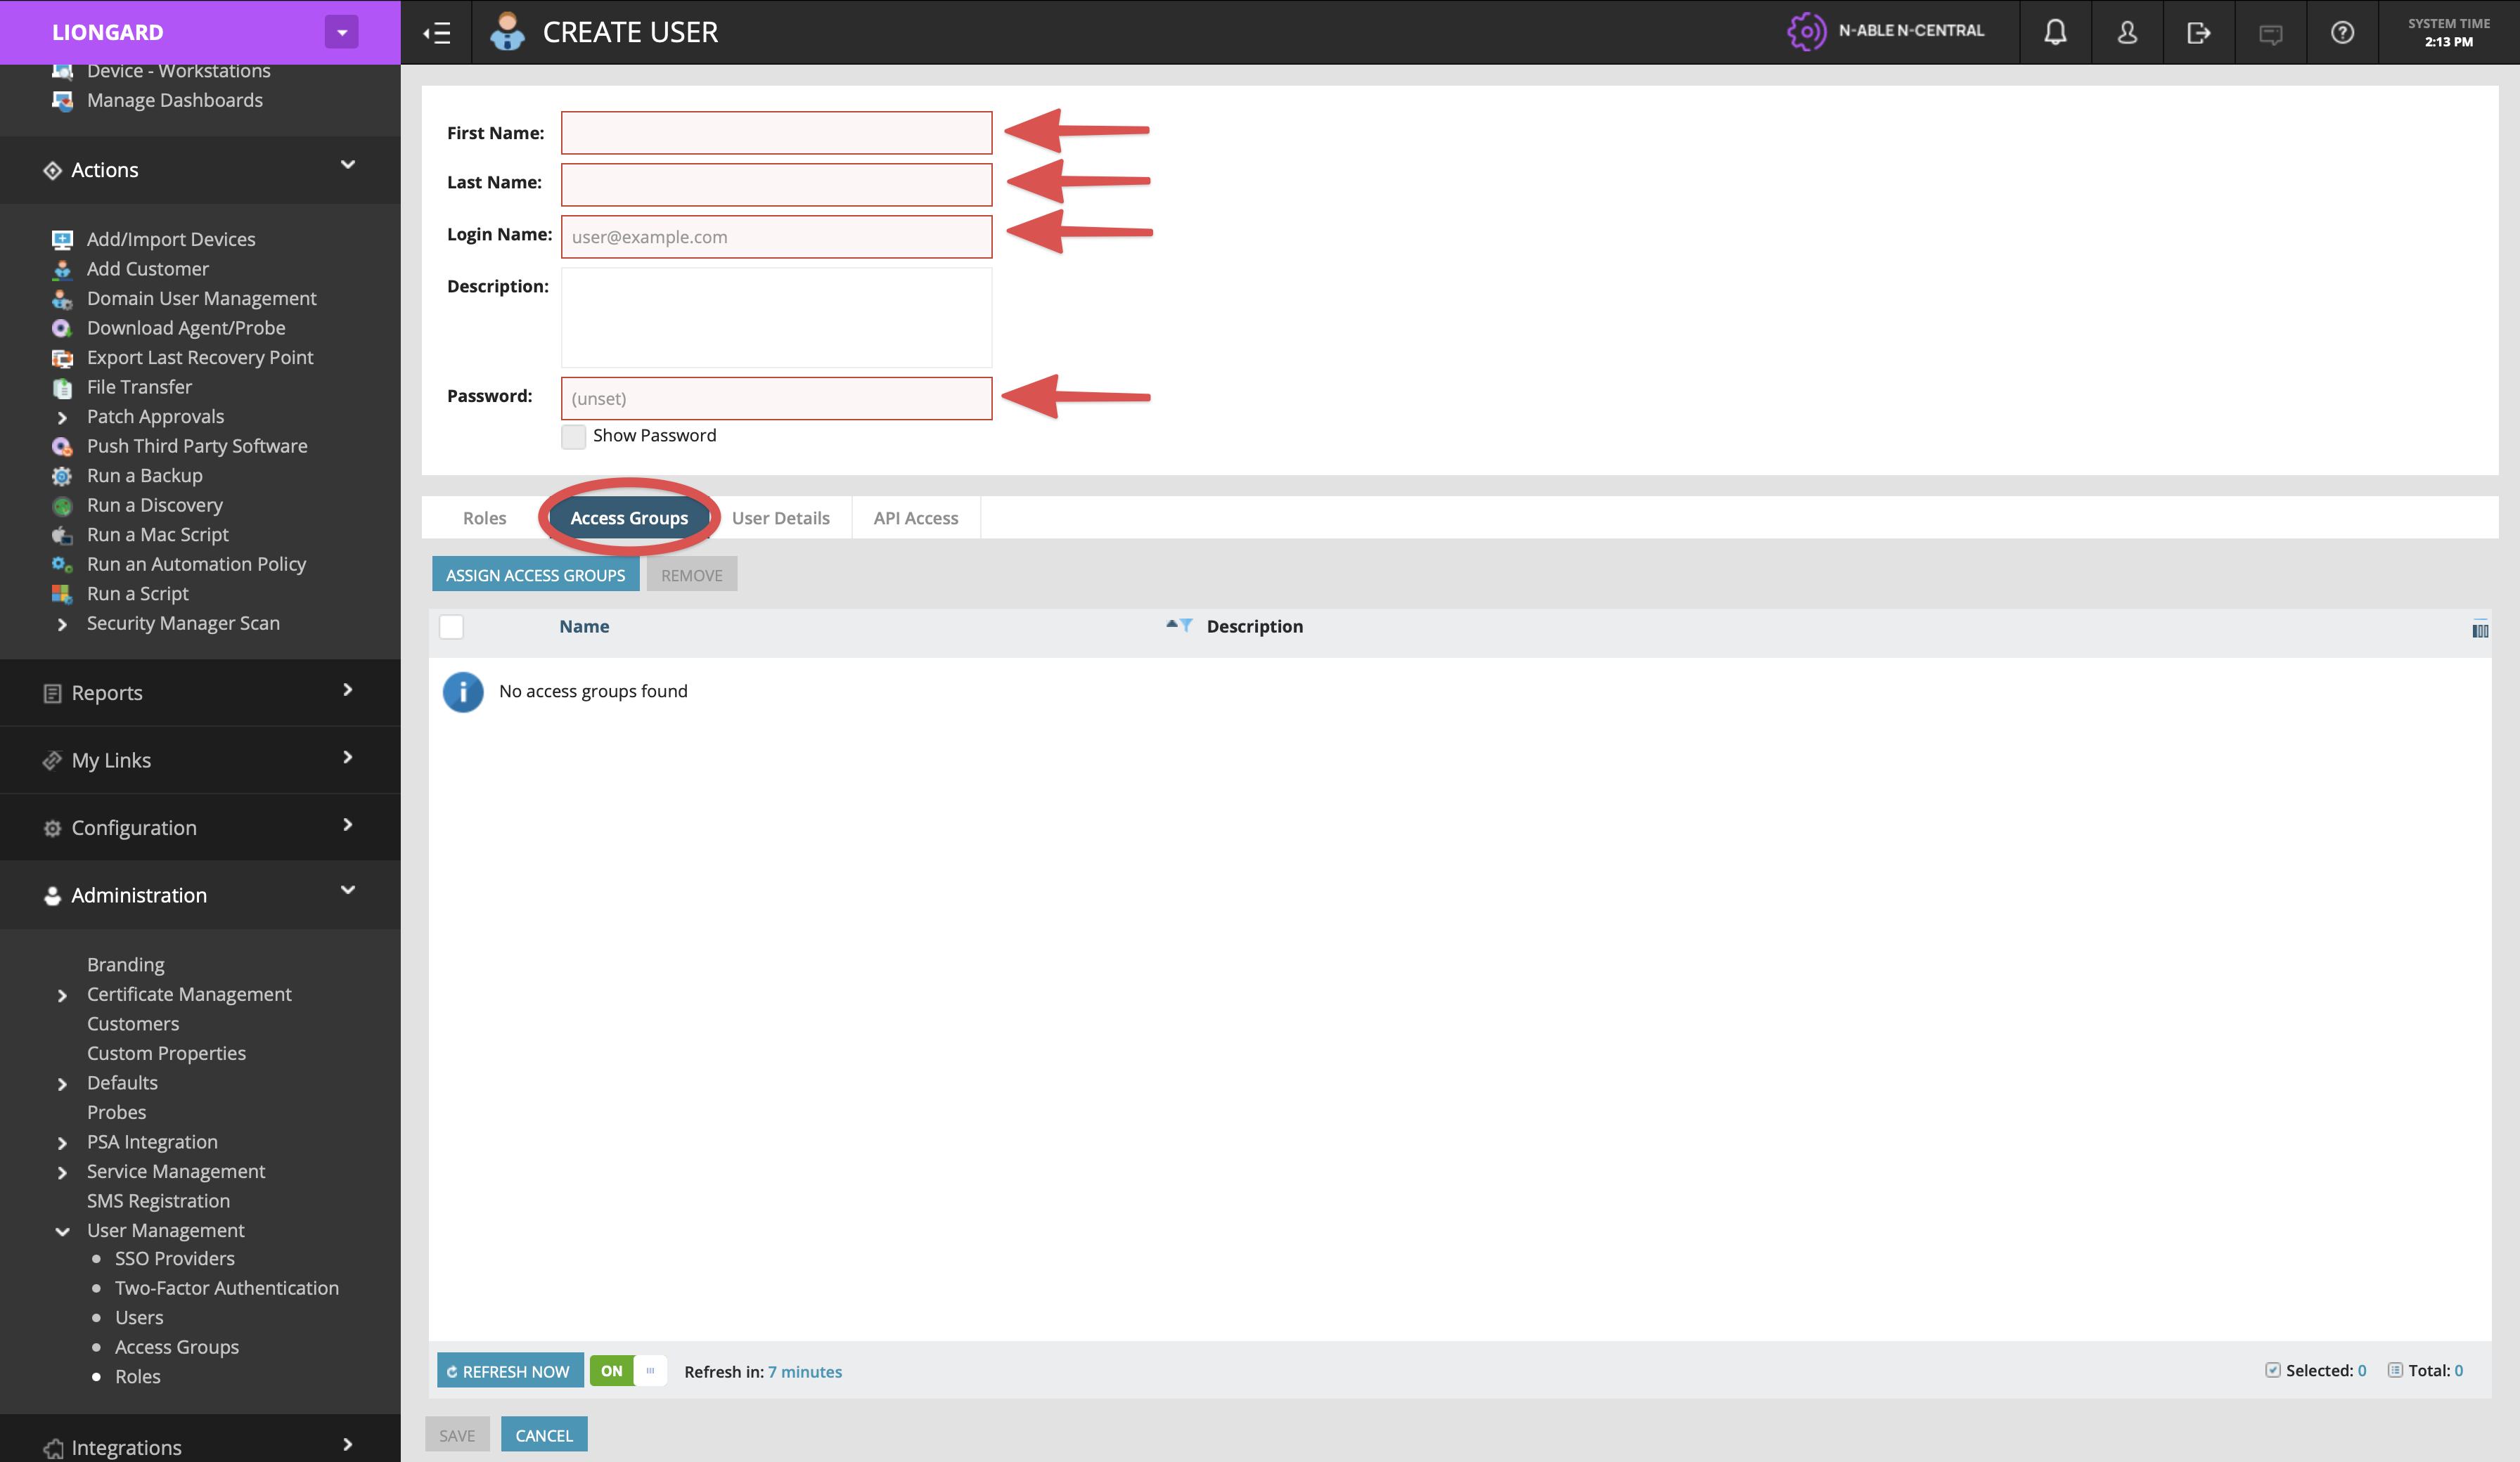
- Fill out the required fields for user creation such a First Name, Last Name, Login Name, and Password. Complete these fields then select the Access Group Tab. Here you will need to assign an Access Group to the user, we recommend the default "All".
Access GroupsThe API will only pull back information of the Companies, sites, SO, etc. in the Access group for which it is assigned, so using the default “All” group is preferred as it should adopt new companies as they are added.
- Next, select the *Roles Tab and Assign the Read-Only role we created in Step 1. Once you are done, save the user changes.
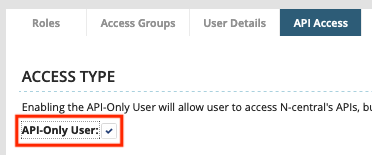
- Navigate to the API Access tab and check the box labelled API-Only User. Click Save.
Step 3: Generate JSON Web Token
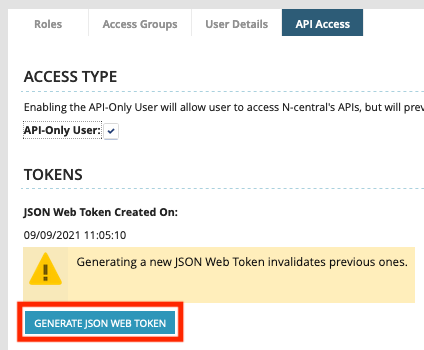
We will now proceed to generate a Token for the user instead of using Password. This provides a secure password to use with the API.
-
Edit the new user you created in the previous step and return to the API Access tab. Click the Generate JSON Web Token button.
-
Copy the token and save it in a secure location. This token will be used in the Liongard Inspector Setup process below.
Liongard Inspector Setup
Step 1: Parent Inspector Setup
Since N-able N-central is a multi-tenant system where a single portal is used to manage many Environments, you will set up a single "Parent" Inspector with your username and password/Token that will then auto-discover "Child" Inspectors for each Environment.
In Liongard, navigate to Admin > Inspectors > Inspector Types > Navigate to the N-able N-central Inspector > Select Add System.
Fill in the following information:
- Type of Inspector: Parent
- Environment: Select your MSP's Environment
- Friendly Name: Suggested Naming: SP Name] NN-able N-central Parent
- Agent: Select On-Demand Agent
- Inspector Version: Latest (Auto-Update)
- Instance URL: This is the Domain and TLD of your N-able N-central instance. For example if the instance name is "https://integration.n-able.com/IndexAction.action," then, the Instance URL is integration.n-able.com.
- Username: Username of the API User
- JSON Web Token: JSON Web Token for the API user.
- Scheduling: The Inspector will default to run once a day at the time the Inspector is set up. Here you can adjust the schedule.
Select Save. The Inspector will now be triggered to run within the minute.
Step 2: Child Inspector Setup
After the first run of the Parent Inspector, your client N-able N-central organizations will be Auto-Discovered and surfaced on the Discovered Systems page.
Navigate to the Discovered Systems tab in your Inspectors > N-able N-central page
- Activate your Discovered Systems by ensuring they're mapped to the correct Environment > Select the checkbox to the left of Inspector(s) > Select the Actions drop-down menu > Activate Launchpoints.
- Users may also Archive Discovered Systems by Selecting the checkbox to the left of the Inspector(s) > Select the Actions drop-down menu > Archive Launchpoints.
Optional: Turn on Flexible Asset/Configuration Auto-Updating
If you would like this Inspector's data to be sent to ConnectWise and/or IT Glue, turn on Flexible Assets/Configurations for this Inspector:
- ConnectWise: Admin > Integrations > ConnectWise > Configuration Types > Confirm the "Configuration Auto-Updating" toggle is enabled
- IT Glue: Admin > Integrations > IT Glue > Flexible Assets > Confirm the "Flexible Asset Auto-Updating" toggle is enabled
Updated 5 months ago
