Visual Insights Pro's Excel Integration
Excel Connector Setup
This guide walks through the setup process for the Excelconnector in Visual Insights. The steps below describe the initial authorization, connection, and data sync experience partners will see when configuring these connectors for the first time.
The Excel connector uses Microsoft OneDrive and/or SharePoint to access Excel files associated with the connected Microsoft account.
Prerequisites
- A Microsoft account with access to OneDrive or SharePoint
- Excel files stored in OneDrive or SharePoint
What the Connector Does
- Retrieves up to the 500 most recent Excel files from OneDrive and/or SharePoint.
- Allows users to select files and sync them into Visual Insights for reporting.
Setup Steps
-
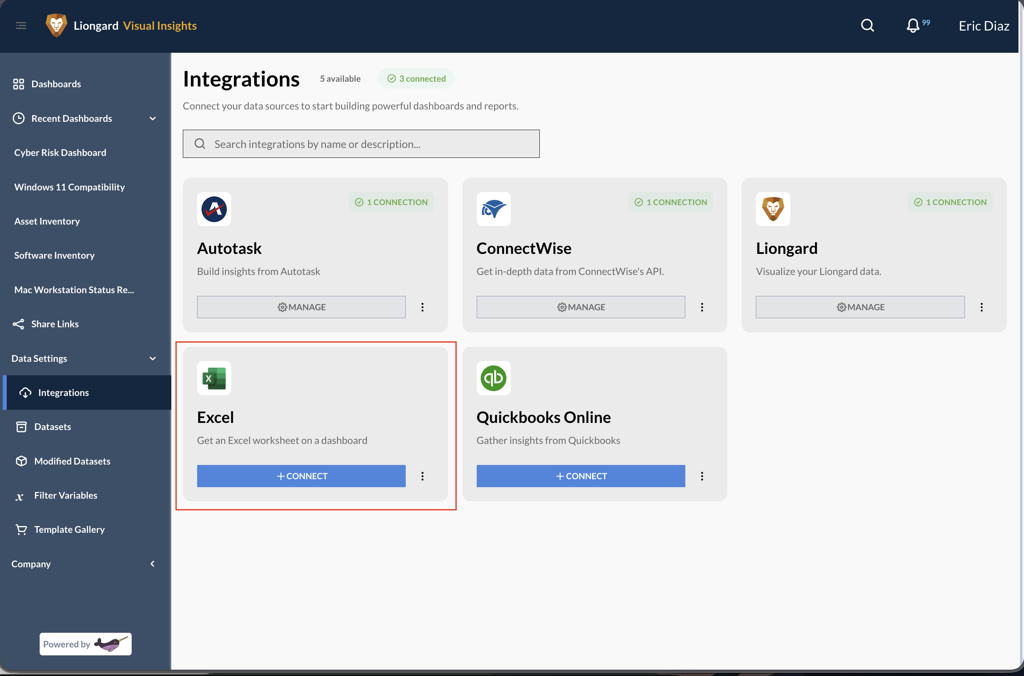
Navigate to the Excel Connector
-
In Visual Insights, locate the Excel connector in the connector list.
-
Click Connect to begin setup.
-
-
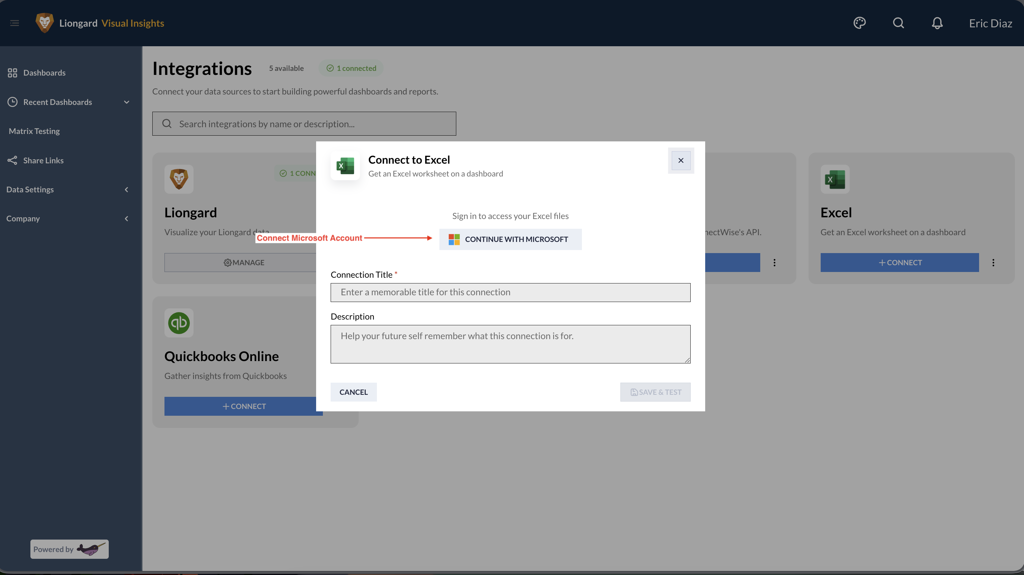
Sign in to Microsoft
-
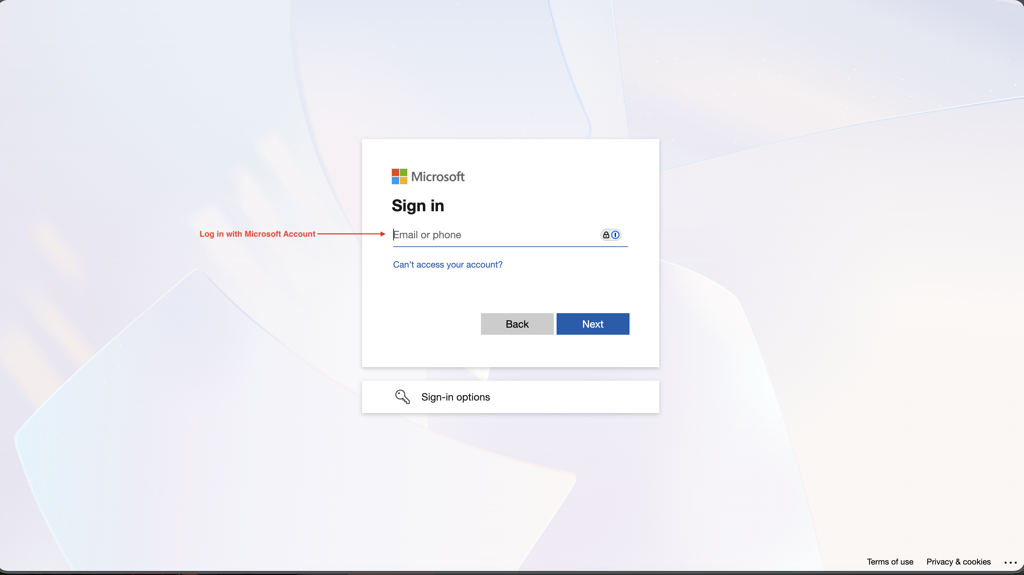
Click the sign-in button to authenticate with Microsoft.
-
Complete the Microsoft sign-in process, including multi-factor authentication (MFA) if prompted.
-
-
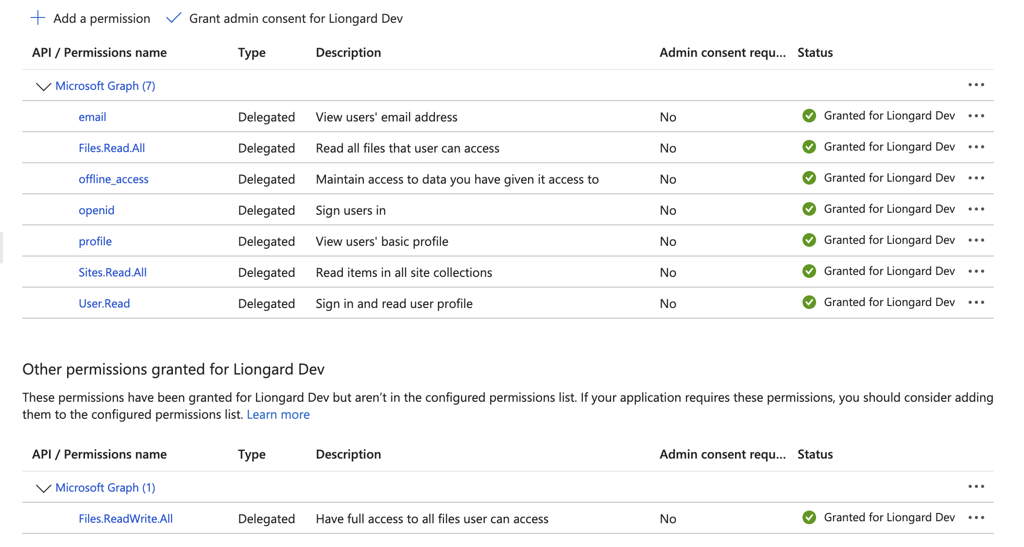
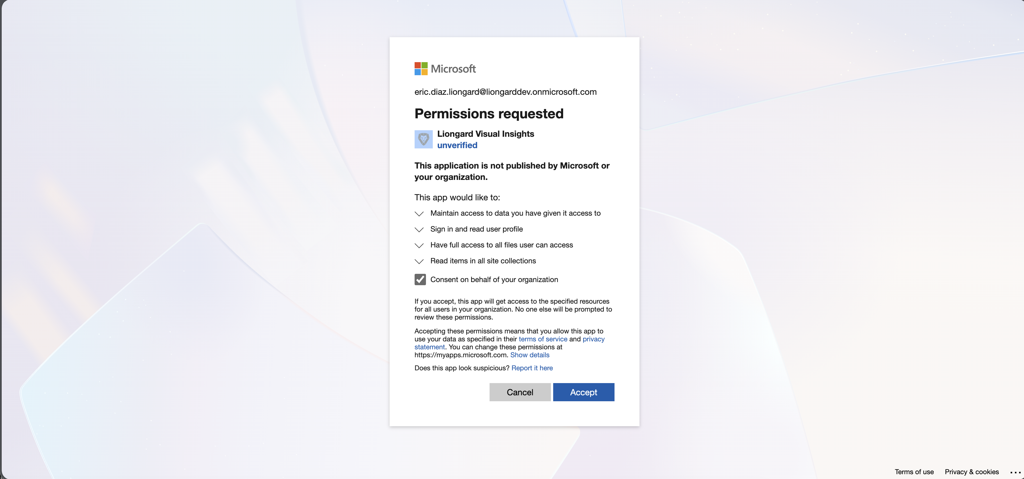
Authorize Application Permissions
-
Review the permissions required for Visual Insights to access Excel files.
-
Permissions the app uses:
-
-
Approve the authorization request to continue.
-
-
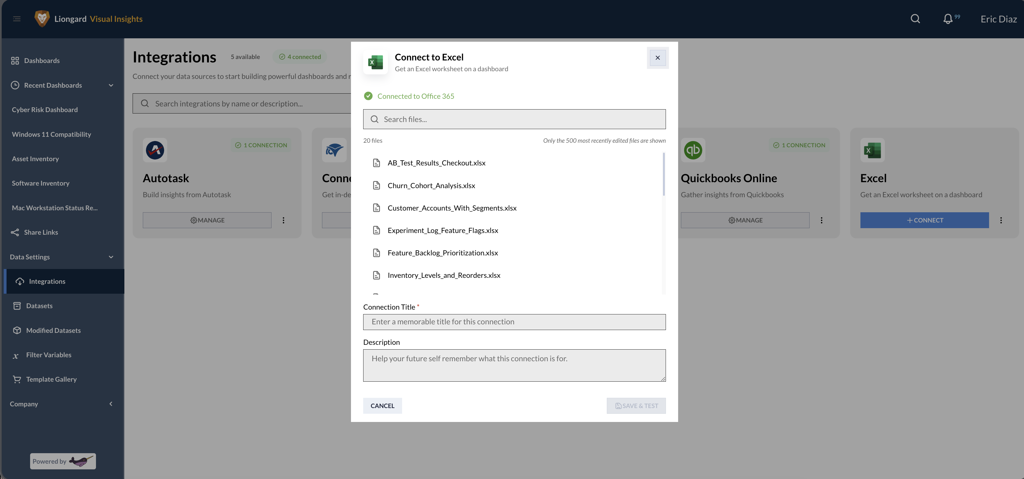
Complete the Connection
- Once authorization is complete, the connector establishes a connection to Office 365.
- Visual Insights automatically retrieves the available Excel files.
-
Configure the Dataset
-
Select the desired Excel file from the list.
-
Enter a title for the dataset.
-
Click Save and Test.
-
A brief re-authorization step may occur.
-
-
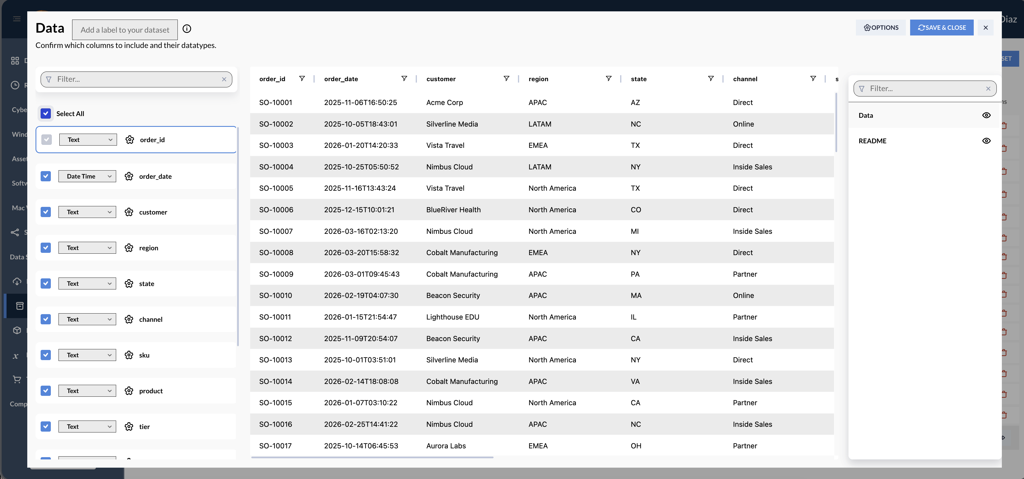
Sync and Review Data
-
After setup, sync the dataset.
-
View the imported Excel data directly within Visual Insights.
-