Install and Configure the Power BI Connector
The Liongard Power BI connector must first be installed on a computer that already has Power BI Desktop installed.
Follow the steps below:
- Configure the Power BI Desktop app for the Data Connector
- Install the Data Connector
- Generate Credentials
- Connect to Liongard from Power BI
Configuring the Power BI Desktop AppIt is necessary to configure the Power BI Desktop app to allow unsigned custom connectors. See steps below.
Liongard is in the process of getting our Power BI data connector signed and certified by Microsoft.
Liongard Connector VersionThe current Power BI connector version is 1.6. Previous versions will continue to function but are not backward compatible. We highly encourage Partners to be on the latest version to take advantage of newer capabilities.
Step 1: Configure the Power BI Desktop app for the Data Connector
- Open the Power BI Desktop app
- Enable the Custom Data Connectors feature in Power BI Desktop:
- Navigate to File > Options and settings > Options > Security > Data Extensions > Select "Allow any extension to load without validation or warning."
- Note: Depending on your version of Power BI, this feature may also be enabled by navigating to File > Options and settings > Enable the checkbox for "Custom data connectors."
- Press OK and restart the Power BI Desktop app
Step 2: Install the Liongard Data Connector
- Download the Liongard Power BI Data Connector to your local machine and place it in C:\Users\yourname\Documents\Power BI Desktop\Custom Connectors
- Confirm the Custom Connectors Folder exists.
- If the Power BI Desktop Custom Connector folder does not exist, please create the proper folders to complete the path ThisPC\Documents\Power BI Desktop\Custom Connectors and place the Connector within the folder. If Power BI is open during this, you may need to restart it so it will recognize the connector
Step 3: Generate Credentials
The Power BI Data Connector will require you to have a Liongard Access Key and Secret upon setup. You must create an Access Key and Secret by navigating, in your Liongard instance to Your Name > Account Settings > Access Tokens > Generate a New Liongard API Token.
Windows Systems
- Once you have your Liongard Access Key and Secret, download and open the Base64 Encoding PowerShell script.
- Note: Depending on system security and permission, you may have to open PowerShell as an administrator. http://resources.static.liongard.com/powerbi/Base64Encoding.ps1
-
In the script, remove the comments from Line 1 and Line 2 and put in your Access Key and Access Secret, respectively.
-
Run the Script. This will provide you with a Base64 encoded key. Be sure to save this key using security best practices.
Alternatively, you can just copy and paste this code into PowerShell, ensuring you add your Access Key and Access Secret respectively.
$key = #your key here in quotes
$Sec = #your secret here in quotes
$Text = $key + ":" + $Sec
$Bytes = [System.Text.Encoding]::UTF8.GetBytes($Text)
$EncodedText =[Convert]::ToBase64String($Bytes)
$EncodedText
Mac or Linux-based Systems
- Once you have your Liongard Access Key and Secret, open a terminal window and Base64 encode them as a single string with a colon between them using this command:
echo -n 'accessKeyId:accessKeySecret' | base64
You may prefer to use a website, such as https://www.base64encode.org, to do the encoding.
- Copy and paste the result to a temporary location. You'll need this later when configuring the Power BI Data Connector.
Step 4: Connect to Liongard from Power BI
- In Power BI Desktop, click Get Data in the Home ribbon.
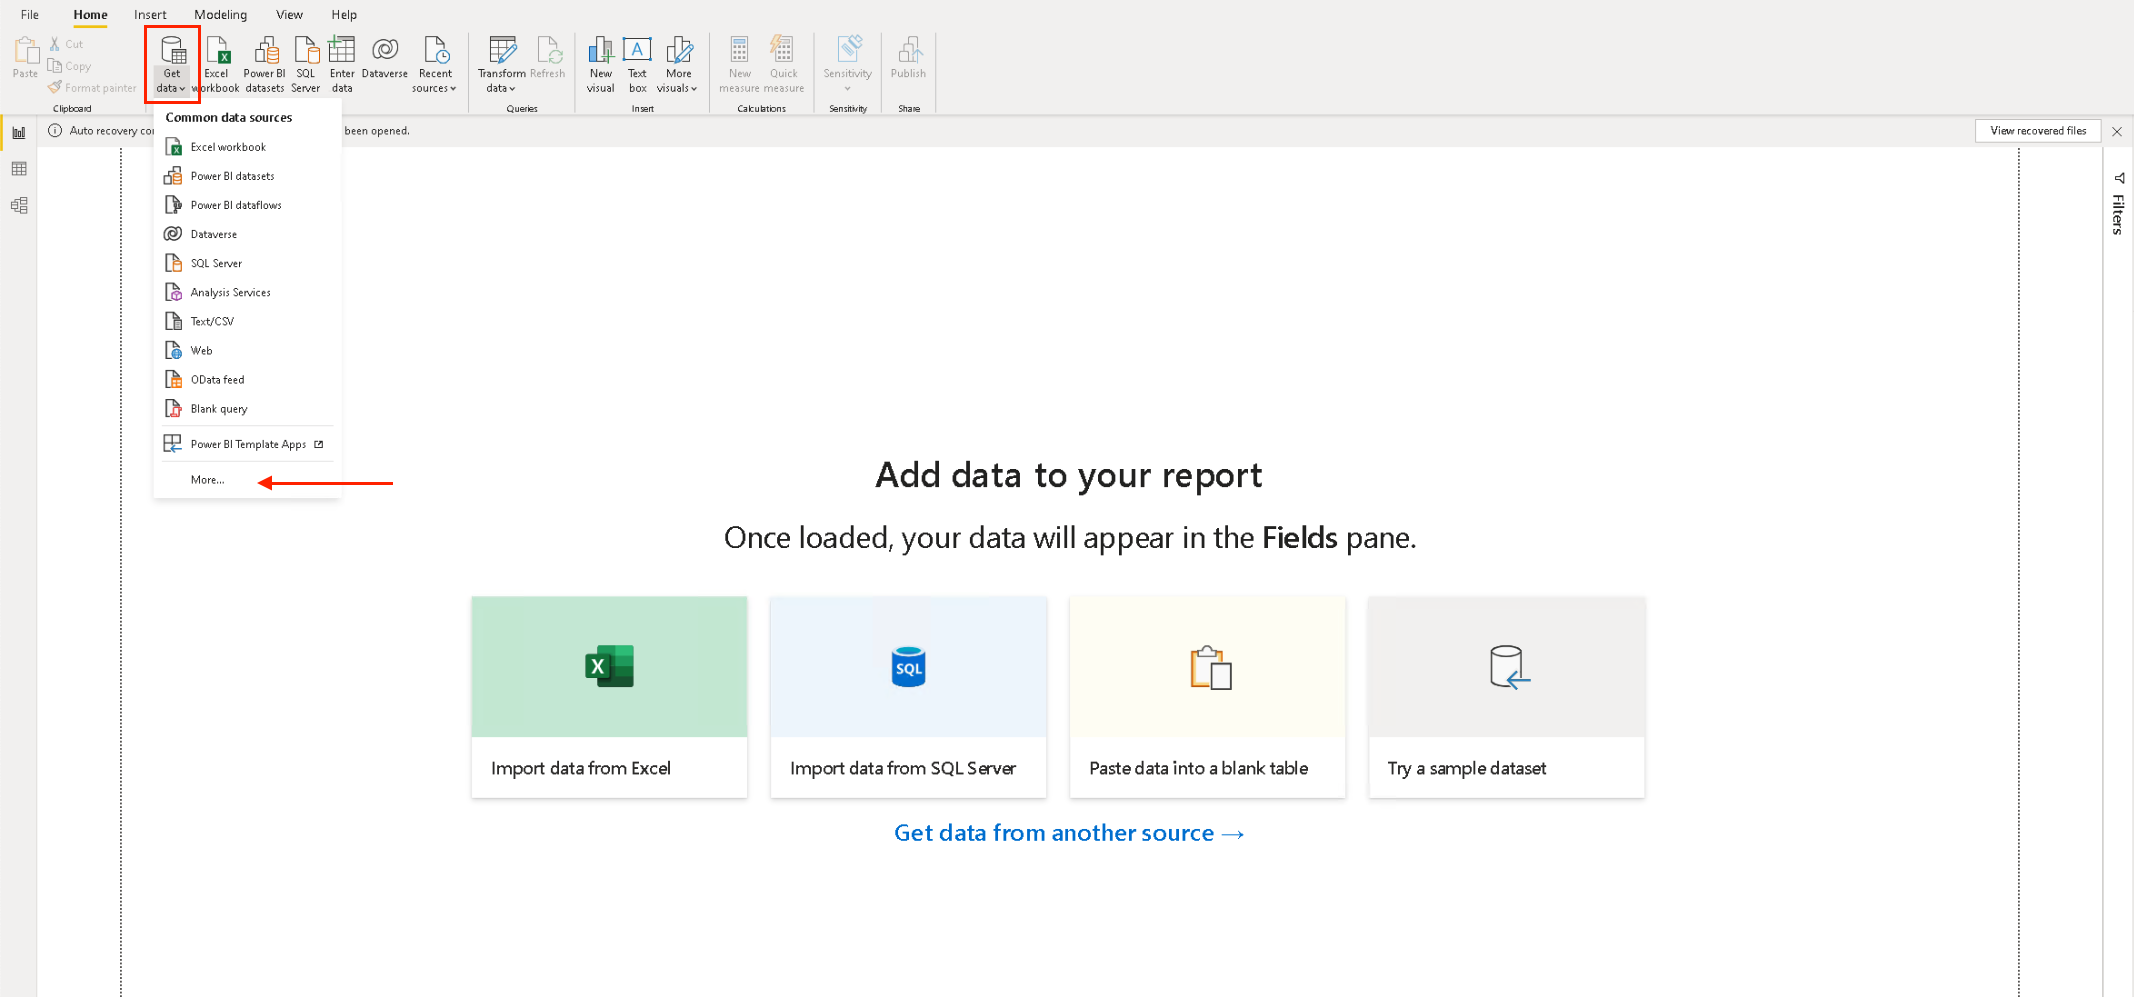
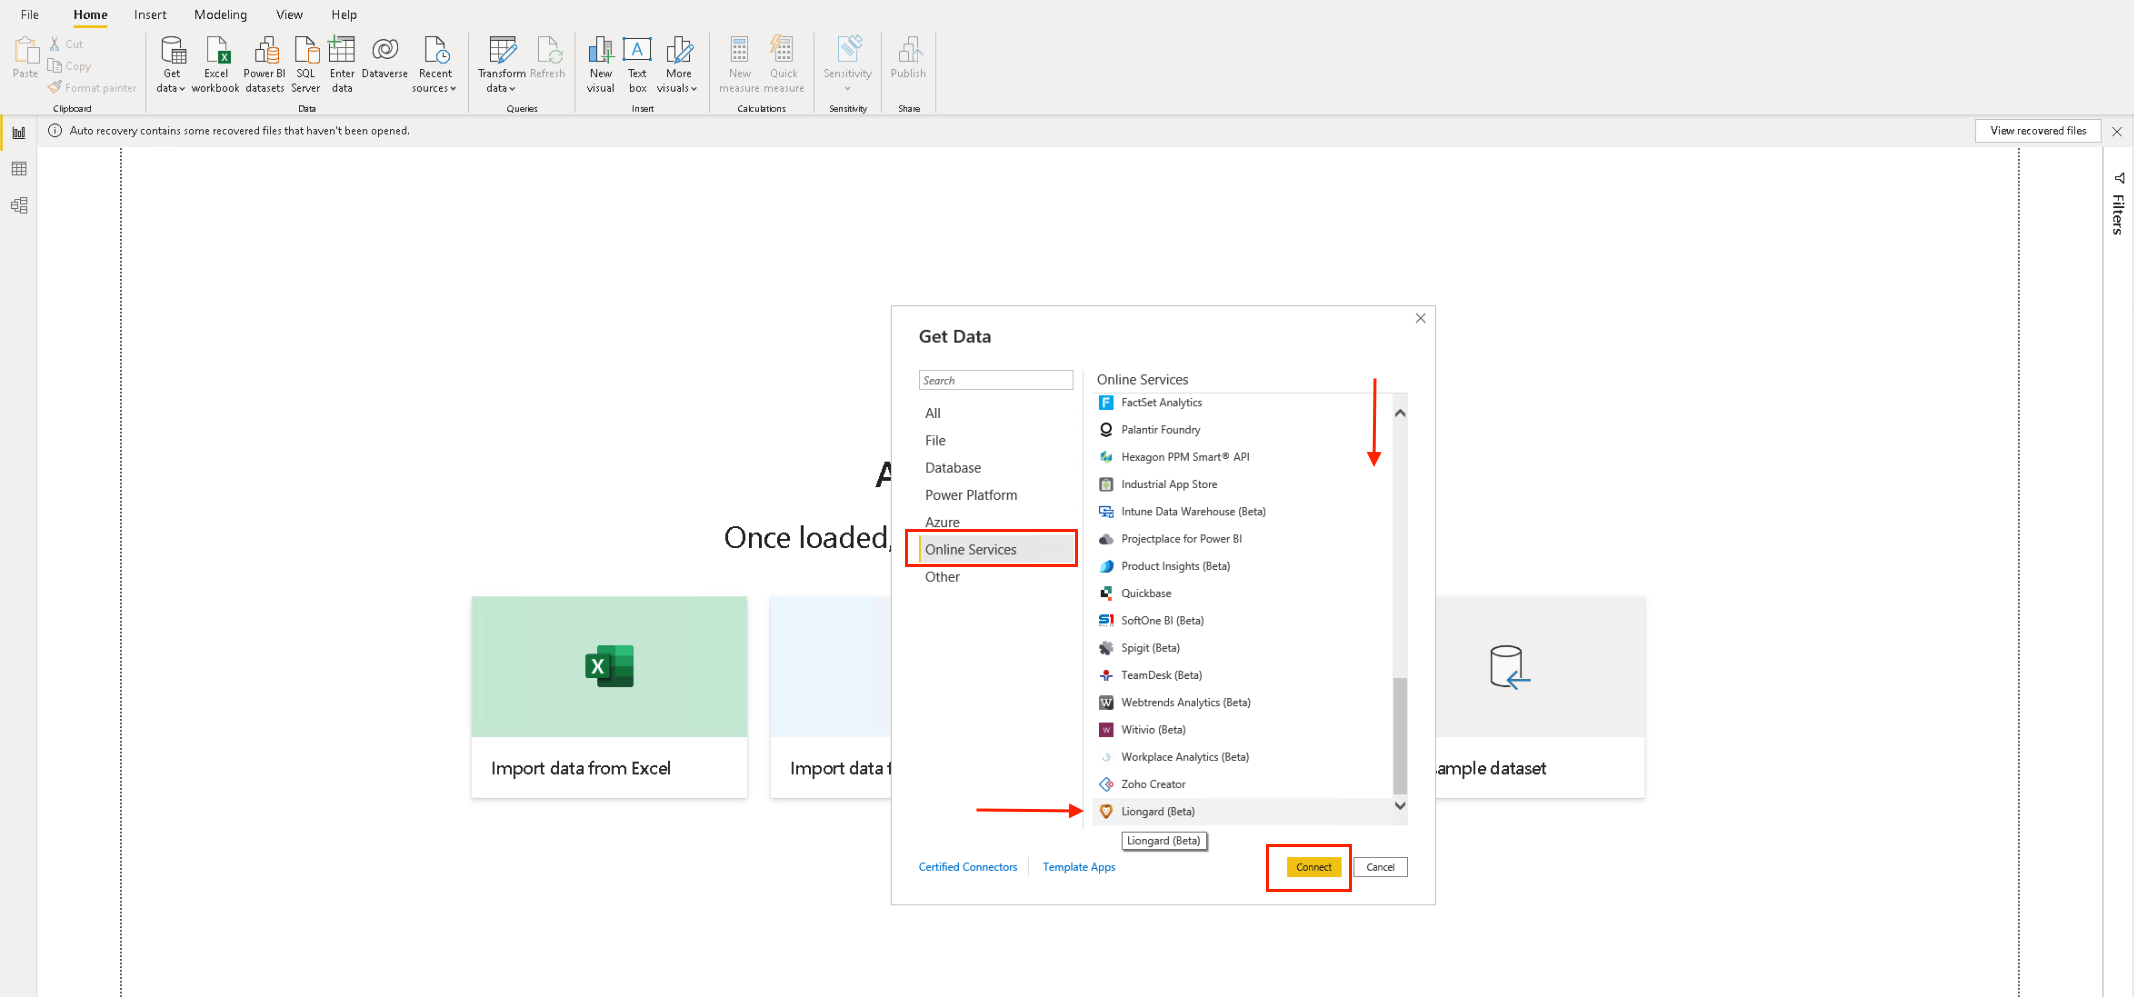
- Search for Liongard in the list of data connectors. It will be listed under "Online Services."
- Select Liongard and click Connect.
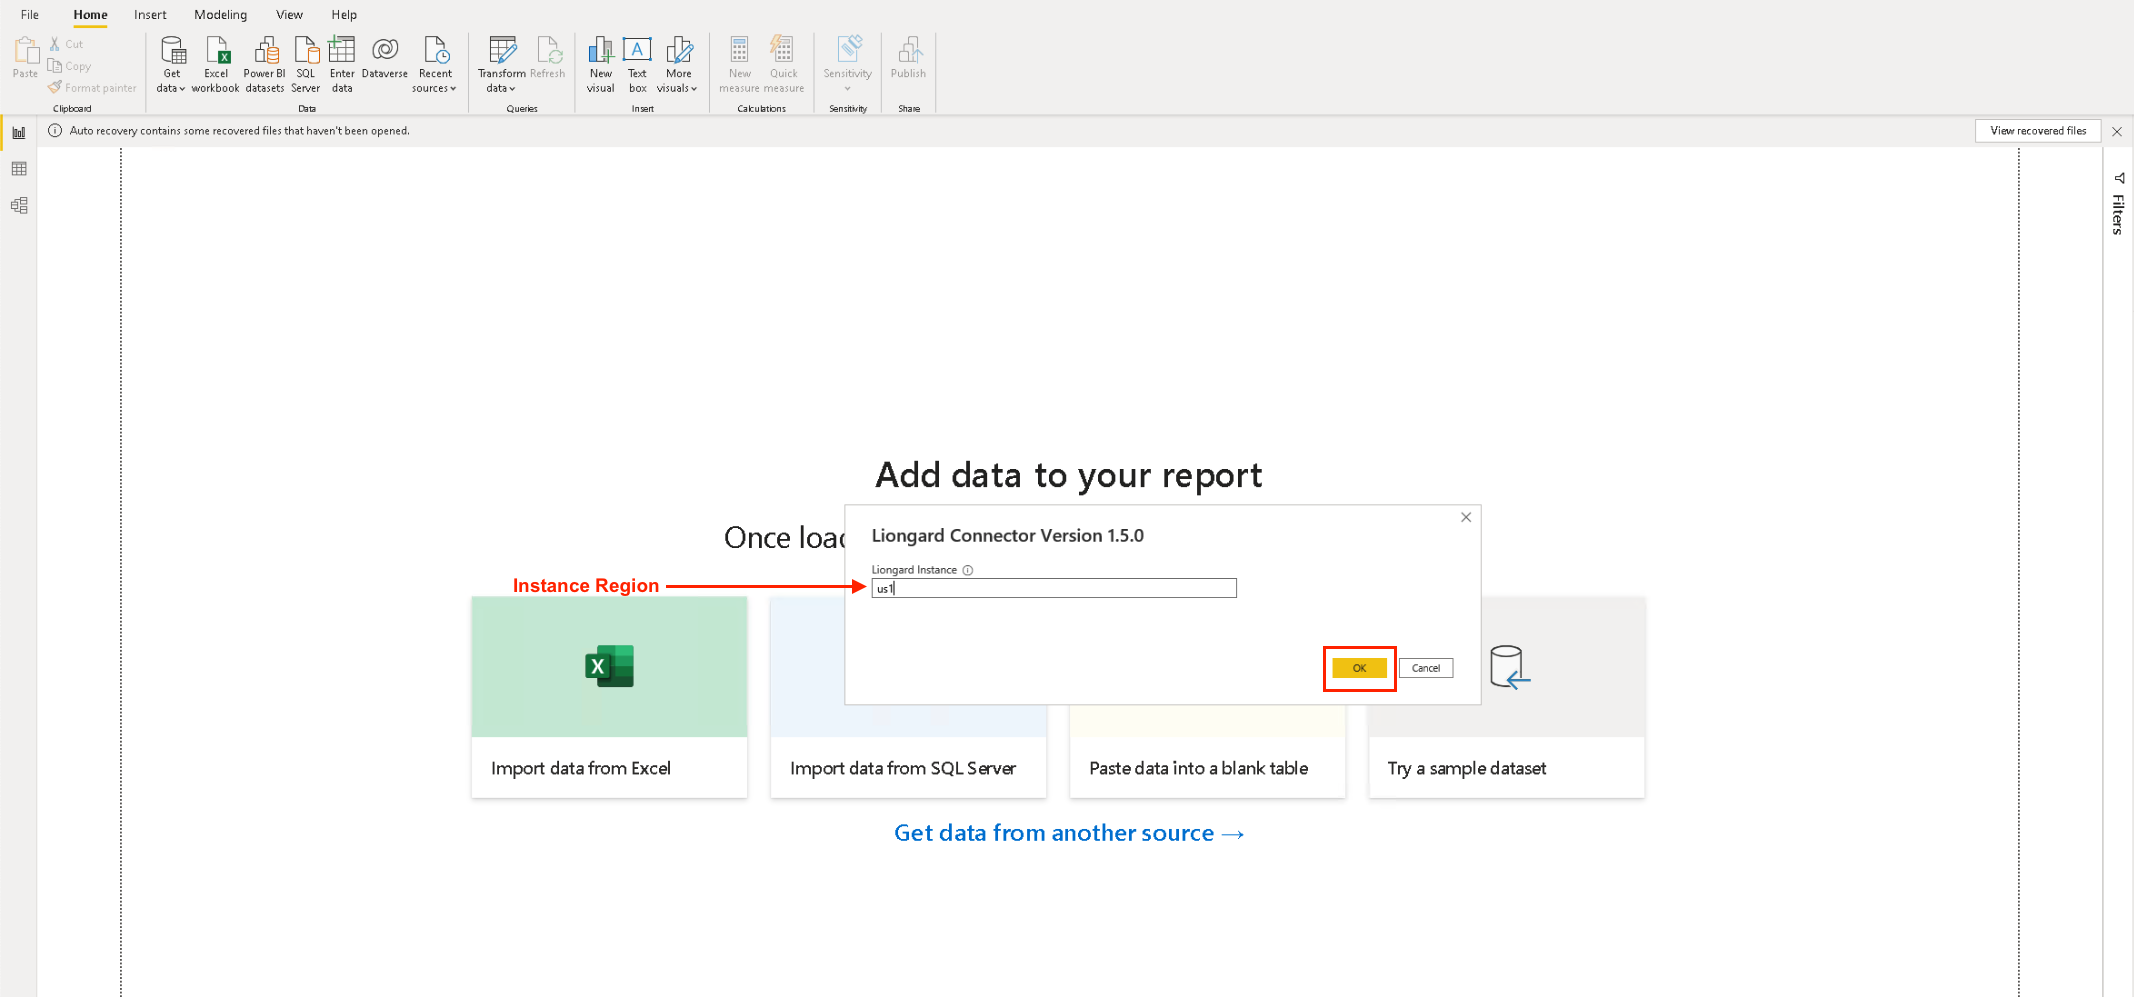
- The data Connector will ask you for your Liongard Instance Name, which can be found in the URL where you log in to Liongard.
For example, if you log in to us1.app.liongard.com then your instance name will be us1.
- Select OK when you are finished.
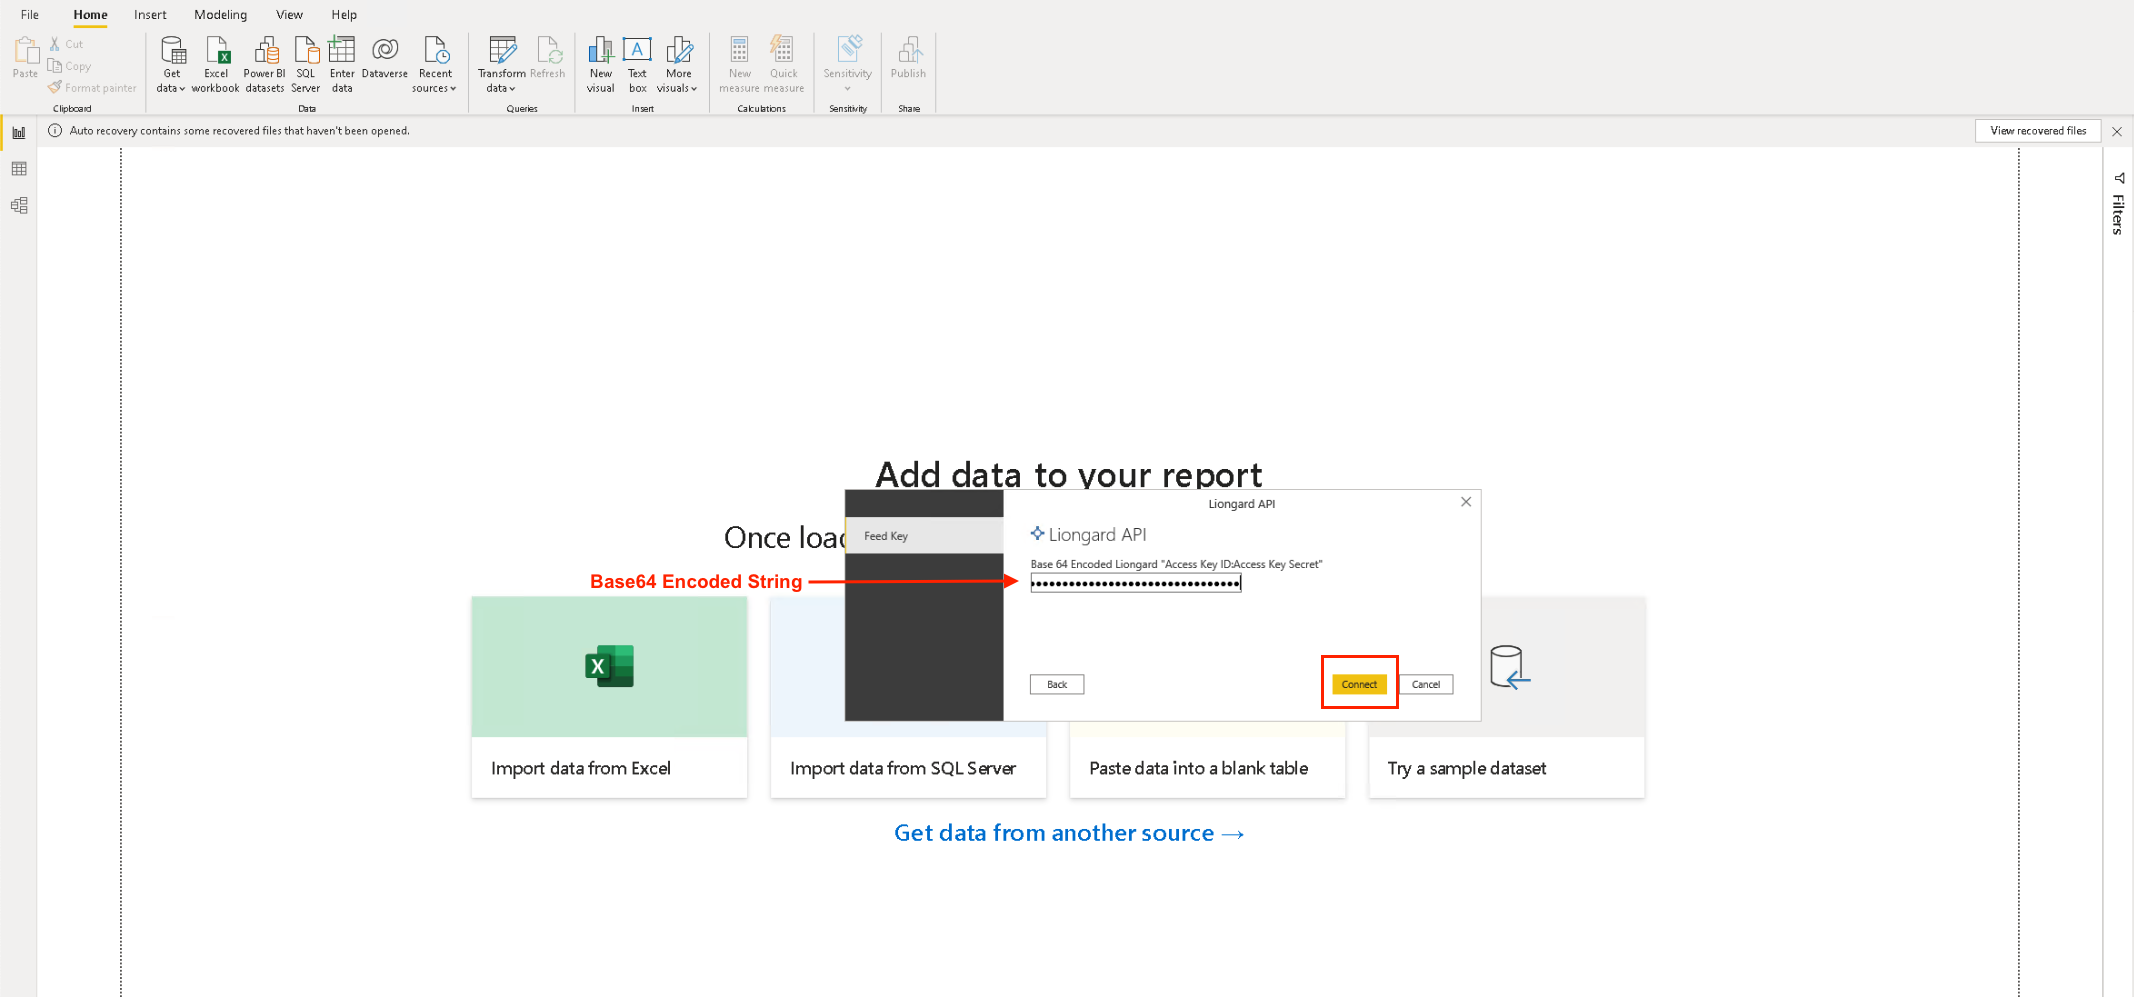
- Enter in your Base 64 encoded API Key and Secret string, then select Connect.
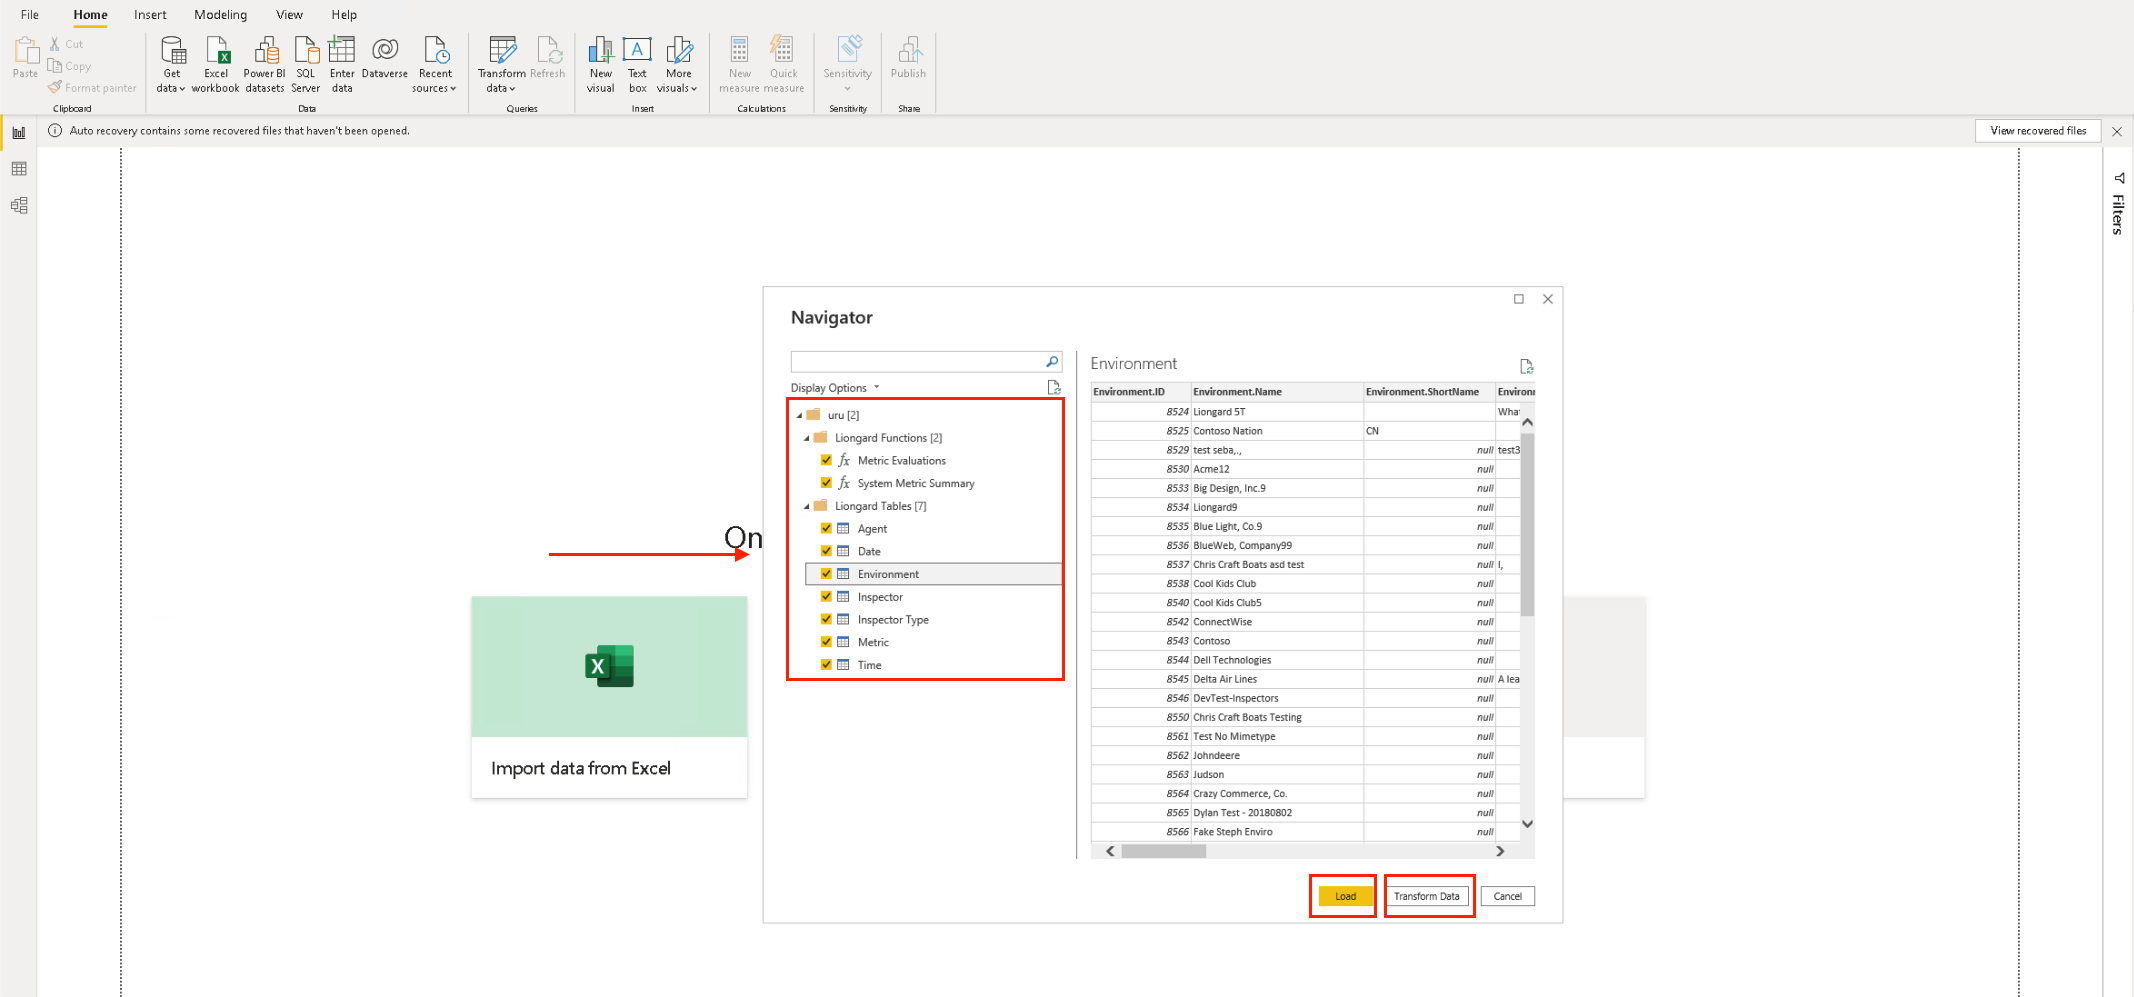
- From here, you can select which tables you would like to load into your Query Editor as well as import available functions for generating tables of Metric data. Select Load if you would like to go straight to building visualizations or Transform Data if you want to pull in more data.
Next Steps
Updated 4 months ago
