Visual Insights' ConnectWise Integration
The Visual Insights and ConnectWise Integration offers a seamless way to connect your ConnectWise data, empowering you to create dynamic, data-driven dashboards. This guide explains how to set up the integration, explore the available datasets, and leverage the key features that make it a valuable asset for enhancing your business operations.
Getting Started: Setting Up the Connector
Getting started with the ConnectWise integration is easy, just create API keys in your ConnectWise instance to enable the connection.
-
Log into ConnectWise Manage and navigate to System > Security Roles and click the "+" sign to add a new role.

-
Name the security role something easy to identify, such as “LG Visual Insights Data” and click Save.
-
This will take you to the Security Modules page.

-
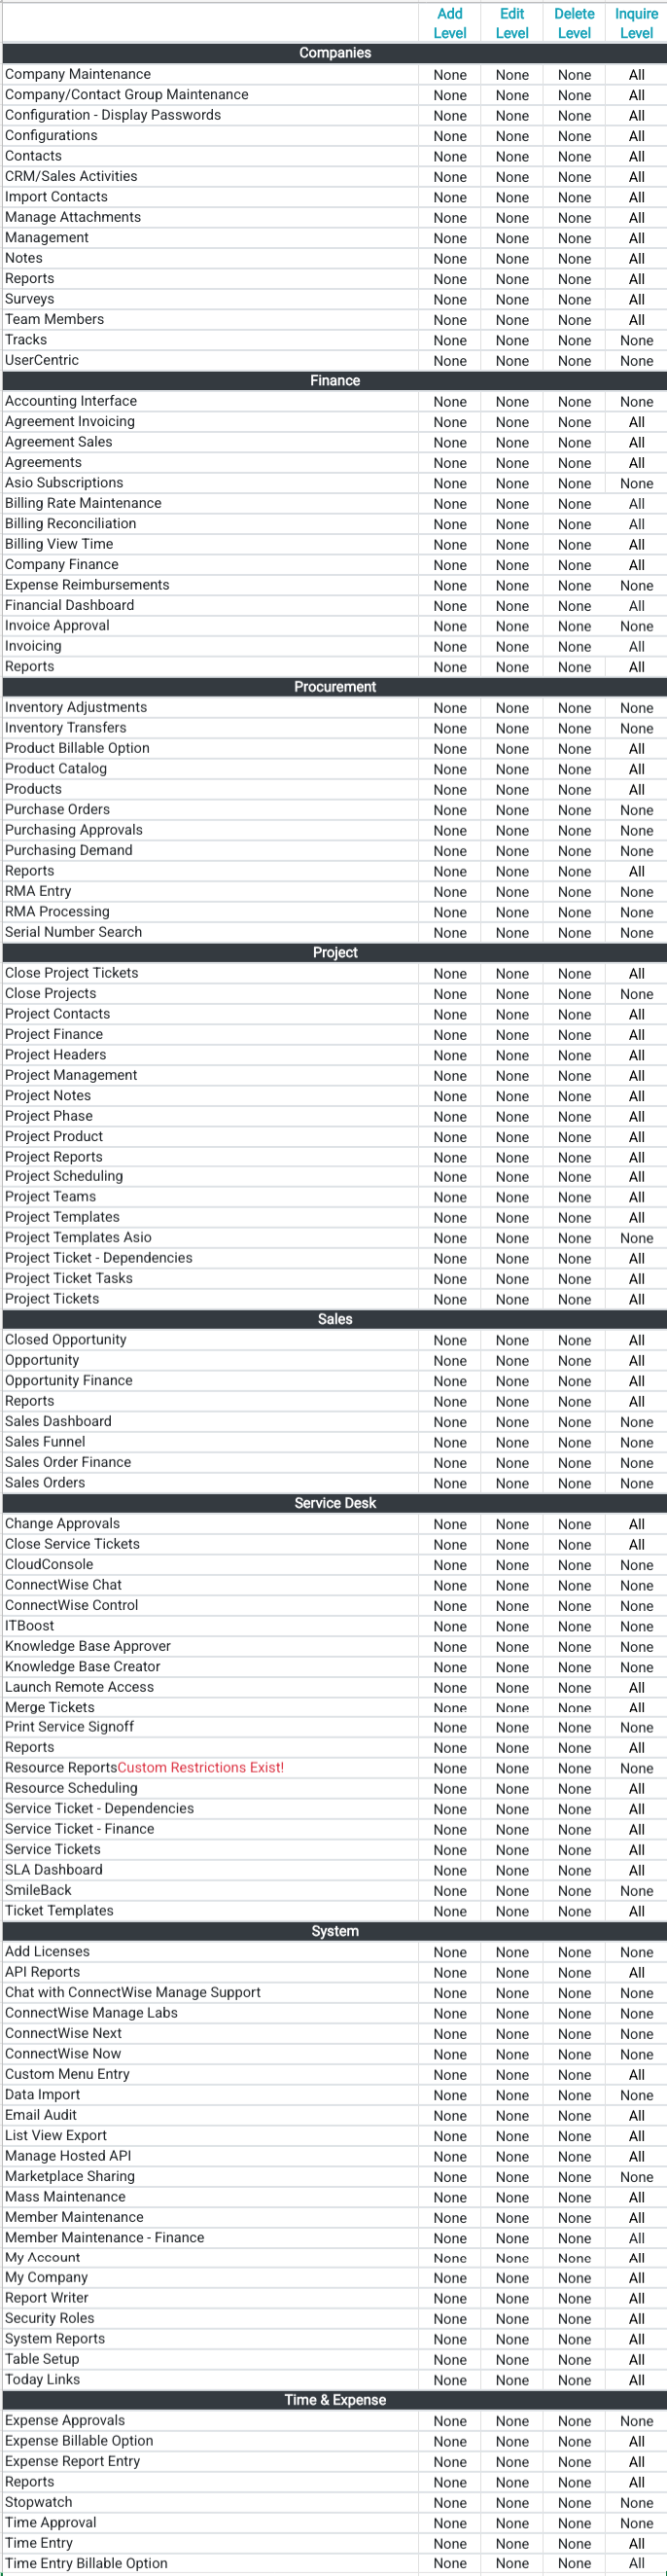
Set the permissions for each row according to the chart below.
-
Click on the Save icon to save the Role's permissions.

-
Next, navigate to System > Members > API Members.
-
Click the “+” icon to add a new API Member.

-
Set the “Member ID” field to “LG Visual Insights Data” (no spaces) and the “Member Name” field to “LG Visual Insights Data”
-
Set the “Role ID” field to “Resplendent Read Only”.
-
Click the save icon.
-
Finally, allocate an API Key under your new API user account
- Click into the recently created API Member.
- Click into the API Keys tab.
-
Add an API Key by clicking on the "+" symbol in the submenu bar
-
Add the Description and click the Save icon to generate the Keys
-
Copy and save the Public Key and Private Key values to a secure place

-
-
Private Key
You will not be able to access these the Private Key once you navigate away from this tab.
-
Click the save icon.
Updated 20 days ago