Set up Liongard Single Sign-on (SSO) with Azure Active Directory
Overview
This document outlines the steps required to configure Azure Active Directory as a Single Sign-On (SSO) provider for Liongard.
For more information, please review Microsoft's Documentation.
NameID Attribute for AuthenticationLiongard uses the
<username>NameID attribute for authentication. This means that Usernames in your SSO platform must match the Usernames in Liongard exactly in order for SSO to function properly.Liongard also sends the NameID in the format
SAML:1.1:nameid-format:unspecifiedto your Identity Provider to allow it to select the claim format. Please note, if the format is unspecified, Azure Active Directory issues the NameID as a pairwise identifier by default. For more details regarding Microsoft’s documentation on NameID Policy, please see Azure Single Sign On SAML Protocol - Microsoft identity platform documentation under the NameIDPolicy section.The NameID format can be customized using Azure portal (see reference from Microsoft’s documentation: Customize app SAML token claims - Microsoft identity platform).
Set up Liongard Single Sign-on (SSO) with Azure Active Directory
Before proceeding, confirm the Usernames in Liongard for all the accounts you would like to enable SSO.
-
Log in to portal.azure.com
-
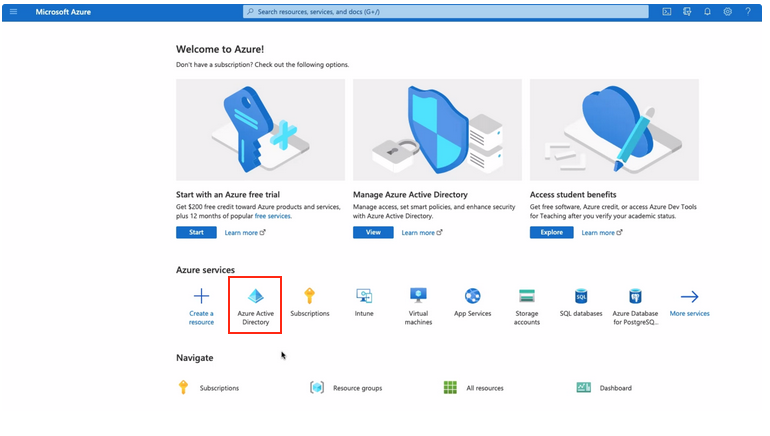
Select Azure Active Directory
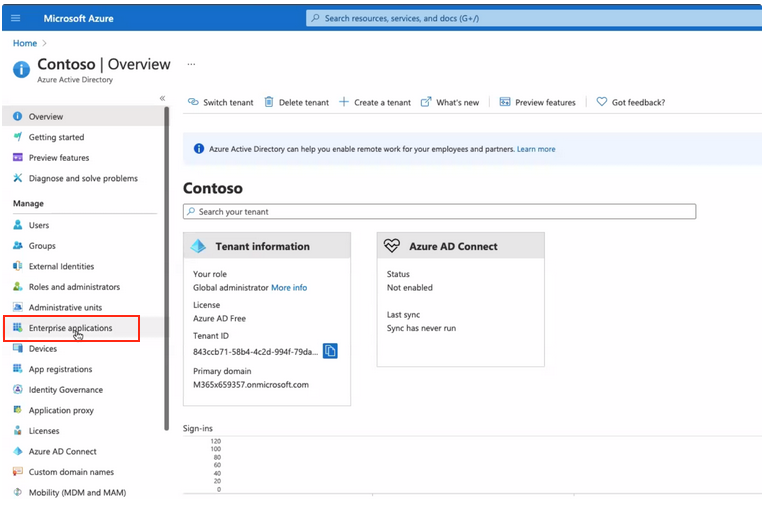
- Select Enterprise Applications from left-hand menu
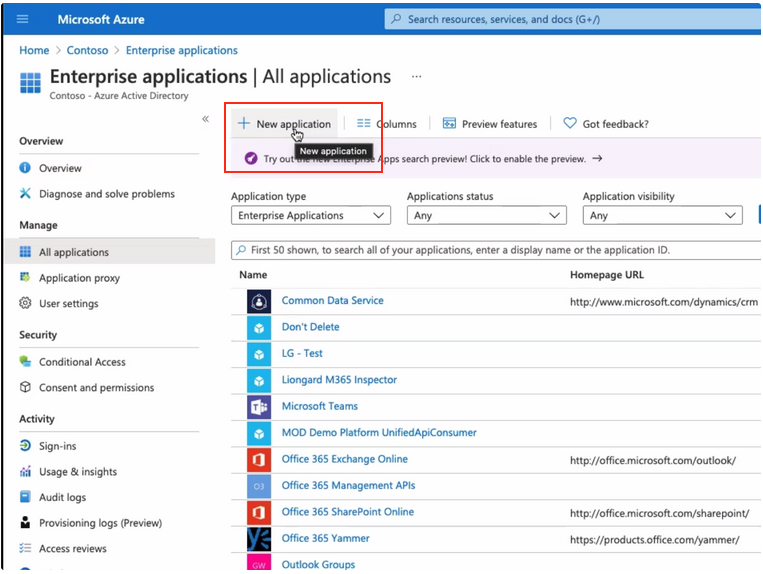
- Select New Application on the main toolbar
- Select Create your own Application
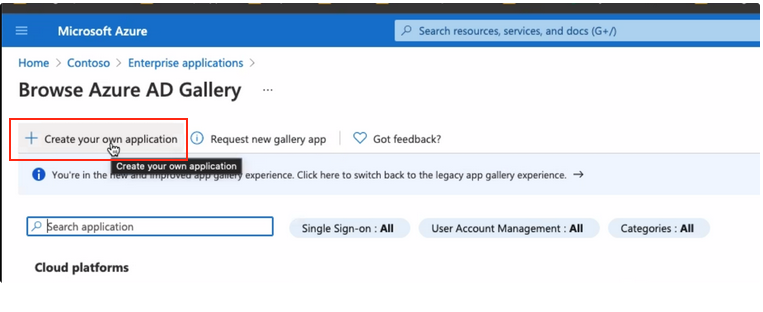
- Give the application a name ("Liongard SSO" is recommended) and select Integrate any other application you don't find in the gallery (Non-gallery)
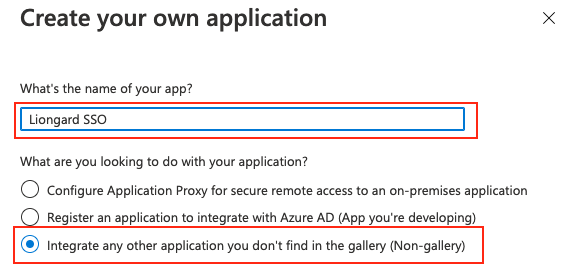
-
Return to Enterprise Applications and refresh the browser if the new application does not show up
-
Select the new application
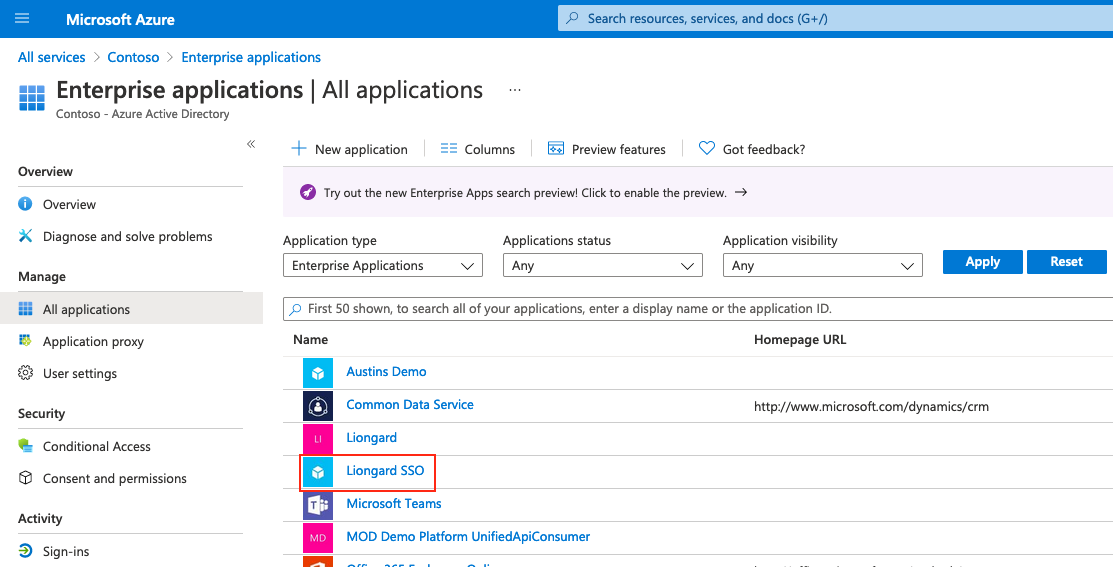
- Select Single Sign-on in the the left-hand menu

- Select SAML
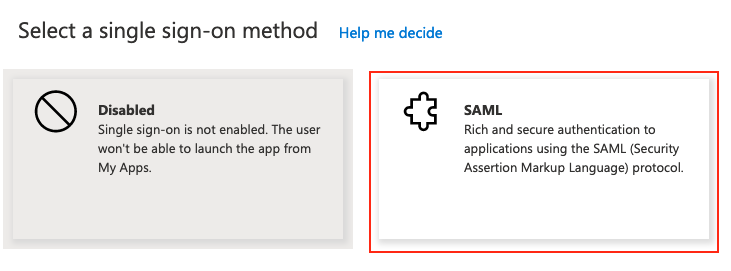
- In the Basic SAML Configuration section, select Edit.
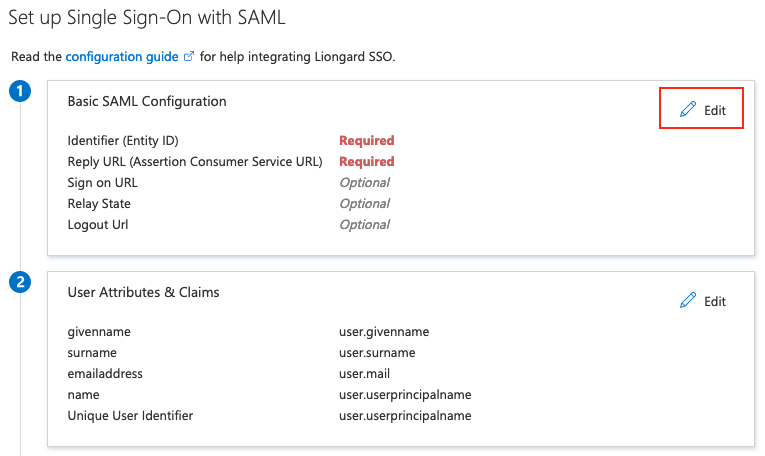
-
Leave your Azure AD window open, and in a separate browser, log in to Liongard.
-
In Liongard, navigate to Account Name > Company Settings > Select SSO Setup on the left-hand side.

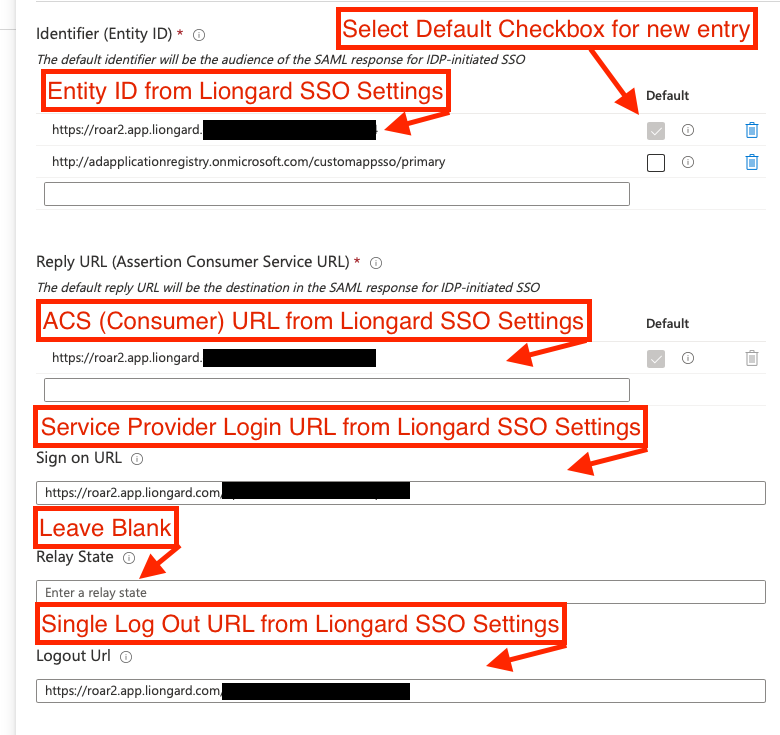
- In the Azure Portal, complete the following fields in the Basic SAML Configuration section using the settings from Liongard's SSO Setup page.
- Identifier (Entity ID) = Liongard Entity ID
- Check the Default checkbox
- Reply URL (Assertion Consumer Service URL) = Liongard ACS (Consumer) URL
- Check the Default checkbox
- Sign on URL = Liongard Service Provider Login URL
- Logout Url = Liongard Single Log Out URL
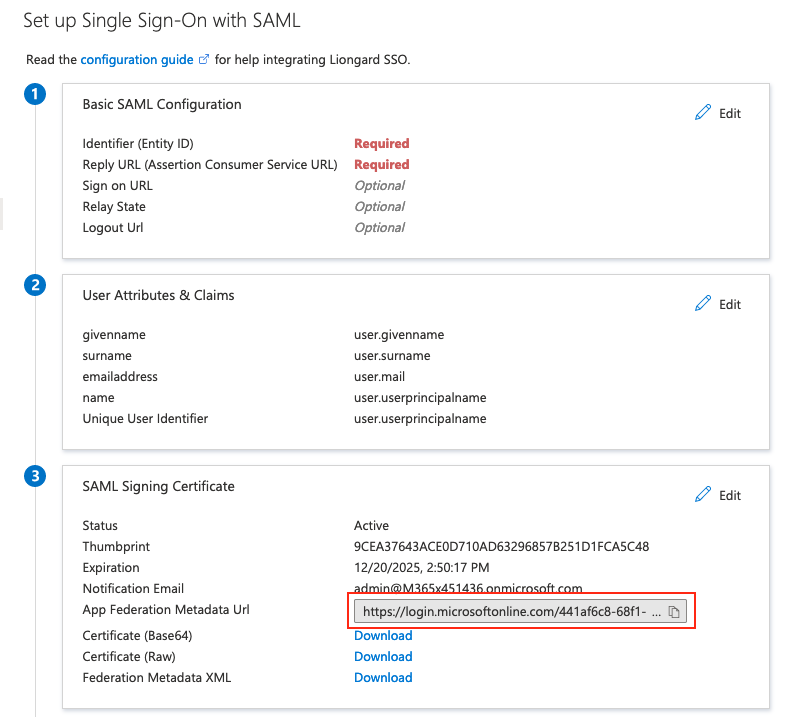
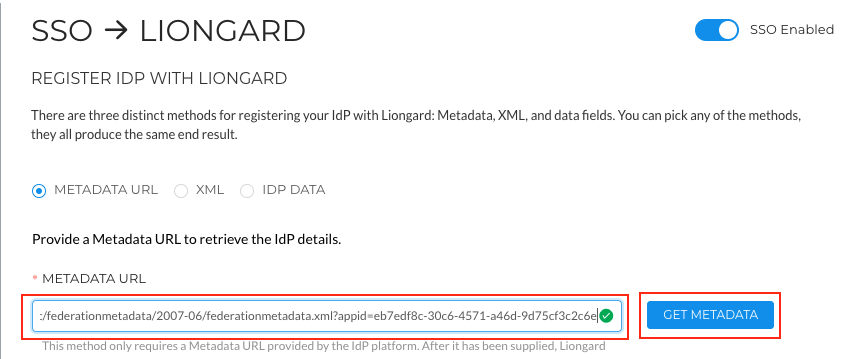
- In the Azure Portal, copy the App Federation Metadata URL and paste it into the Liongard SSO settings under Metadata URL. Click Get Metadata.
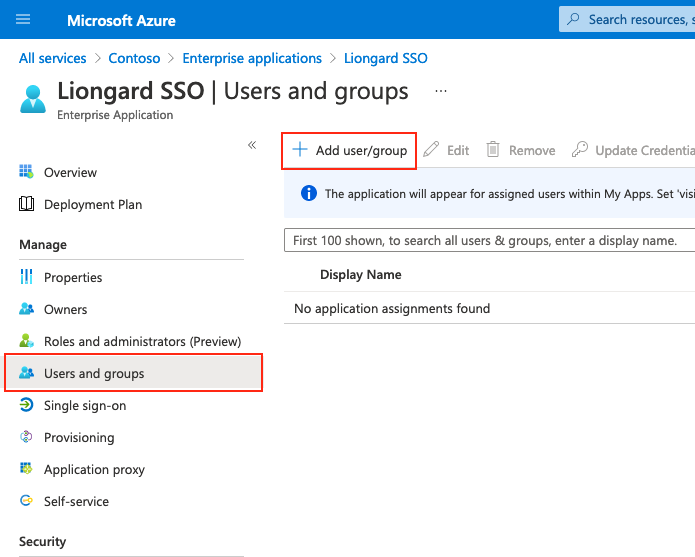
- In the Azure Portal, select Users and groups in the left-hand menu. Then, select Add user/group in the main toolbar
NameID Attribute for AuthenticationLiongard uses the
<username>NameID attribute for authentication. This means that Usernames in your SSO platform must match the Usernames in Liongard exactly in order for SSO to function properly.Liongard also sends the NameID in the format
SAML:1.1:nameid-format:unspecifiedto your Identity Provider to allow it to select the claim format. Please note that Azure Active Directory issues the NameID as a pairwise identifier by default if the format is unspecified. For more details regarding Microsoft’s documentation on NameID Policy, please see Azure Single Sign On SAML Protocol - Microsoft identity platform documentation under the NameIDPolicy section.The NameID format can be customized using Azure portal (see reference from Microsoft’s documentation: Customize app SAML token claims - Microsoft identity platform).
-
Add any users or groups that should have Liongard Single Sign-On capabilities. Liongard recommends adding at least one Global Administrator in the Exclude Users list during the setup and testing of SSO.
-
Select Save.
Updated 5 months ago
