Set up Liongard Single Sign-on (SSO)
Overview
Simple and secure, Liongard's Single Sign-On (SSO) provides users with an easy and consistent login experience. Below are some quick steps and helpful tips to get you started on setting up SSO and securing your users' logins.
SSO Platform
Liongard's SSO capabilities are built using SAML 2.0 standards. This allows you to set up SSO with any SSO platform that supports SAML 2.0.
A Liongard Global Administrator account is needed in order to view and set up SSO.
How to Set up SSO
Step 1: Set up Protected Application
Log in to your SSO platform and follow the vendor-specific steps for setting up a protected application.
Step 2: Configure Liongard in your SSO Platform
- Log into your Liongard instance using a Global Administrator account
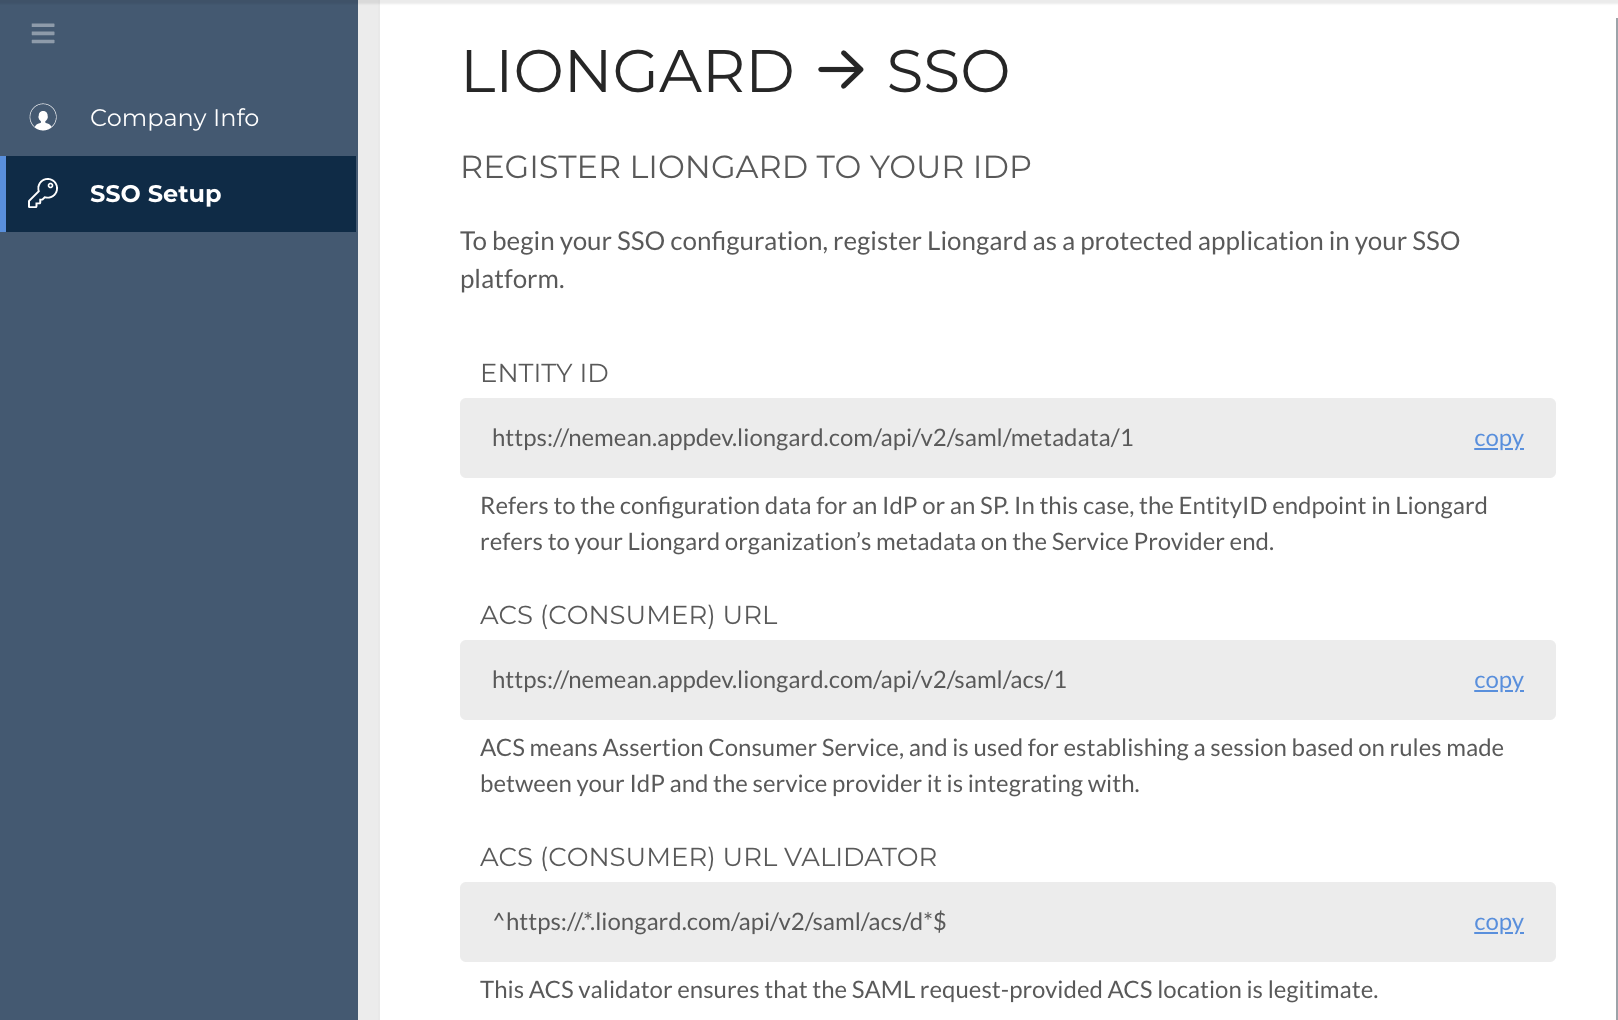
- Navigate to Username > Company Settings > SSO Setup tab on the left-hand menu. Here, you will see a section called "Liongard SSO" which contains the information needed to configure Liongard as a protected application in your SSO platform.

- Copy and paste the information from Liongard SSO into your SSO Platform. Note: Some fields may not be required by your SSO Platform.
- Adjust any settings in your SSO platform to provide SAML Authentication Information.
NameID Attribute for AuthenticationLiongard uses the
<username>NameID attribute for authentication.This means that Usernames in your SSO platform must match the Usernames in Liongard exactly in order for SSO to function properly.
Step 3: Configure SSO Platform Settings in Liongard
Once you complete the input of Liongard information into your SSO platform, you can set up Liongard with the information your SSO platform provides.

There are three different options to set up your Identity Provider:
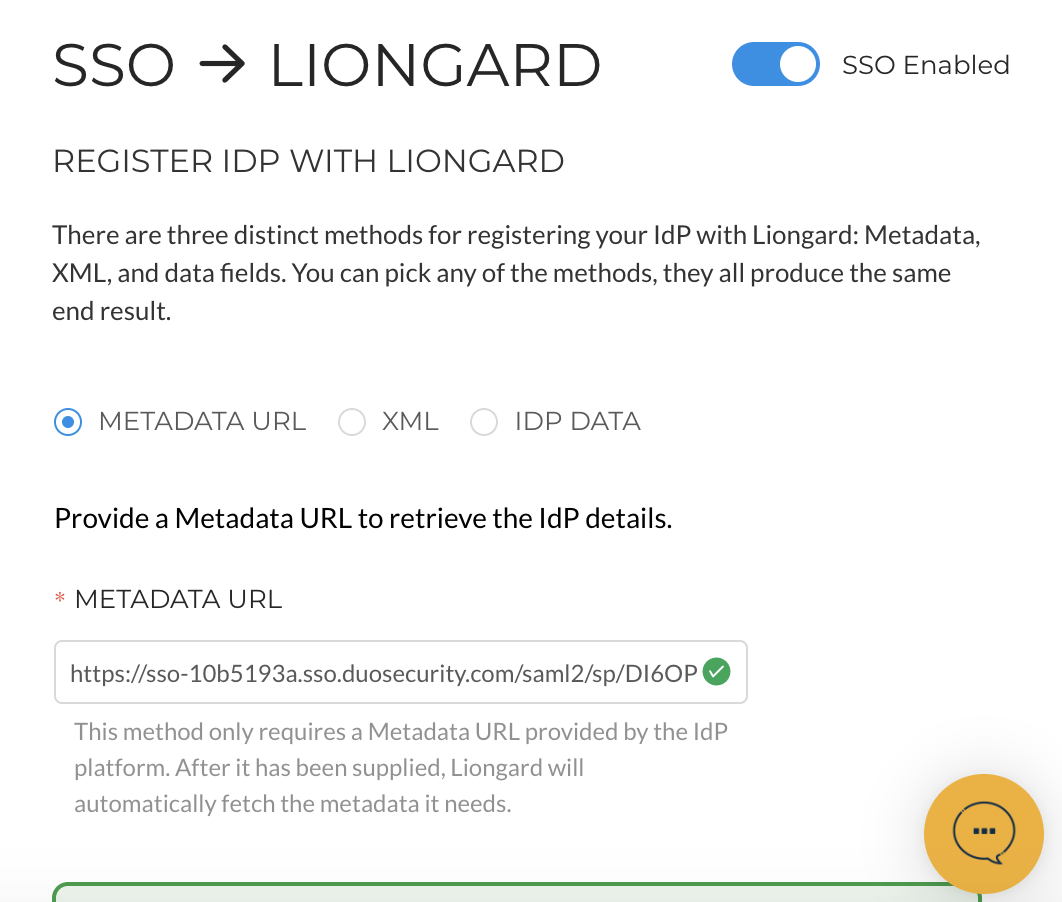
Option 1: Metadata URL
The quickest and easiest way to set up your SSO in Liongard is to use the Metadata URL.
- In your Liongard instance, navigate to Username > Company Settings > SSO Setup. In the SSO Liongard section, under Register IdP with Liongard, select Metadata URL.
- Copy and paste the Metadata URL, provided by your SSO platform, into the Metadata URL field.
- Select Get Metadata to the right of the input field.
- If completed successfully, you should see an "All set! Metadata has been successfully collected." message.
Option 2: XML
The XML option allows for a simple copy and paste of an XML export from your SSO platform.
- In your Liongard instance, navigate to Username > Company Settings > SSO Setup. In the SSO Liongard section, under Register IdP with Liongard, select XML.
- Copy and paste the Metadata XML IdP details, provided by your SSO platform, into the Metadata XML field. Note: You must copy and paste the text of the XML. Liongard does not support the uploading of an XML file.
- Select Parse Metadata below the input field.
- If completed successfully, you should see an "All set! Metadata has been successfully collected." message.
Option 3: IdP Data
The IdP Data option allows for the manual configuration of key fields to set up SSO.
- In your Liongard instance, navigate to Username > Company Settings > SSO Setup. In the SSO Liongard section, under Register IdP with Liongard, select IdP Data.
- Copy and paste the required fields from your SSO platform into Liongard via the provided input fields. Required fields are marked with a red asterisk. Note: The Single Log Out URL is an optional setting for those looking to configure this capability.
- Copy and paste the complete text contents of your certificate into the X509 Public Certificate field. Note: You must copy and paste the text of the X509 Certificate. Liongard does not support the uploading of a certificate file.
- Select the Save Metadata button below the certificate input field
- If completed successfully, you should see an "All set! Metadata has been successfully collected." message.
Step 4 (Optional): Users Setup
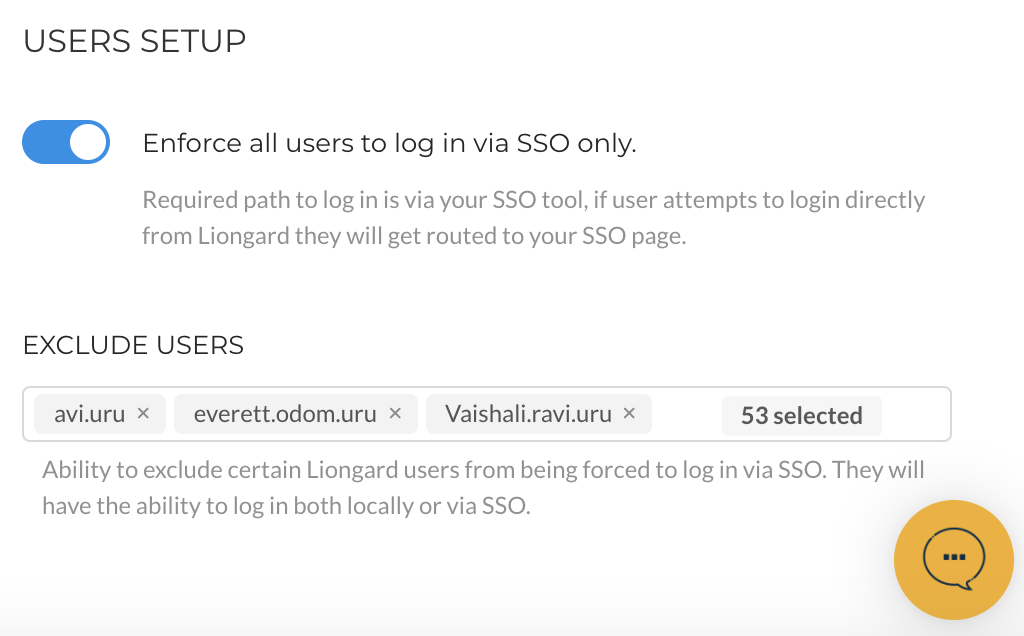
In addition to the basic SSO setup, Liongard gives you the option to enforce SSO for all users. This will redirect any user who attempts to log in to Liongard, directly via URL, to their configured SSO provider for authentication.
Exclude Users
You have the option to exclude users from this requirement. You might exclude users who, for example, do not have access to your SSO platform.
Liongard recommends adding at least one Global Administrator in the Exclude Users list during the setup and testing of SSO. This will allow you to access your Liongard instance in the case of any configuration errors. This account should immediately be removed from the Exclude Users list once SSO configuration and testing are completed.
In accordance with industry standards and security best practices, Liongard advises against excluding users when possible.

- Enable the Enforce all users to log in via SSO only toggle.
- Click into the Excluded Users input field and select/type the name of the User account(s) you wish to exclude from the SSO requirement.
- Your configuration will auto-update and a confirmation message will appear after each change.
Once you have completed these settings, you are all set! You should now be able to log in to your SSO platform and launch Liongard.
Updated 5 months ago
