Deployment via Datto RMM
Liongard Agent MSI Name ChangeStarting with version 2.0.2, the Liongard Agent MSI package was renamed to "LiongardAgent-lts" as part of our new brand messaging.
Deployment scripts using the old naming conventions (RoarAgent.msi, ROARURL, ROARACCESSKEY, etc.) will still work if necessary, but we do recommend updating the scripts when possible to ensure consistency across the platform.
New installations using the MSI will change the Windows service name to "Liongard Agent." Upgrading an existing installation will leave the service name as "Roar Agent."
Datto ComStoreA script for Liongard's On-Premises Agent is now available in Datto's ComStore.
On-Premises Agent Overview
On-Premises Agent Installation Best Practices
- Install On-premises Agents on Domain Controllers
- We support On-premises Agents installed on servers; however, installing an On-Premises Agent on a Domain Controller will result in more Inspector auto-discovery, and therefore, less manual work.
- Generally, install One On-premises Agent per Network
- Our Agents speak across VPN tunnels
- Our Agents DO NOT speak across Active Directory Domains, so if you have two Active Directory Domains in one network, then you'll need an Agent within each Active Directory Domain.
- Install an additional On-premises Agent on any server NOT tied to an Active Directory Domain
- The additional Agent will auto-activate an Inspector for the local Windows server, and that Inspector will auto-discover a Network Discovery, Hyper-V, and/or SQL Server Inspectors if present
- Agent Names must be unique. Include a unique identifier in the Agent script to ensure all Agents will have a unique name.
On-Premises Agent Installation = Inspector Auto-DiscoveryWhen you roll out an On-premises Agent, there is a potential for the auto-discovery of several other Inspectors:
- Upon install, an On-premises Agent will auto-activate an Inspector for the local Windows Server
- After the Windows Inspector runs, it will auto-discover an Active Directory Inspector
- Once activated and successfully run, the Active Directory Inspector will auto-discover Inspectors for any additional Windows servers within its Domain
- Once activated and successfully run, the Windows Inspectors will auto-discover Inspectors for any installed Hyper-V or SQL Server Inspectors
- After the first Windows Inspector runs, it will also auto-discover a Network Discovery Inspector
- After the Network Discovery Inspector is activated, it will auto-discover Inspectors for several makes/models of network devices. See our Network Discovery Inspector docs for more information.
Script Overview
The script below provides for a basic install of the Liongard Windows Agent via Datto RMM using our MSI Installer. It takes in variables associated with your Liongard instance, such as the URL and Access Key ID and Secret, to complete the install.
- This script will be supported on a best-effort basis.
This script can:
- Install an On-Premises Agent
- (Optionally) Create a Domain Admin User
- Assign the Domain Admin User to the Agent
This script cannot:
- Assign the Agent to an Environment
Step 1: Download the Script from the Datto ComStore
Part 1: Create New job and Set Variables
-
Log in to your Datto RMM instance
-
In Datto RMM, navigate to ComStore > Scripts
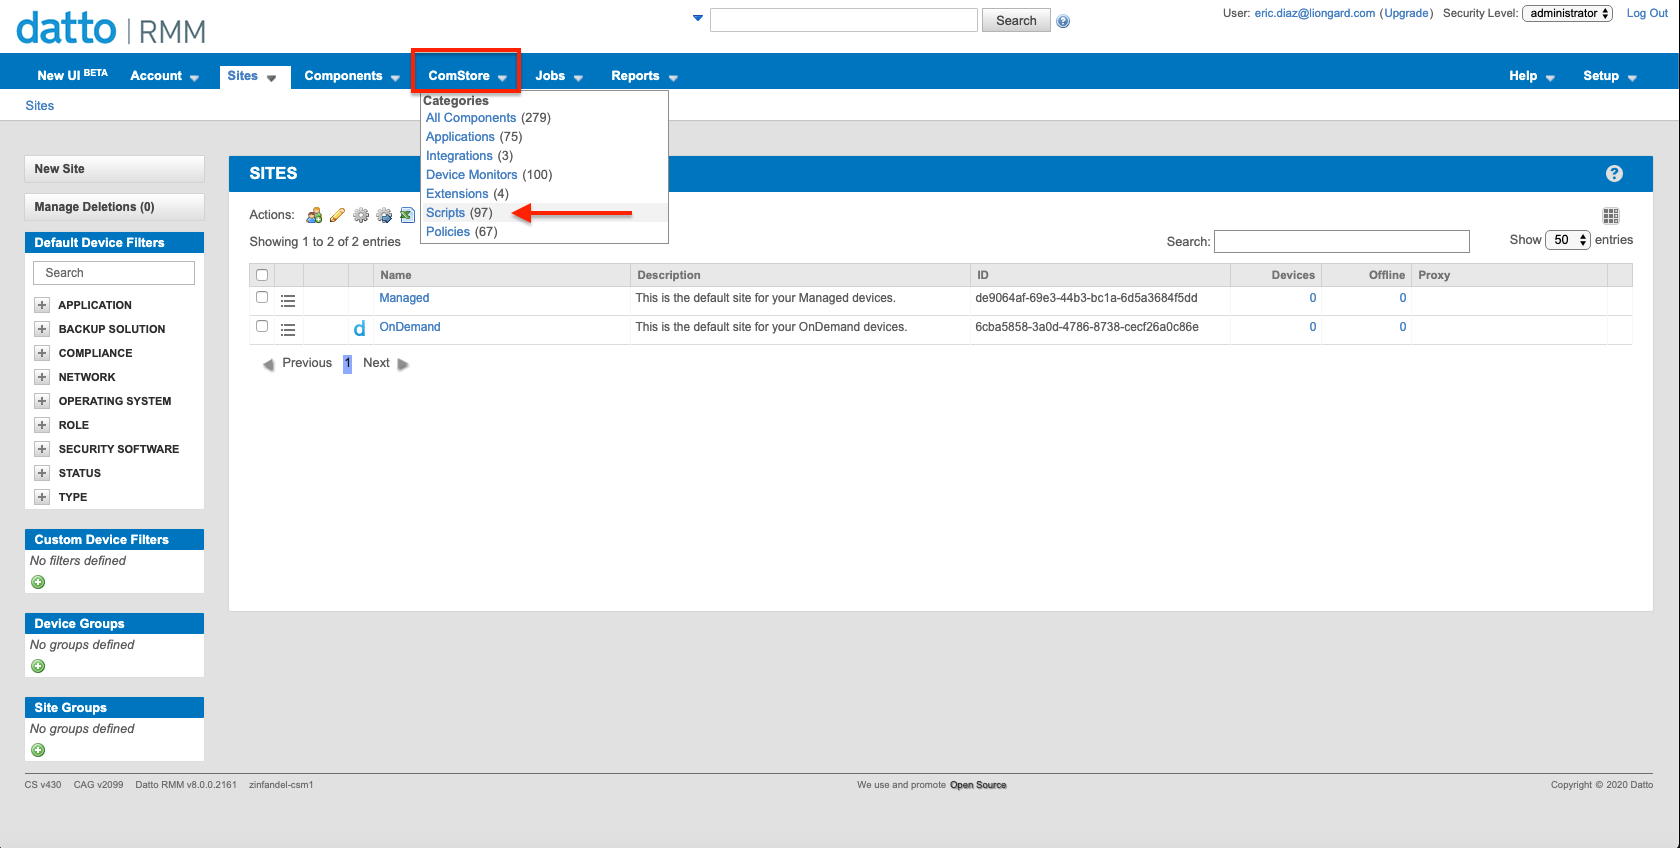
- Use the Top Navigation to search for the Liongard Script. This will lead you to the screen below:
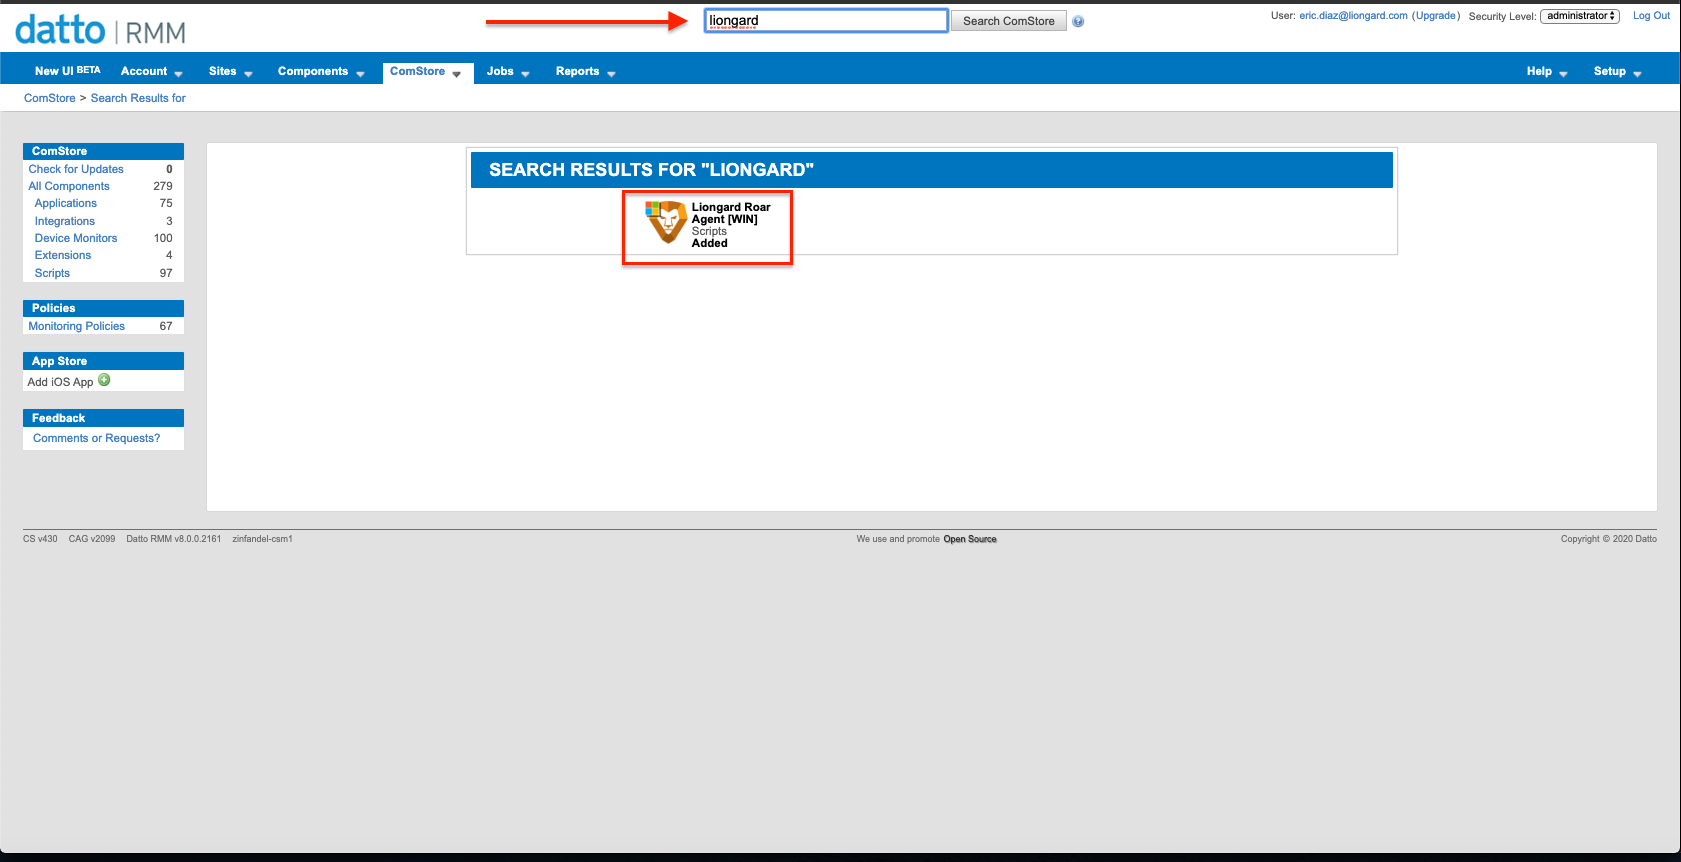
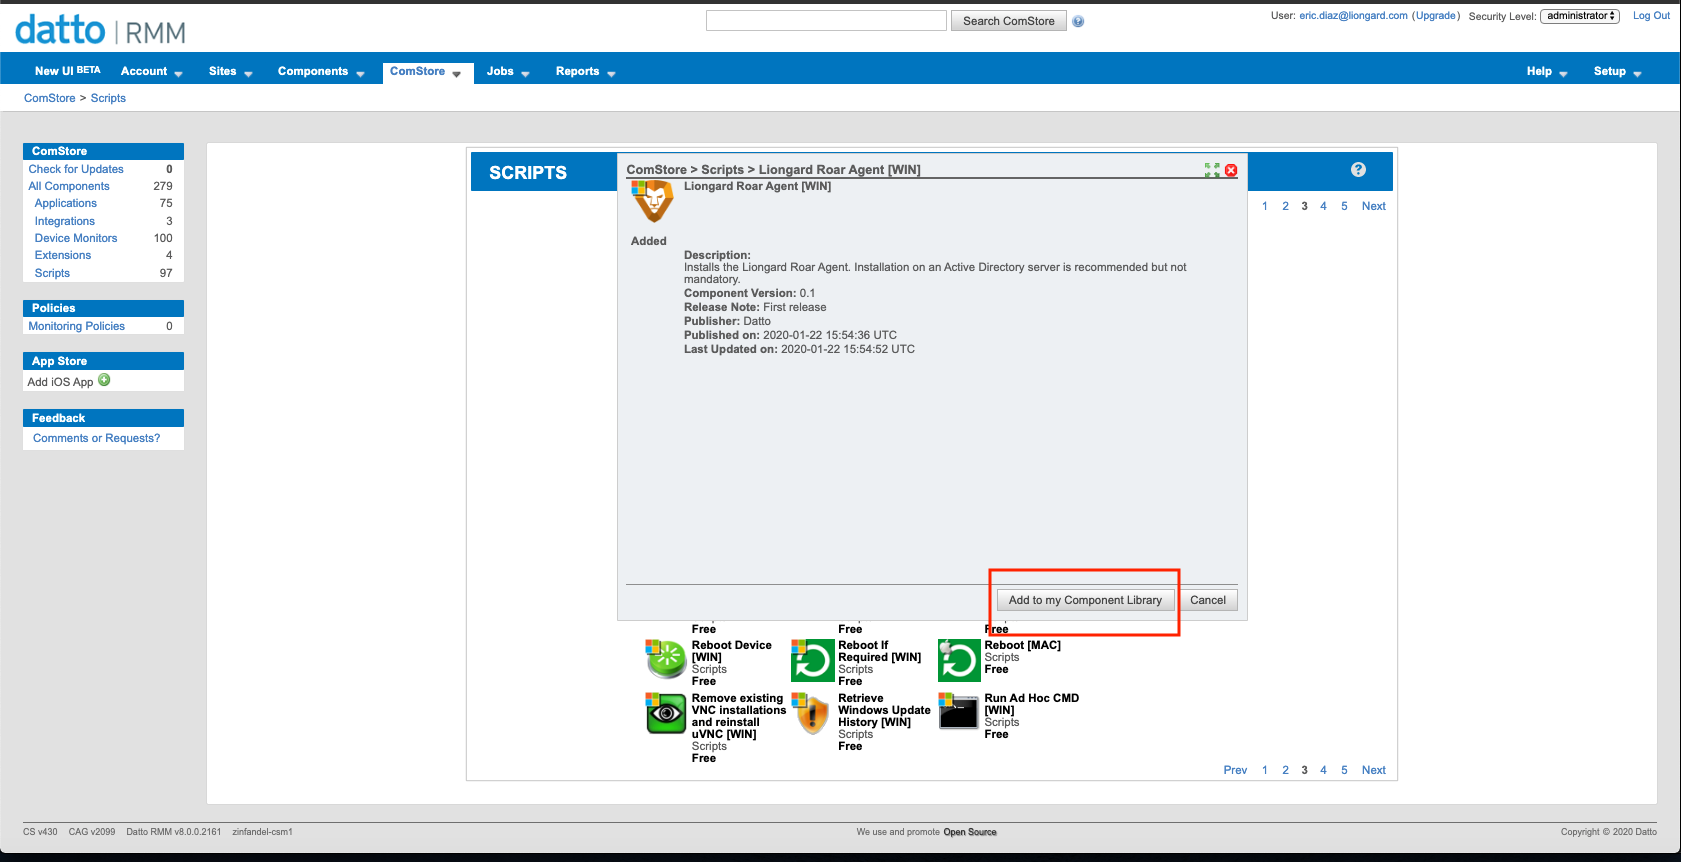
- Here you'll be able to Download the script into your components library:
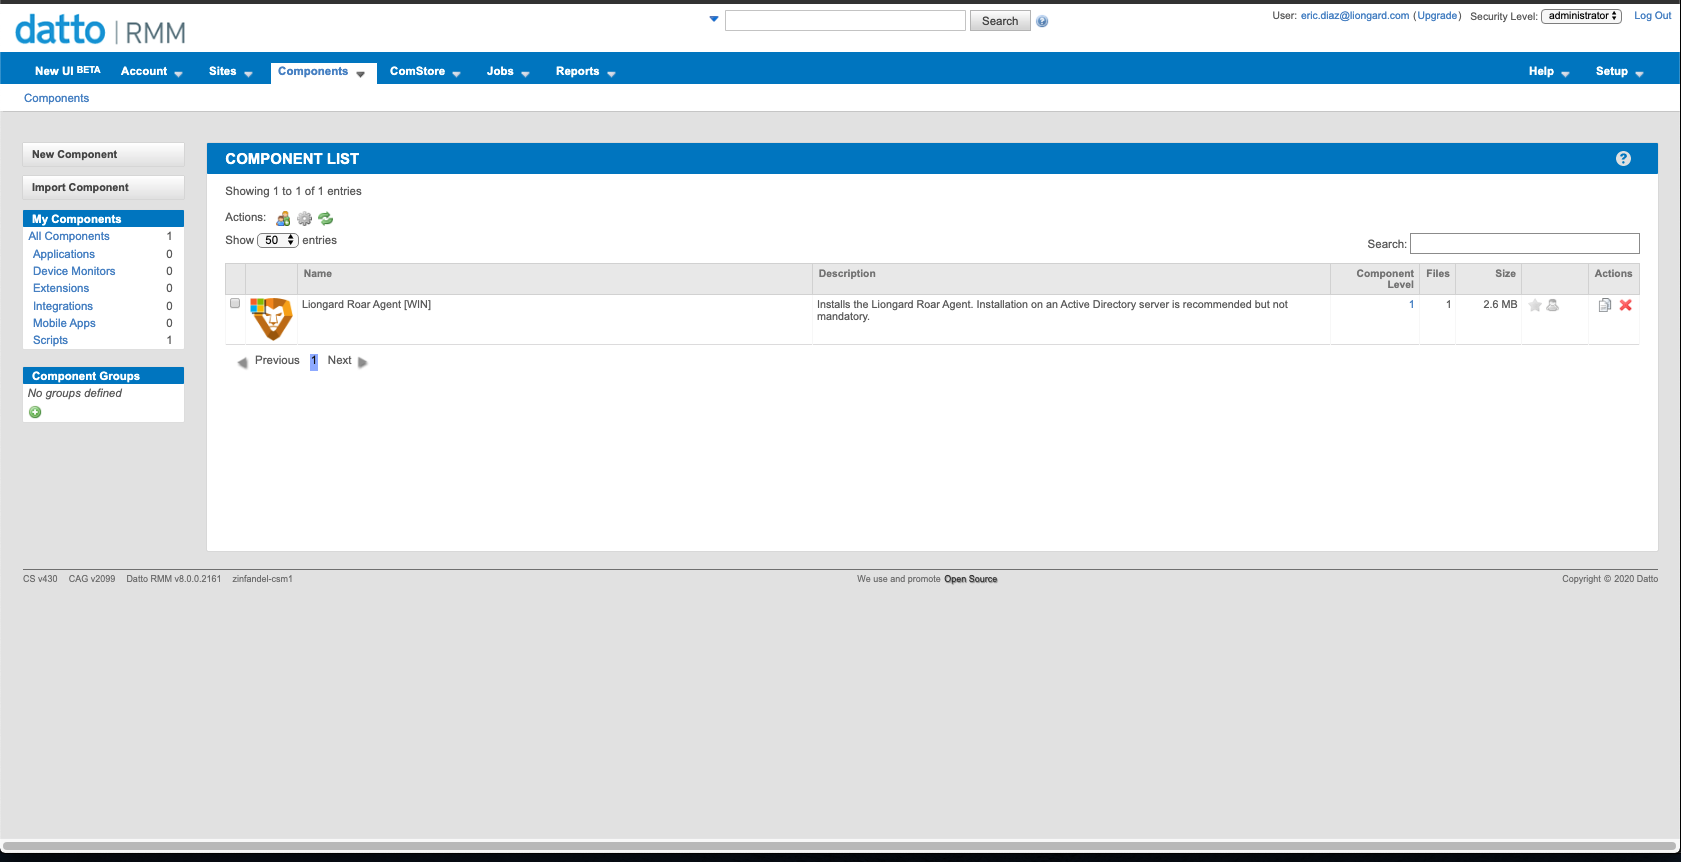
- You will now find the script in your components library.
Part 2: Create new job and Set Variables
Once the Script has been downloaded, you will be able to schedule new jobs and populate required variables
Obtain a Liongard Access Key and SecretFor a successful installation, you will need to obtain a Liongard Access Key and Secret.
To do so, in Liongard, navigate to your User Account Name in the top right corner > Account Settings > Access Tokens > Generate a New Token
These keys can be used for every Agent installation, or you can create a new one each time you install an Agent.
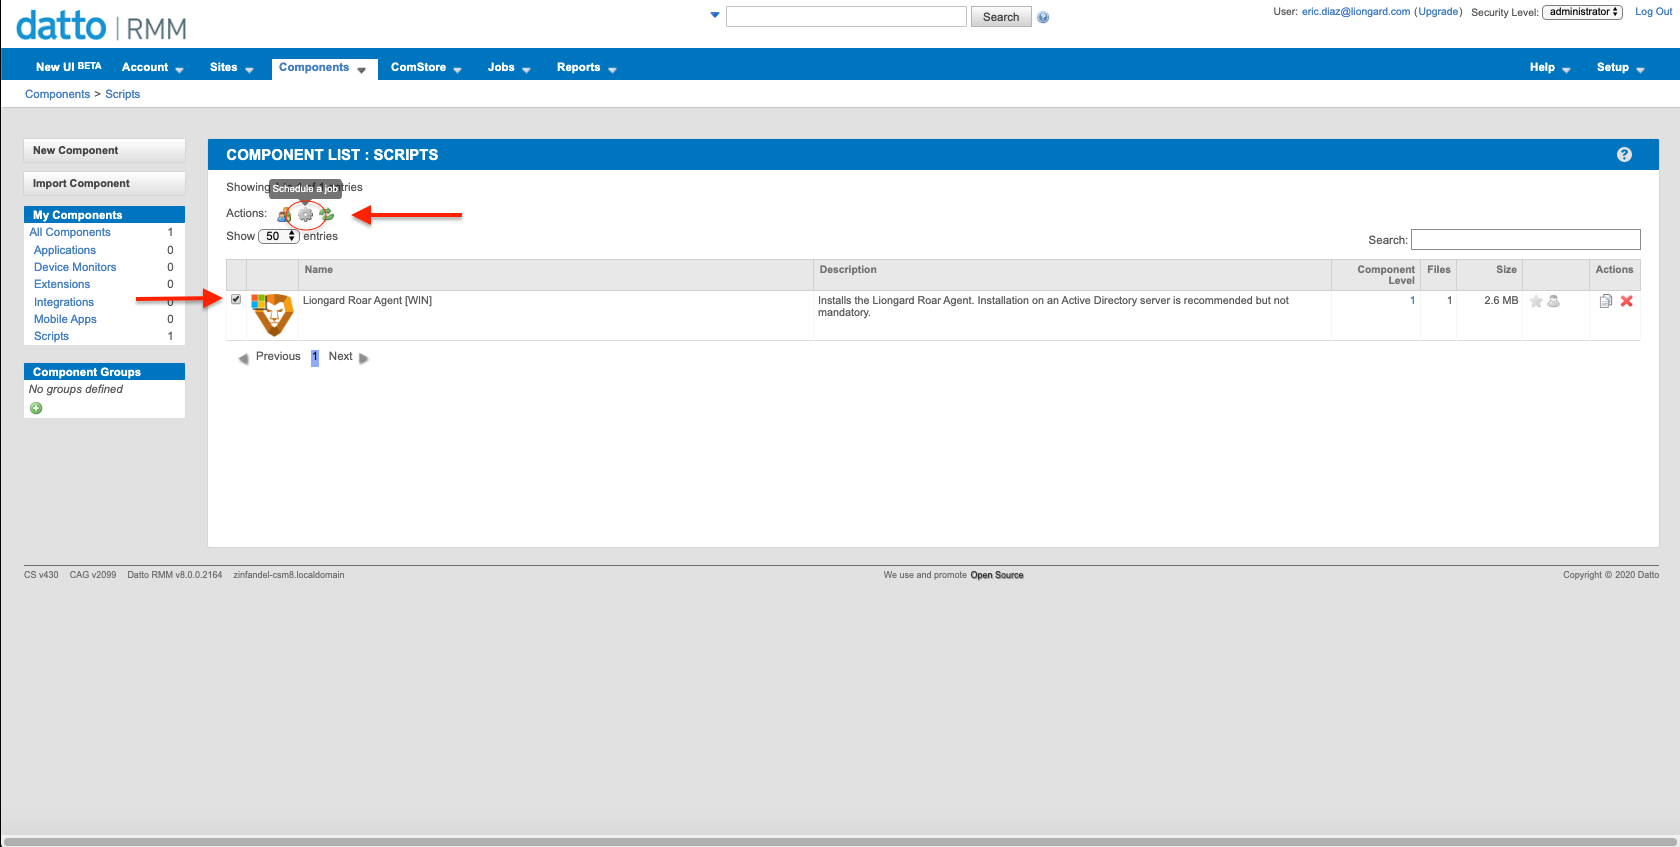
- Select the Liongard script component and select the gear at the top to schedule a new job
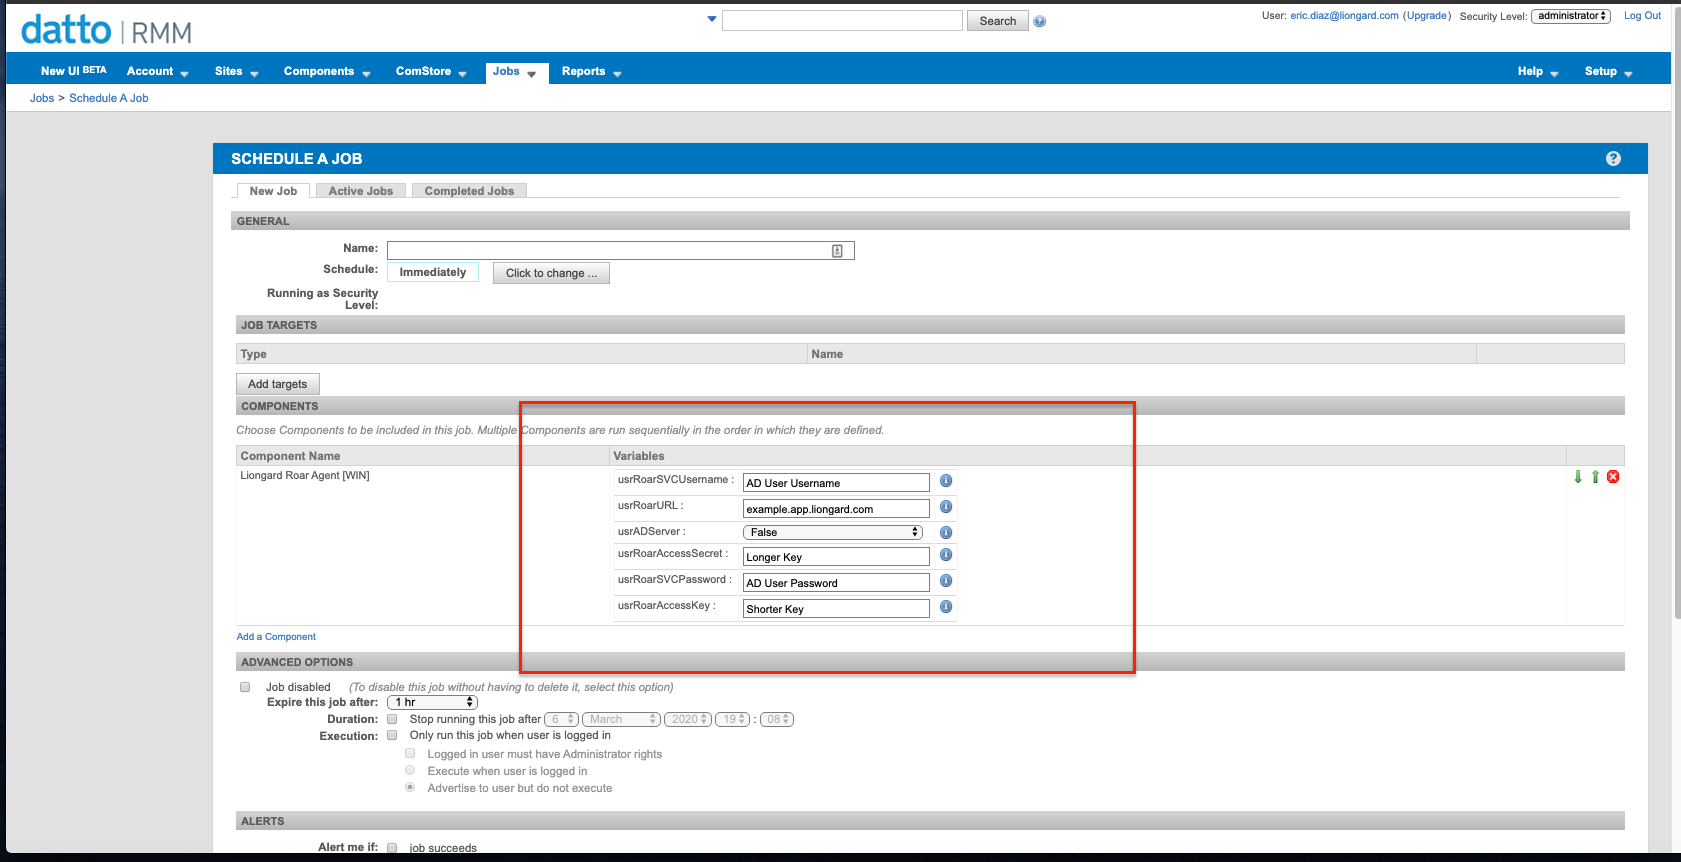
- Upon Job setup, you will see the Liongard script variables that need to be populated for successful Agent install
Creating a Domain Admin UserThis script, optionally, creates a Domain Admin User in Active Directory.
If you would not like this script to create a Domain Admin User, you can:
- Leave the "adServer" set to "true," and enter the credentials of an existing Active Directory user in the variable fields "roarSvcUsername" and "roarSvcPassword"
- Set the "adServer" set to "false"
Creating a Domain Admin User for the Agent to "Run As"If the "adServer" variable is set to "true," then this script will check if the Username and Password entered into the Default Values fields matches the Username and Password for an existing user.
- If the values match those of an existing user, then it will assign the Agent to "Run As" that user.
- If the values do not match those of an existing user, then it will create a user with the Username and Password set in the Default Values fields, add the user to the Domain Admins group, and assign the Agent to "Run As" that user.
If the "adServer" variable is set to "false," then this script will ignore the Username and Password entered into the Default Values fields.
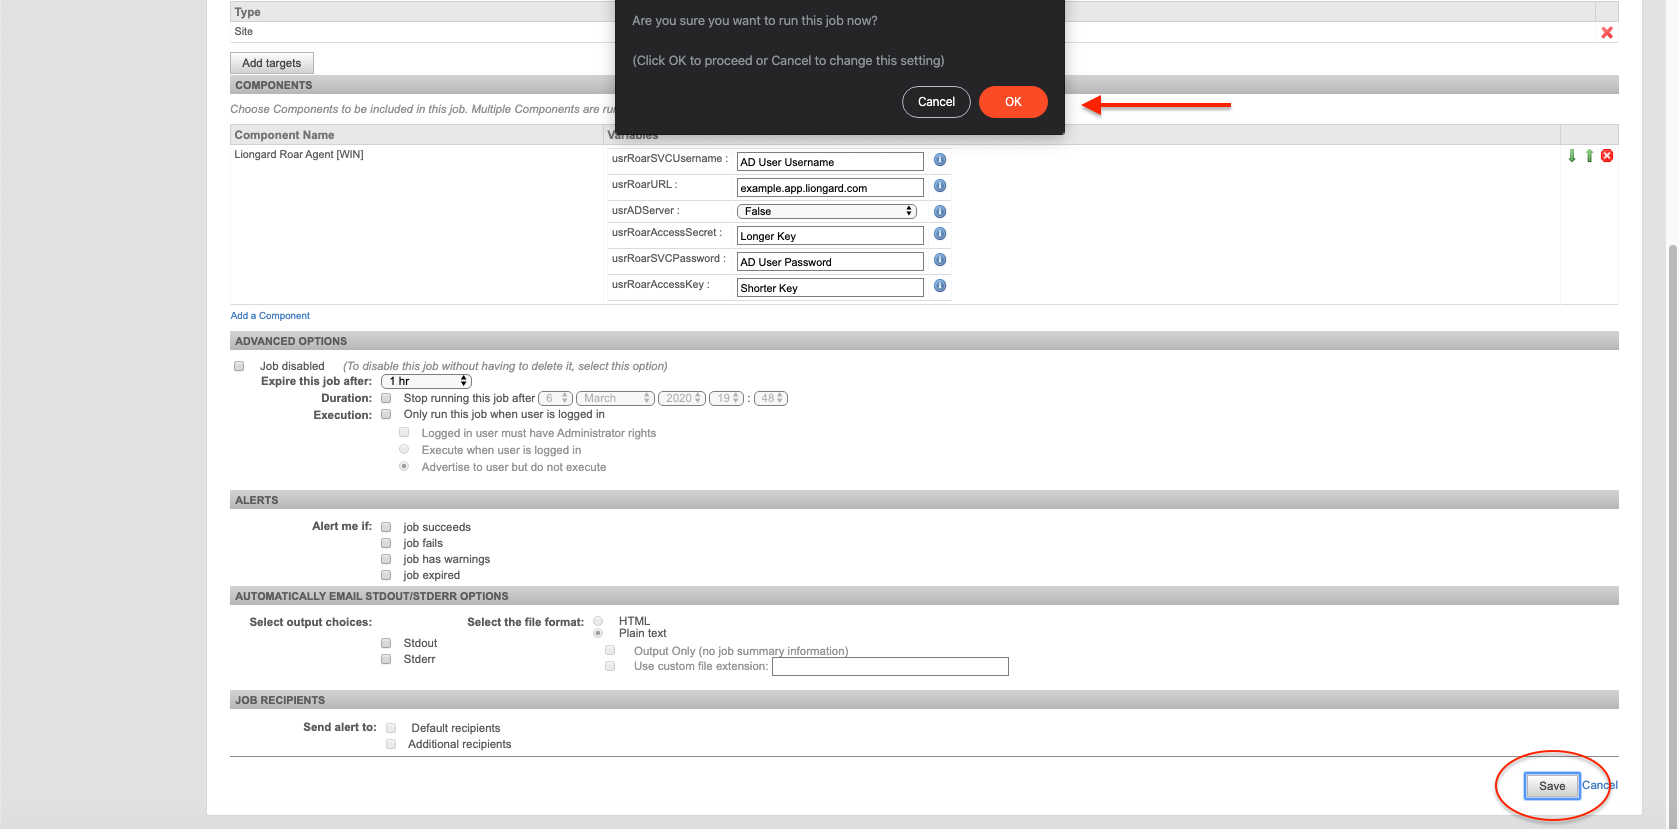
Fill in the following fields:
- roarAccessKey: Enter a Liongard Access Key
- roarAccessSecret: Enter a Liongard Access Secret
- roarSvcPassword: Enter a Liongard Service Account Password that you would like auto-created by the script for the Agent.
- Note: This user will not be created and this default value will be ignored if, before running the script, this value is edited to, or already reflects, the values of an existing Active Directory User. This can be edited upon installation.
- roarURL: Enter your Liongard URL (e.g. us1.app.liongard.com)
- roarSvcUsername: Enter a Liongard Service Account Username that you would like auto-created by the script.
- Note: This user will not be created, and this default value will be ignored if, before running the script, this value is edited to, or already reflects, the values of an existing Active Directory User. This can be edited upon installation.
- adServer: The Default Value is by default set to "true," meaning that this script will fail if run on a non-Domain Controller server. Change this to "false" if you would like to install an On-Premises Agent on non-Domain Controller servers
- Note: If set to "false," the script will not create an Active Directory User or assign the Agent to "Run As" an Active Directory User
Part 3: Finish Configuring and Run the Script
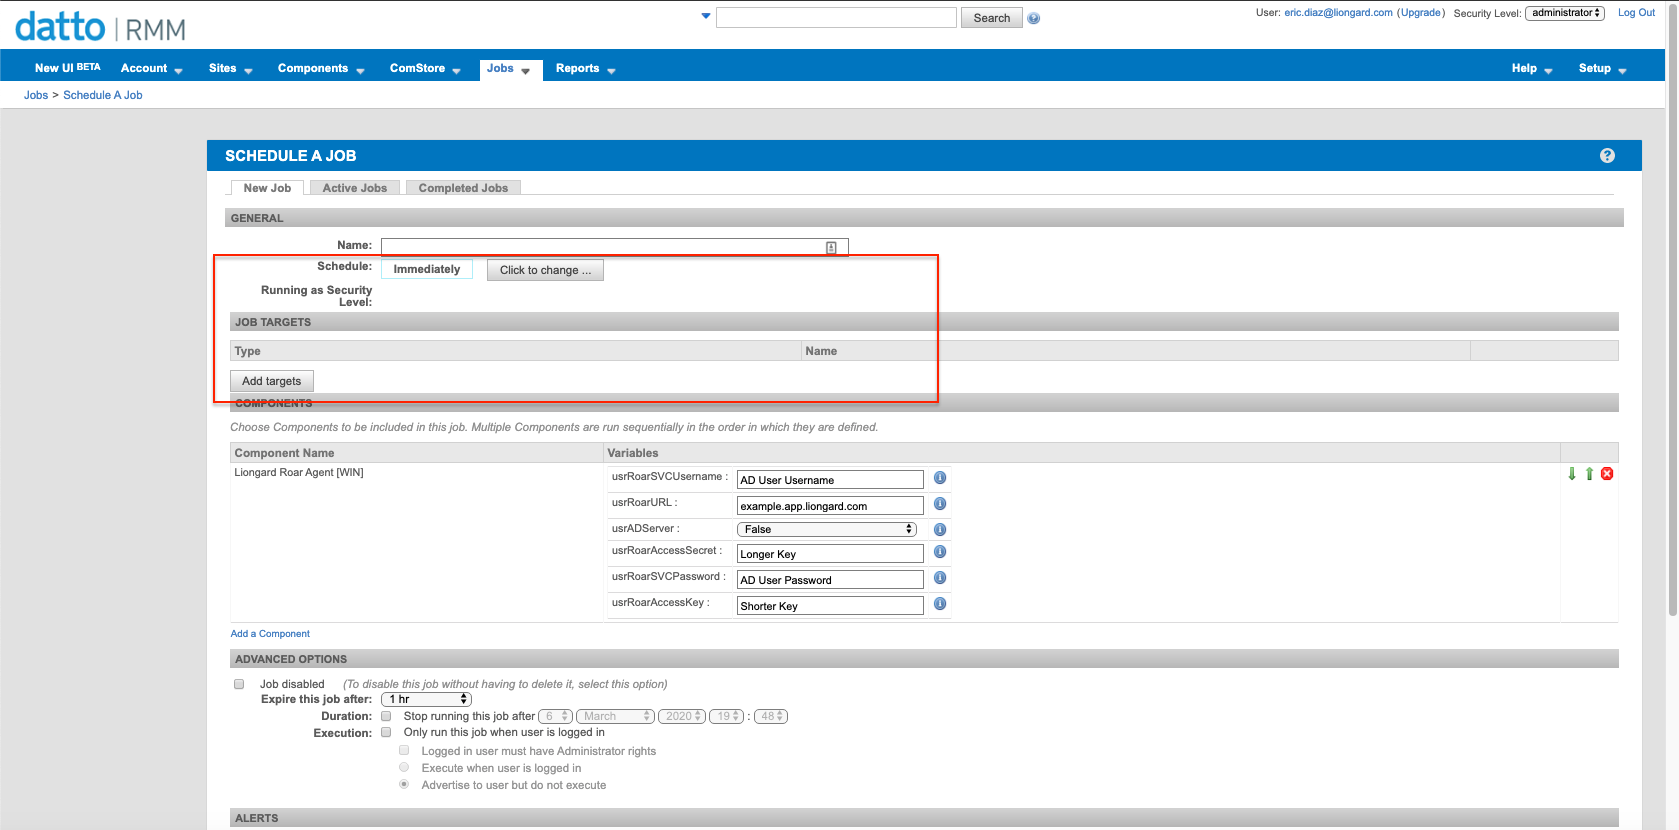
- You can finish the configuration of the Job by selecting a target for the script to run against. You can also set a schedule for the script.
- Optionally, you can configure additional alerting and options for the script.
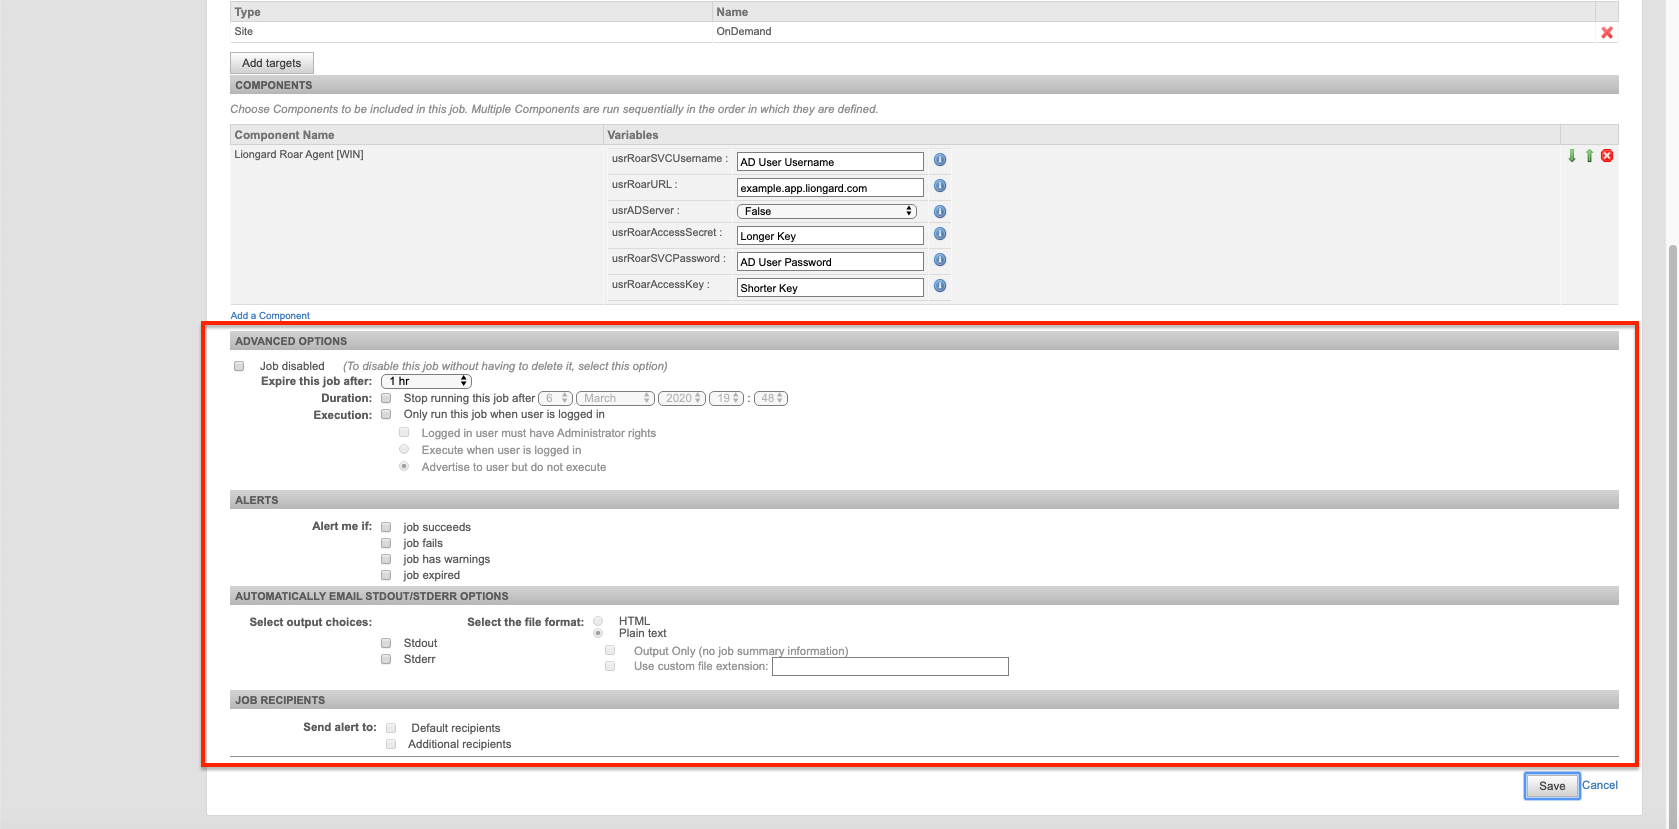
- Once you save these changes, the script will proceed to run
Associating the Agent to an Environment in LiongardThis script does not associate Agents with their Environments. This will need to be completed in Liongard.
You can do this in Liongard by navigating to Admin > Agents > Select the Agent installed > Fill the Environment field with the associated Environment. This field is case sensitive.
adServer = "true"If the "adServer" variable is set to "true," then this script will fail if run on non-Domain Controller servers.
Setting VariablesEach variable must be filled in upon install or the script will fail.
Step 2: Roll out Auto-Discovered Inspectors
On-Premises Agent Auto-DiscoveryRemember there is a lot of Auto-Discovery that follows installing just one On-Premises Agent in Liongard!
In Liongard, after installing an On-Premises Agent (including associating it to an Environment), a Windows Inspector for the local Windows Server where the Agent was installed will be auto-activated.
After this Inspector runs, if the Agent was installed on a Domain Controller, then this auto-activated Windows Inspector will auto-discover an Active Directory Inspector and the auto-discovery wil continue.
You can activate auto-discovered Inspectors on your Dashboard Screen by navigating to the "Discovered Systems" tab. For more information on Auto-Discovery, please review our documentation.
Agent Fail Logs
If this script fails, you can find an install log in the temporary folder c:\Windows\Temp, called install.log.
Updated 2 months ago
