Send Tickets to Autotask
Learn how to send Liongard Actionable Alerts as tickets into your Autotask PSA.
Once you've set up Liongard's Autotask integration and imported and mapped Accounts from Autotask, you're ready to enable ticket creation in your PSA.
Step 1: Enable Autotask Service Ticket Generation
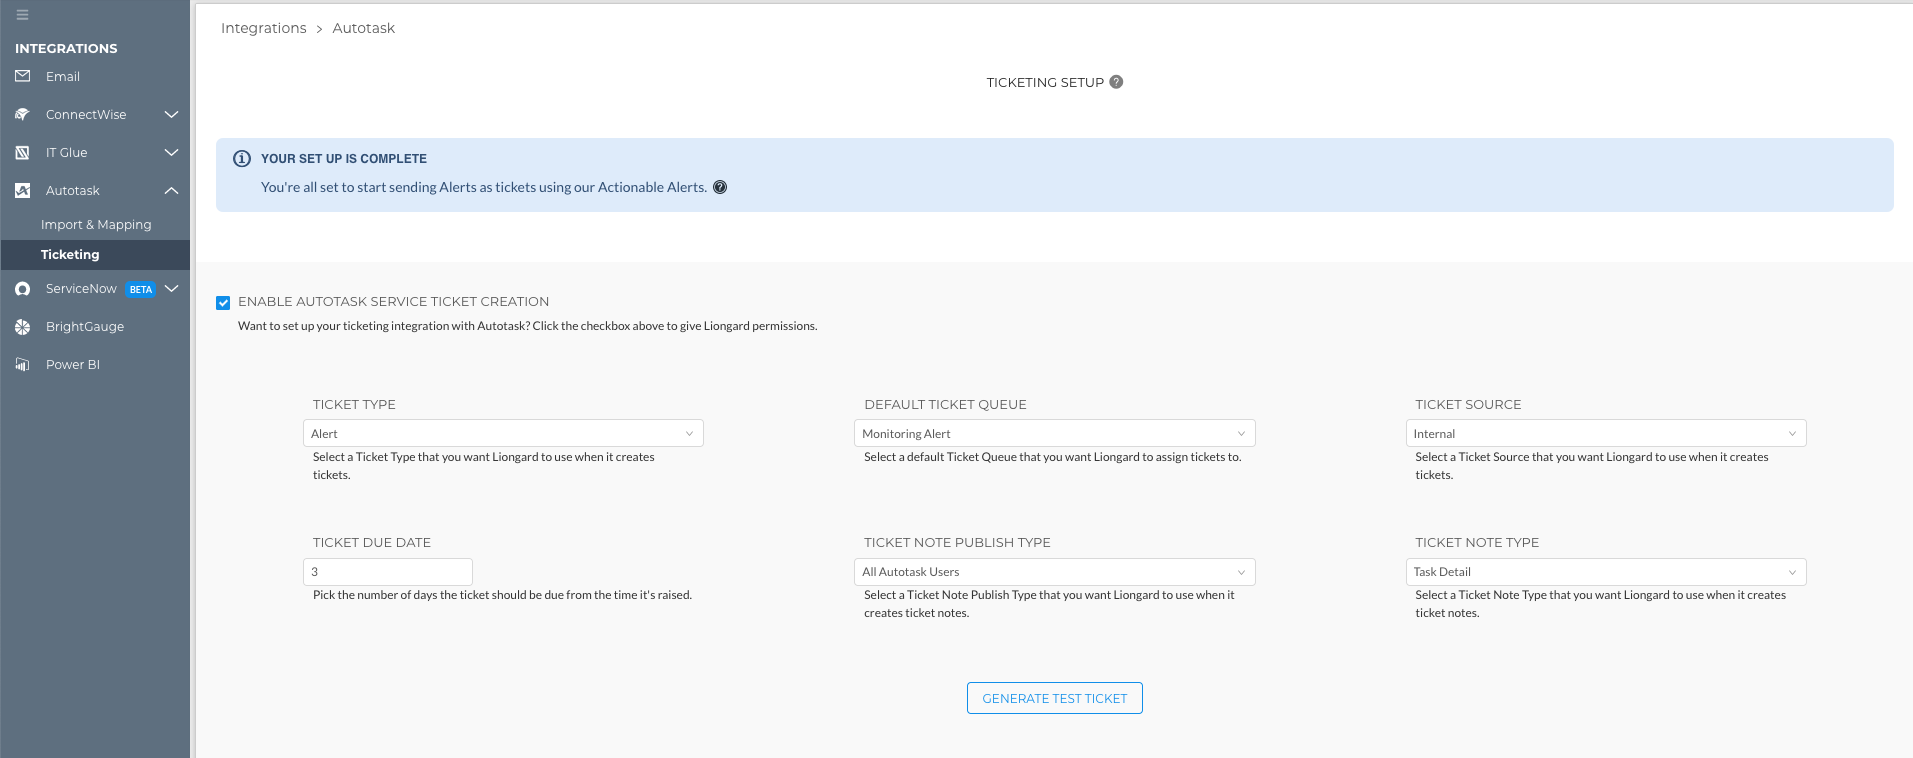
Navigate to Admin > Integrations > Autotask > Ticketing and select Enable Autotask Service Ticket Creation
Step 2: Configure Ticket Details
Configure how tickets will land in your Autotask instance by customizing the parameters below the Enable Checkbox.
Here are some recommended defaults, but you should customize them to fit your Autotask workflow:
- Ticket Type: Alert
- Default Ticket Queue: Triage
- Ticket Source: Internal
- Ticket Due Date: 2 days
- Ticket Note Publish Type: Internal Project Team
- Ticket Note Type: Task Detail
- Generate a Test Ticket. Log in to your Autotask instance to view the ticket.

Custom Ticket SourceIf you select a custom Ticket Source, the Source must be marked as "Active" within Autotask in order for Liongard to send tickets successfully.
Sending Tickets to Specific Autotask QueuesYou can send Liongard Tickets to specific Autotask Queues.
Step 3: Configure Ticket Statuses and Priorities
Liongard has an internal set of Status and Priority fields associated with Actionable Alerts in Liongard. With the Status Mapping and Priority Mapping sections, you can map those internal Liongard values to equivalent values in your Autotask instance.
Statuses
When a ticket is first created, Liongard sets the Status field to the Autotask status mapped to the "New" status in Liongard.
Prior to an inspection processing, Liongard will retrieve the latest status for each Liongard-created Autotask ticket and will update the matching Actionable Alert status in Liongard. This allows for consistent management of Liongard-created Autotask tickets and Liongard Actionable Alerts.
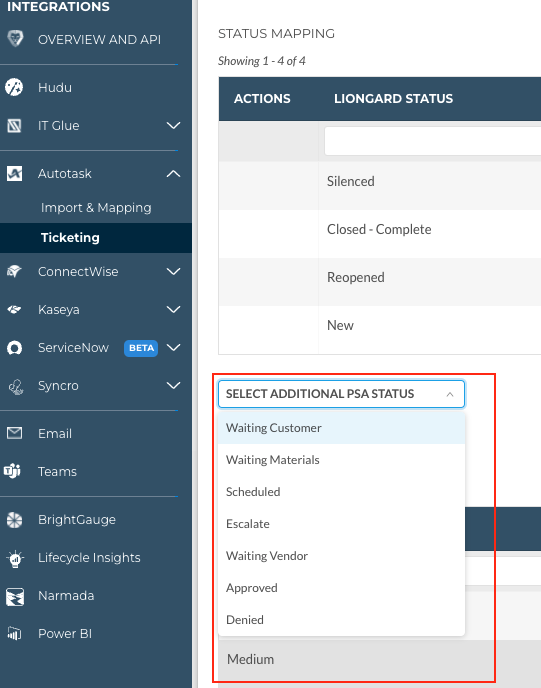
For this sync to work properly, each ticket status must be mapped on the Admin > Integrations screen using the "Select Additional PSA Status" pull-down, as detailed here.
This feature is enabled by default and can be disabled on the Admin > Integrations > PSA > Ticketing screen.

You should have Autotask statuses for the following Liongard statuses:
- New
- Re-Opened
- Closed - Complete
- Tickets set to this status will trigger a validation.
- Silenced
- This is the status Liongard will use if an Actionable Alert is silenced
Note: Liongard's "Closed-Complete" status will trigger a revalidation and possible reopening of the ticket, or if another Status is mapped to Closed within Autotask, it will also trigger a self-heal attempt (revalidation) and possible reopening.

If Liongard detects that a condition is resolved, it will automatically close the ticket in Autotask.
Priorities
Liongard has an internal set of Priority values that are set by Actionable Alert rules. You can choose to map those Priorities to the preferred priorities you use in Autotask.

To set up which alerts you want sent as tickets, clickhere.
Additional PSA Statuses
Any status in your PSA can be mapped in Liongard. Clicking the Select Additional PSA Status button on the ticketing page will allow you to select the status you would like to map.

Once mapped, you can remove the mapping by selecting the trash icon.

Updated 3 months ago
