Salesforce
This document provides the steps required to configure the Salesforce Inspector.
Quick Details
Recommended Agent: On-Demand
Supported Agents: On-Demand or Self-Hosted
Is Auto-Discovered By: N/A
Can Auto-Discover: N/A
Parent/Child Type Inspector: No
Inspection via: API
Data Summary Here
See it in Action

Video isn't playing? Click here.
Inspector Setup Preparation
Step 1: Log in to Salesforce as an Administrator
Step 2 Create a New Connected App
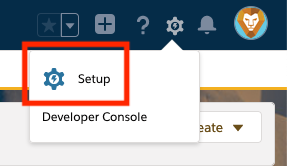
- Click on the gear icon in the top-right corner, then click Setup in the drop-down menu.
- Use the search bar at the top of the page, search App Manager, and click on the icon.

- Click on the New Connected App button in the top-right corner.

- Enter the following information in the specified fields:
- Connected App Name: "Liongard Inspector"
- *API Name: "Liongard_Inspector" (This should auto-fill after entering the Connected App Name)
- Contact Email: Enter the email address for the person or group who will be responsible for configuring the Liongard Inspector
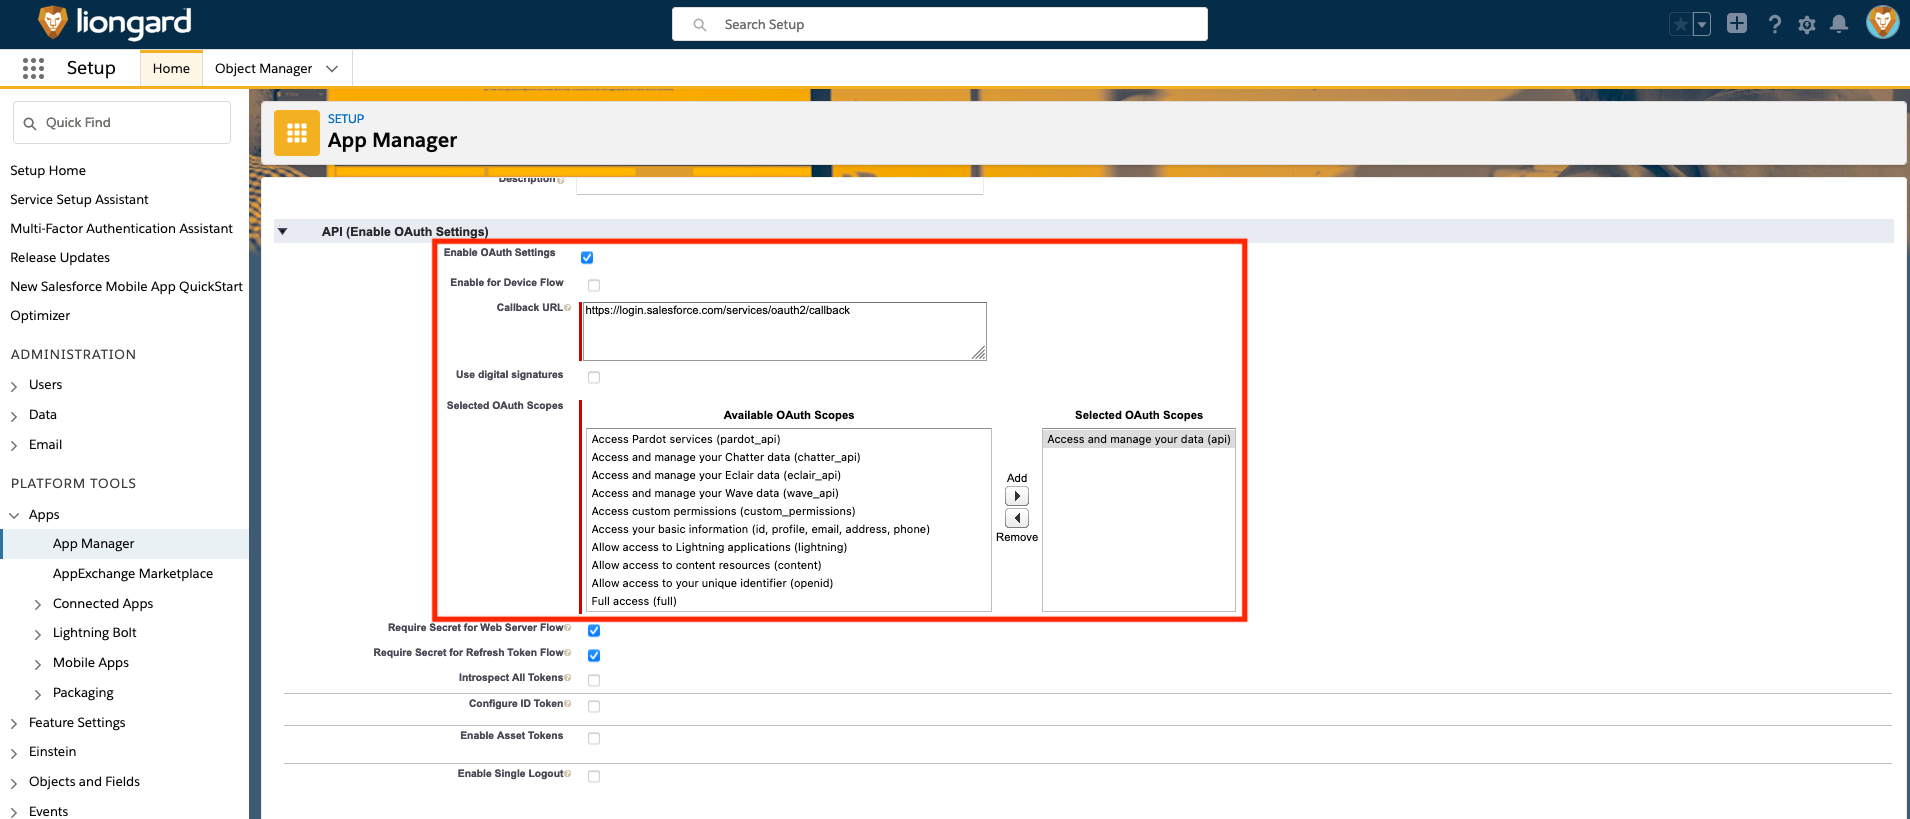
- Enable OAuth Settings: Check this field
- Callback URL: You can use the default URL Salesforce provides in the tooltip (https://login.salesforce.com/services/oauth2/callback) but any URL should work for our purposes.
- Selected OAuth Scopes: Select Access and manage your data (api), and click the Add button
- All other fields can be left in their default state.

- Click Save at the bottom of the page.
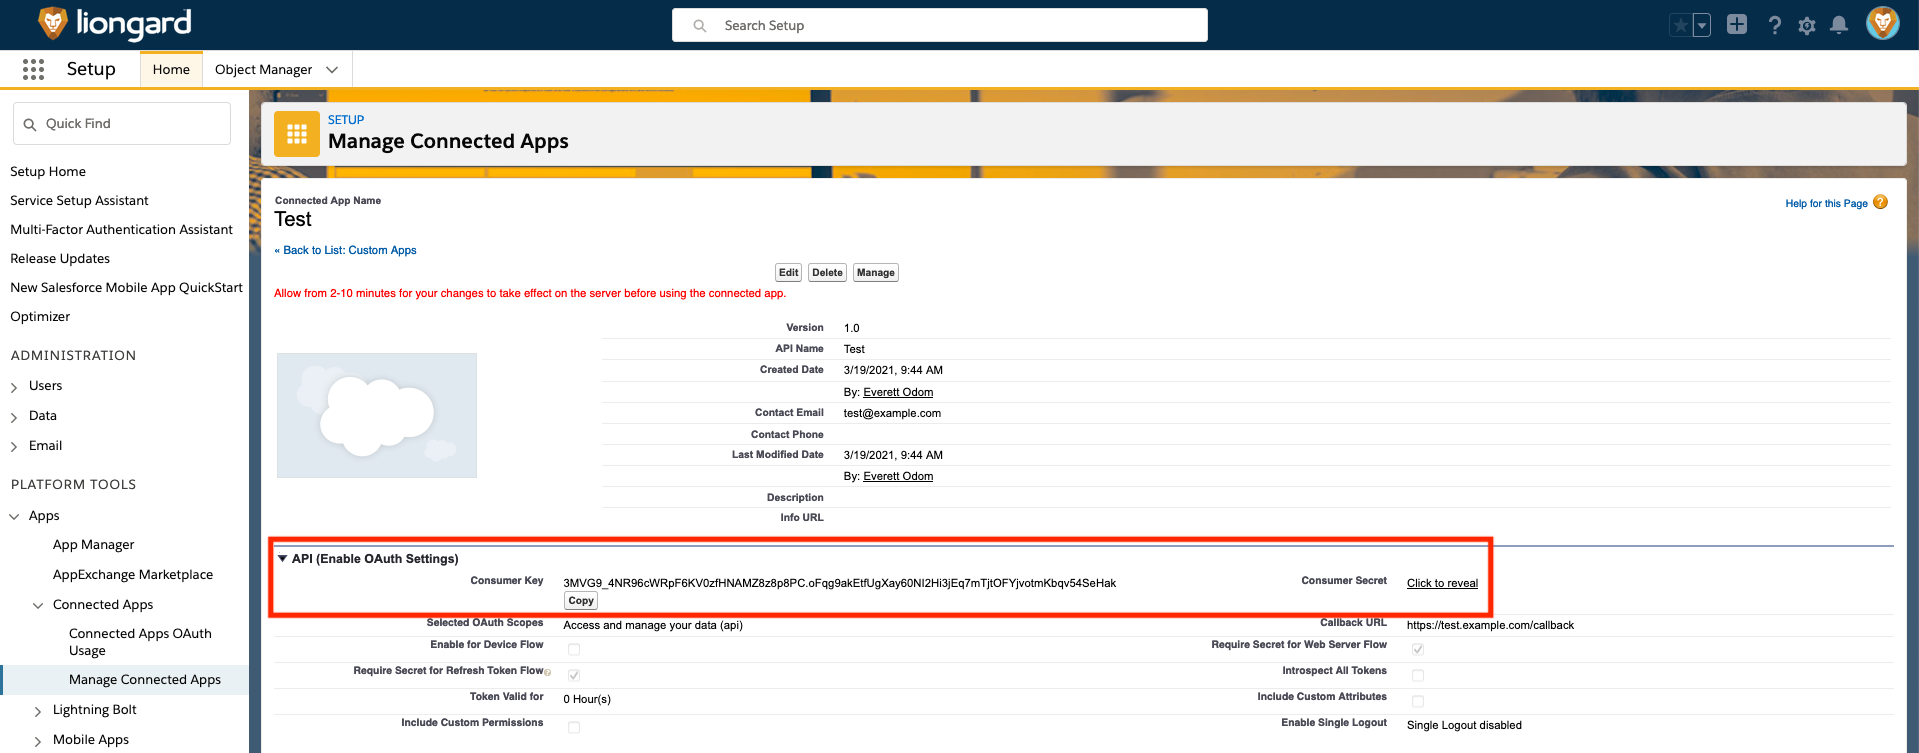
- After saving, you'll be taken to an Overview page for the new Inspector. Under the API heading, there will be a Consumer Key and Consumer Secret. Document these fields as they will be used later in the setup process.
Step 3: Create a New profile
- Click on the gear icon in the top-right corner. Then, click Setup in the drop-down menu.
- Using the search bar, search Profiles, and click on the icon.

- Click the New Profile button on the left side of the page.

- Set the Existing Profile field to Read-Only, set the Profile Name field to Liongard Inspector, and click Save.

- On the profile overview page, scroll down to the System section and click on the System Permissions link.
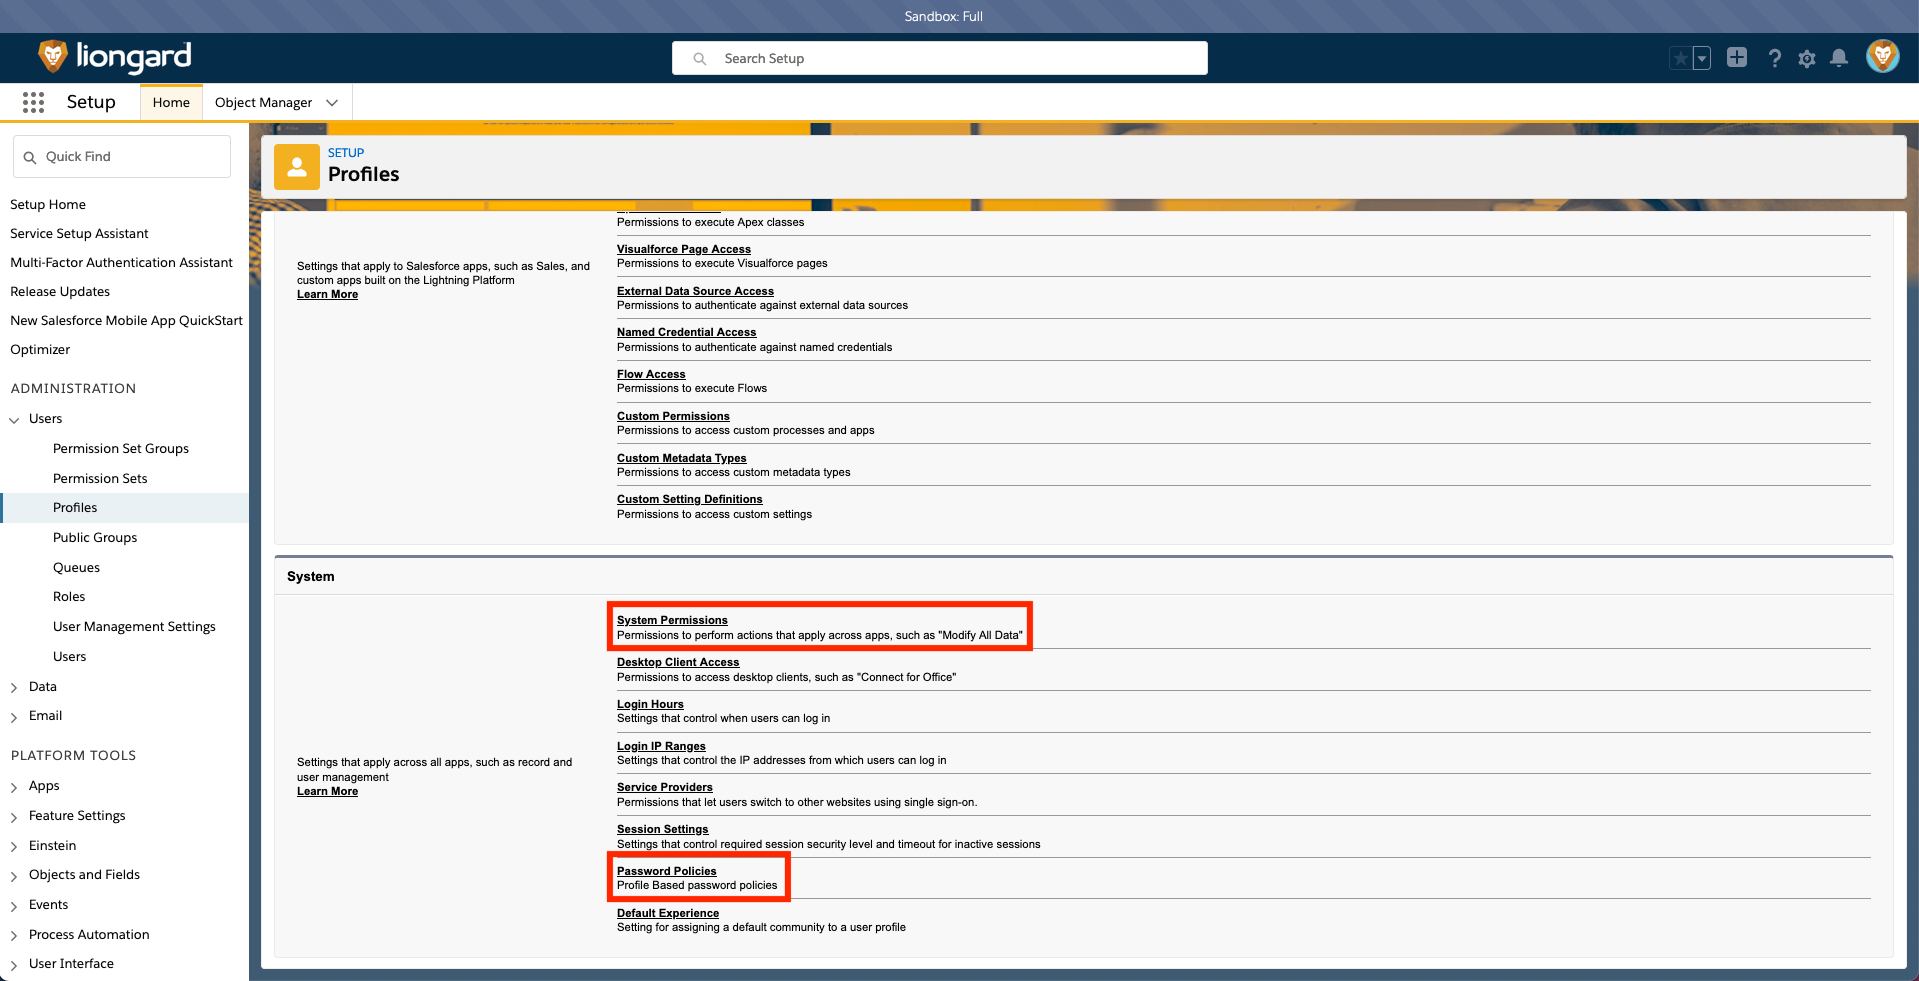
- Check or uncheck permissions until only the following optional permissions are enabled:
- API Enabled
- View All Custom Settings
- View All Data
- View Dashboards in Public Folders
- View Data Categories in Setup
- View Event Log Files
- View Health Check
- View Reports in Public Folders
- View Roles and Role Hierarchy
- View Setup and Configuration
- View All Profiles
- View All Users
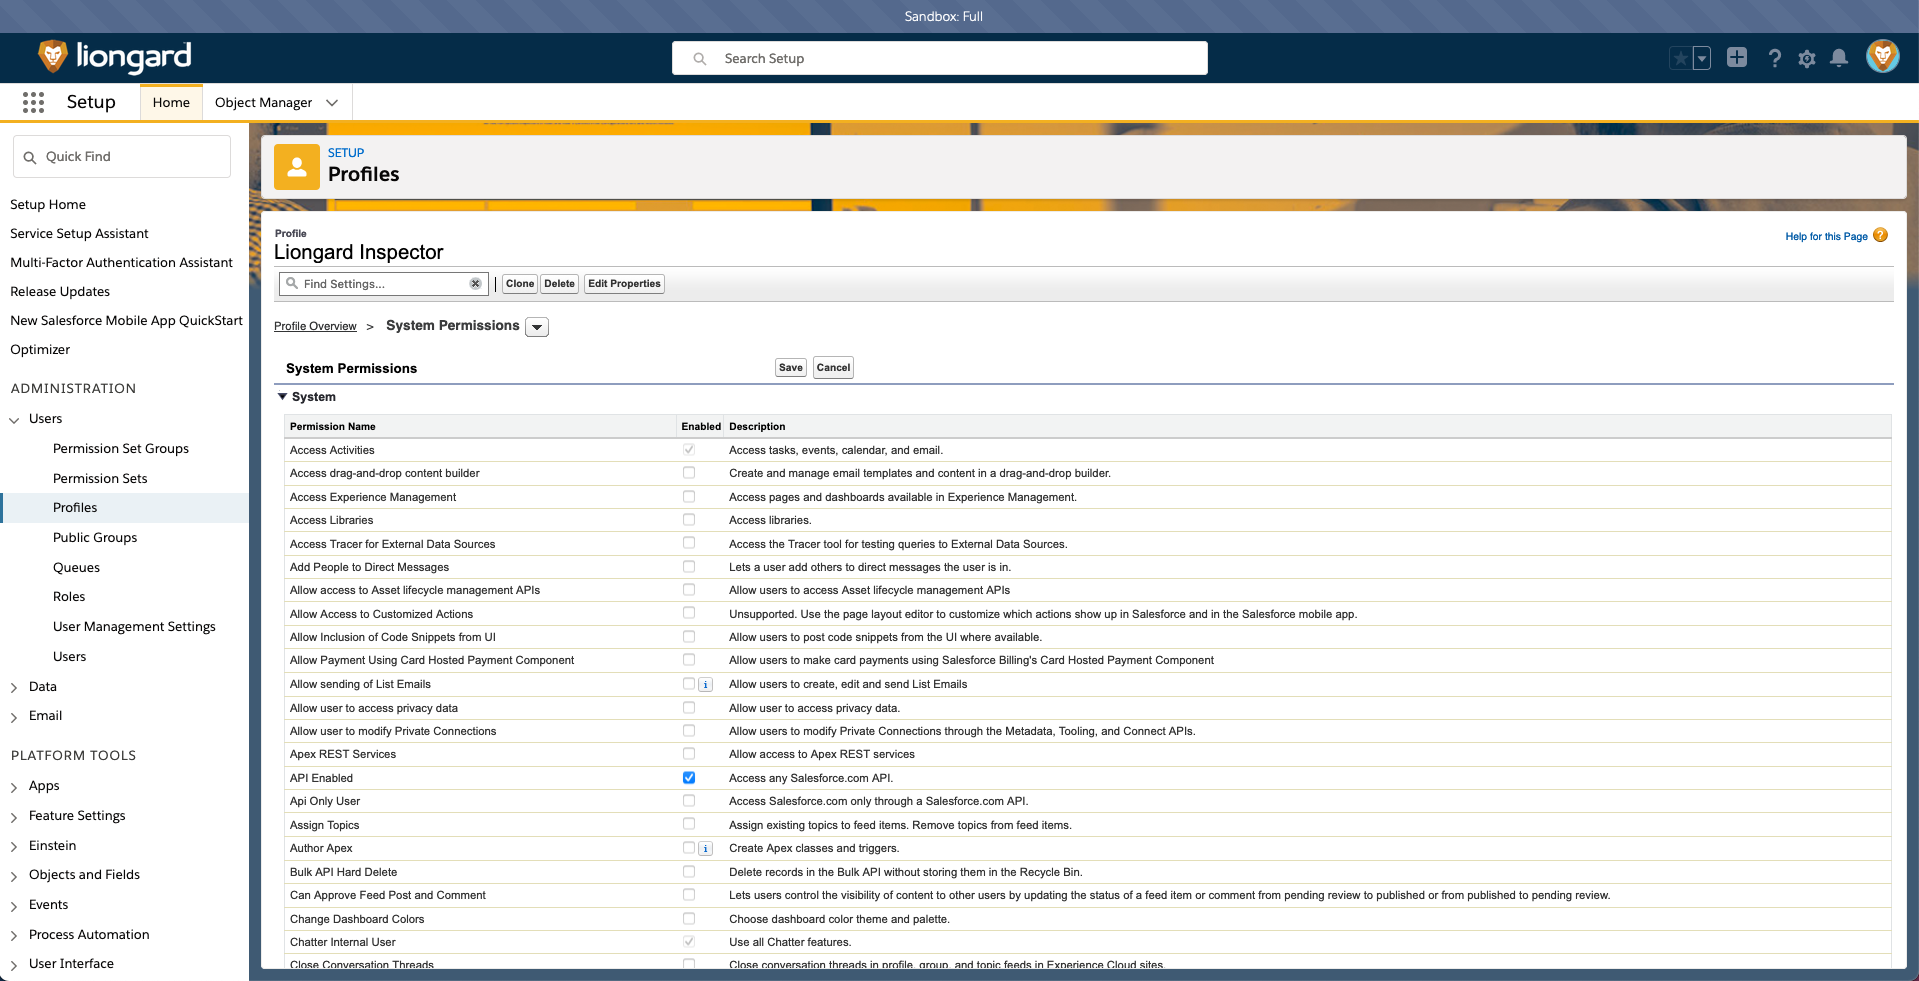
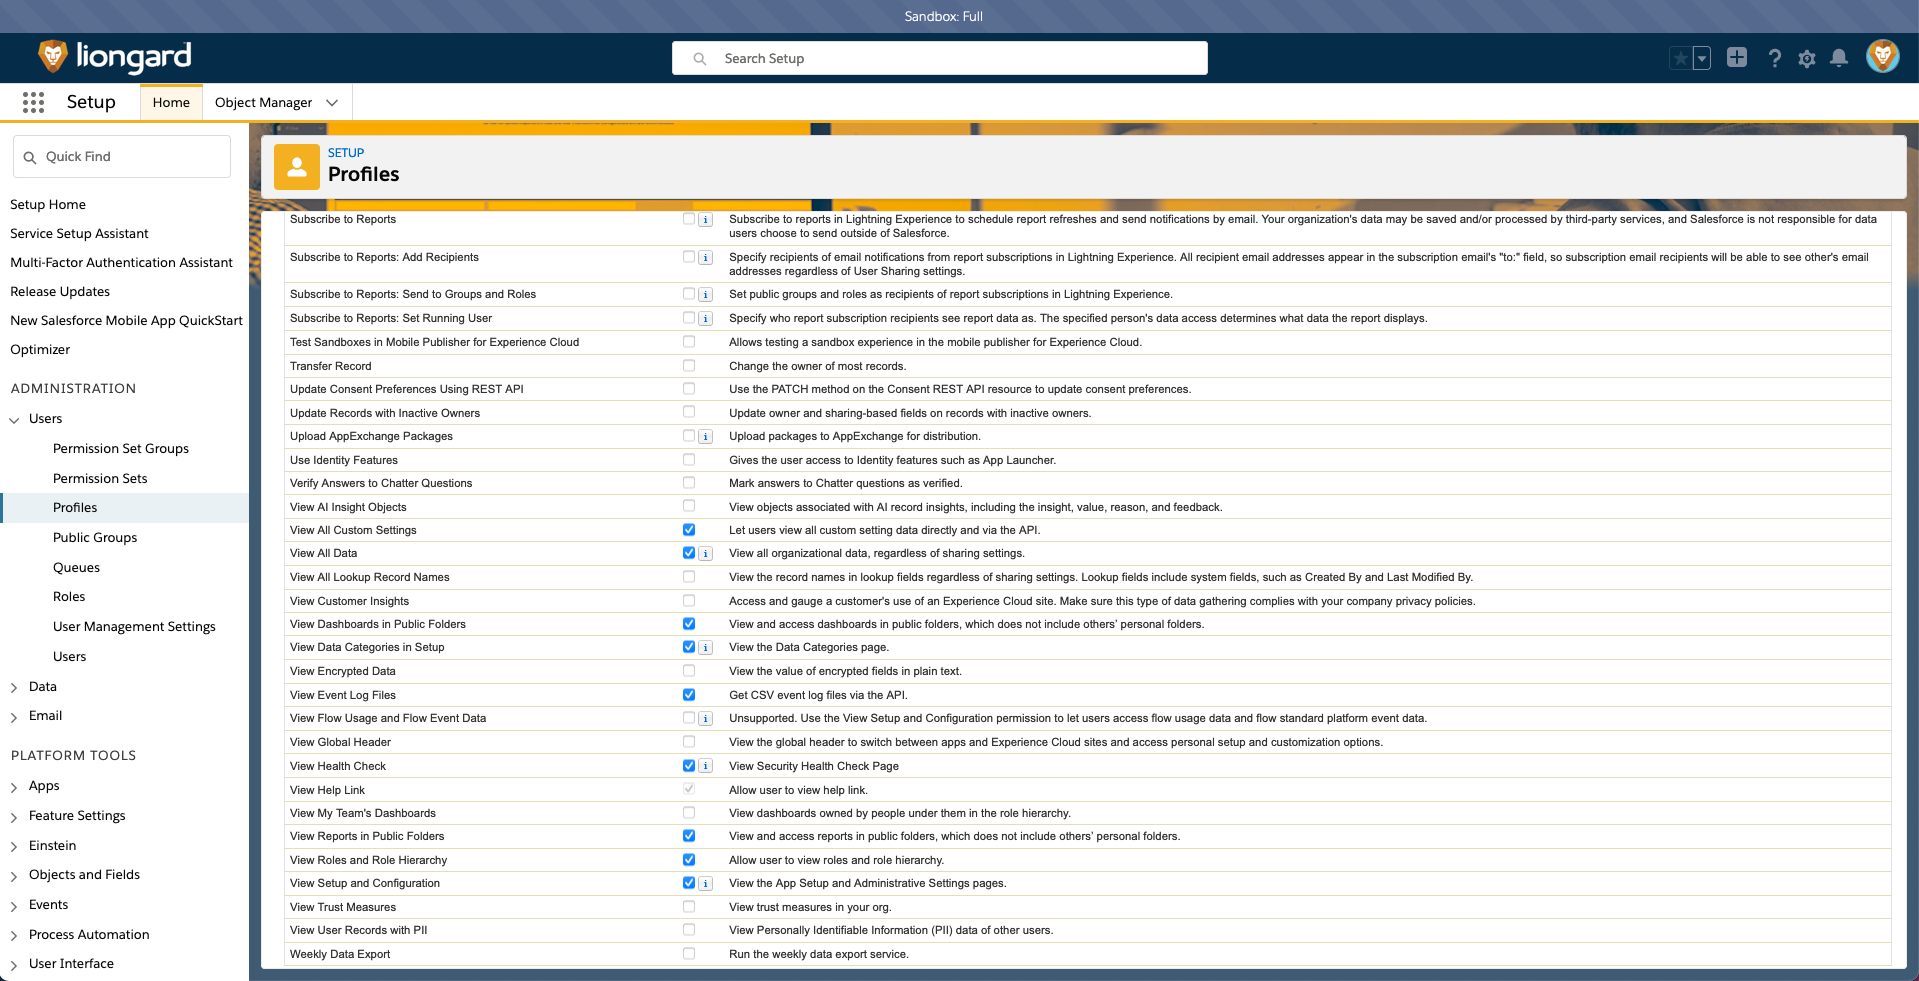
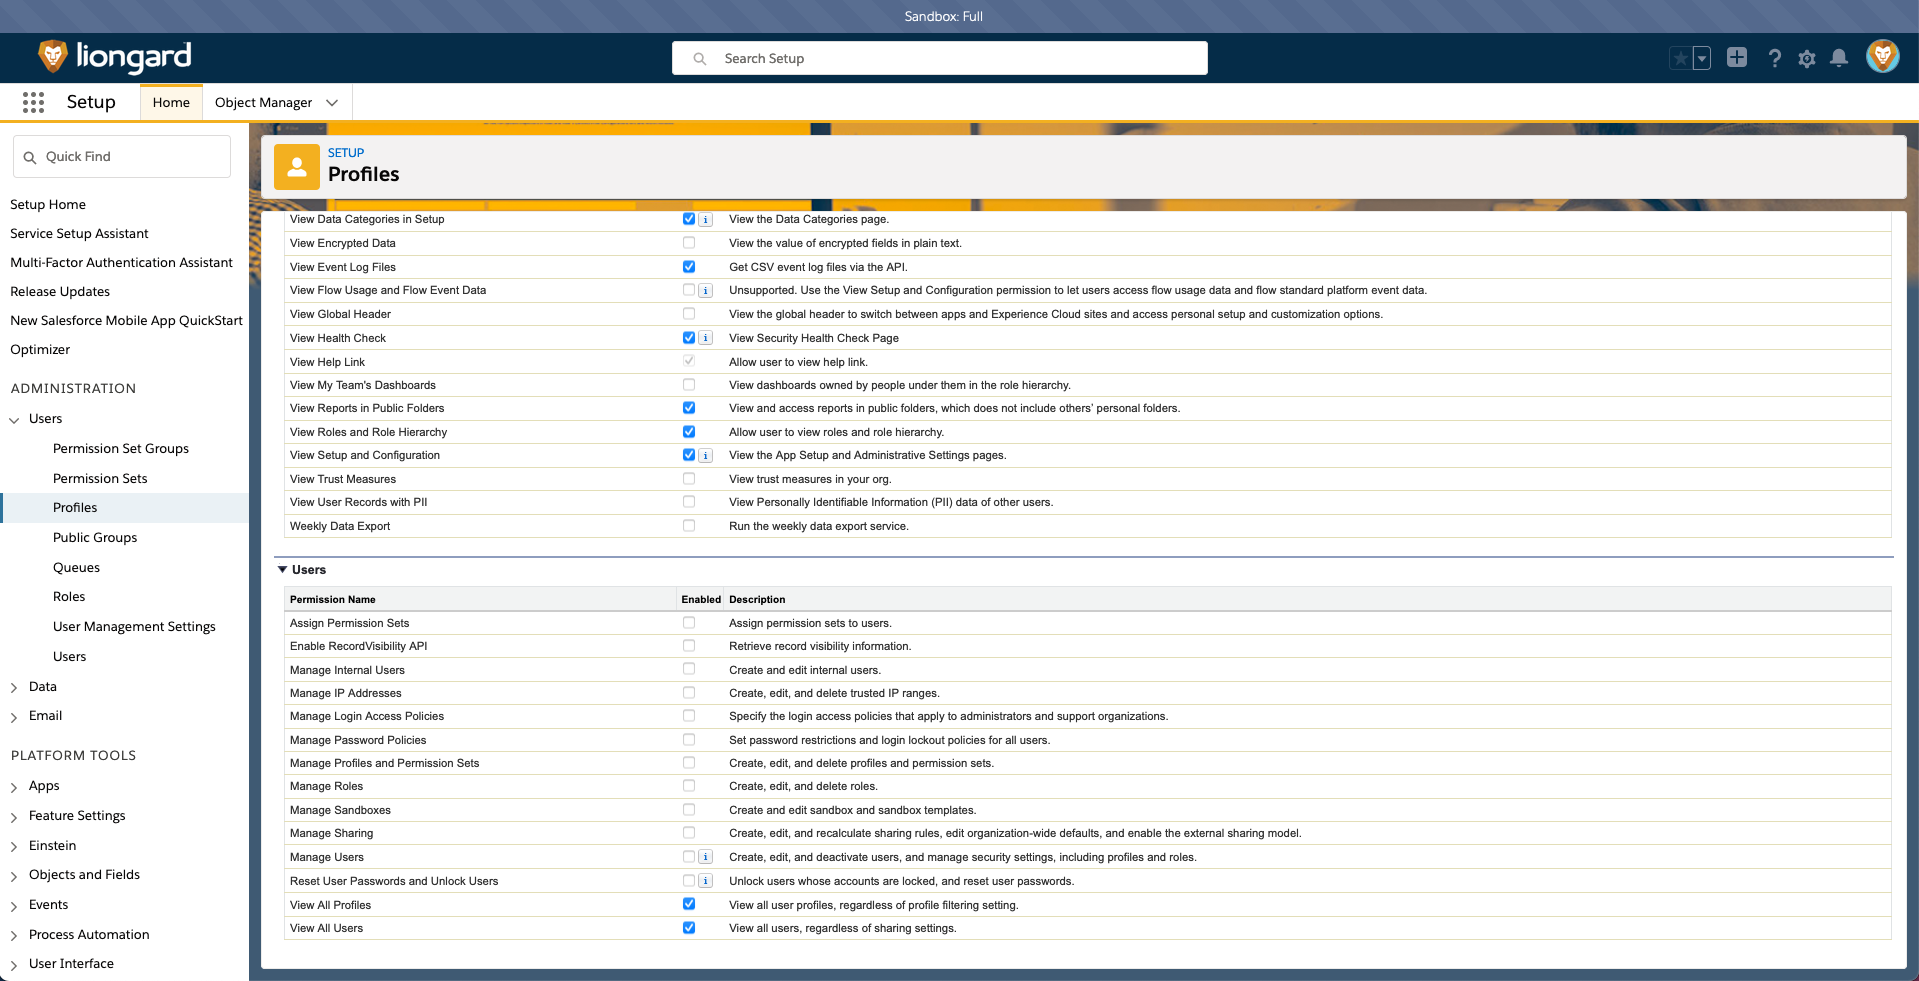
- Click Save.
- On the profile overview page, scroll down the the System section and click on the Password Policies link.
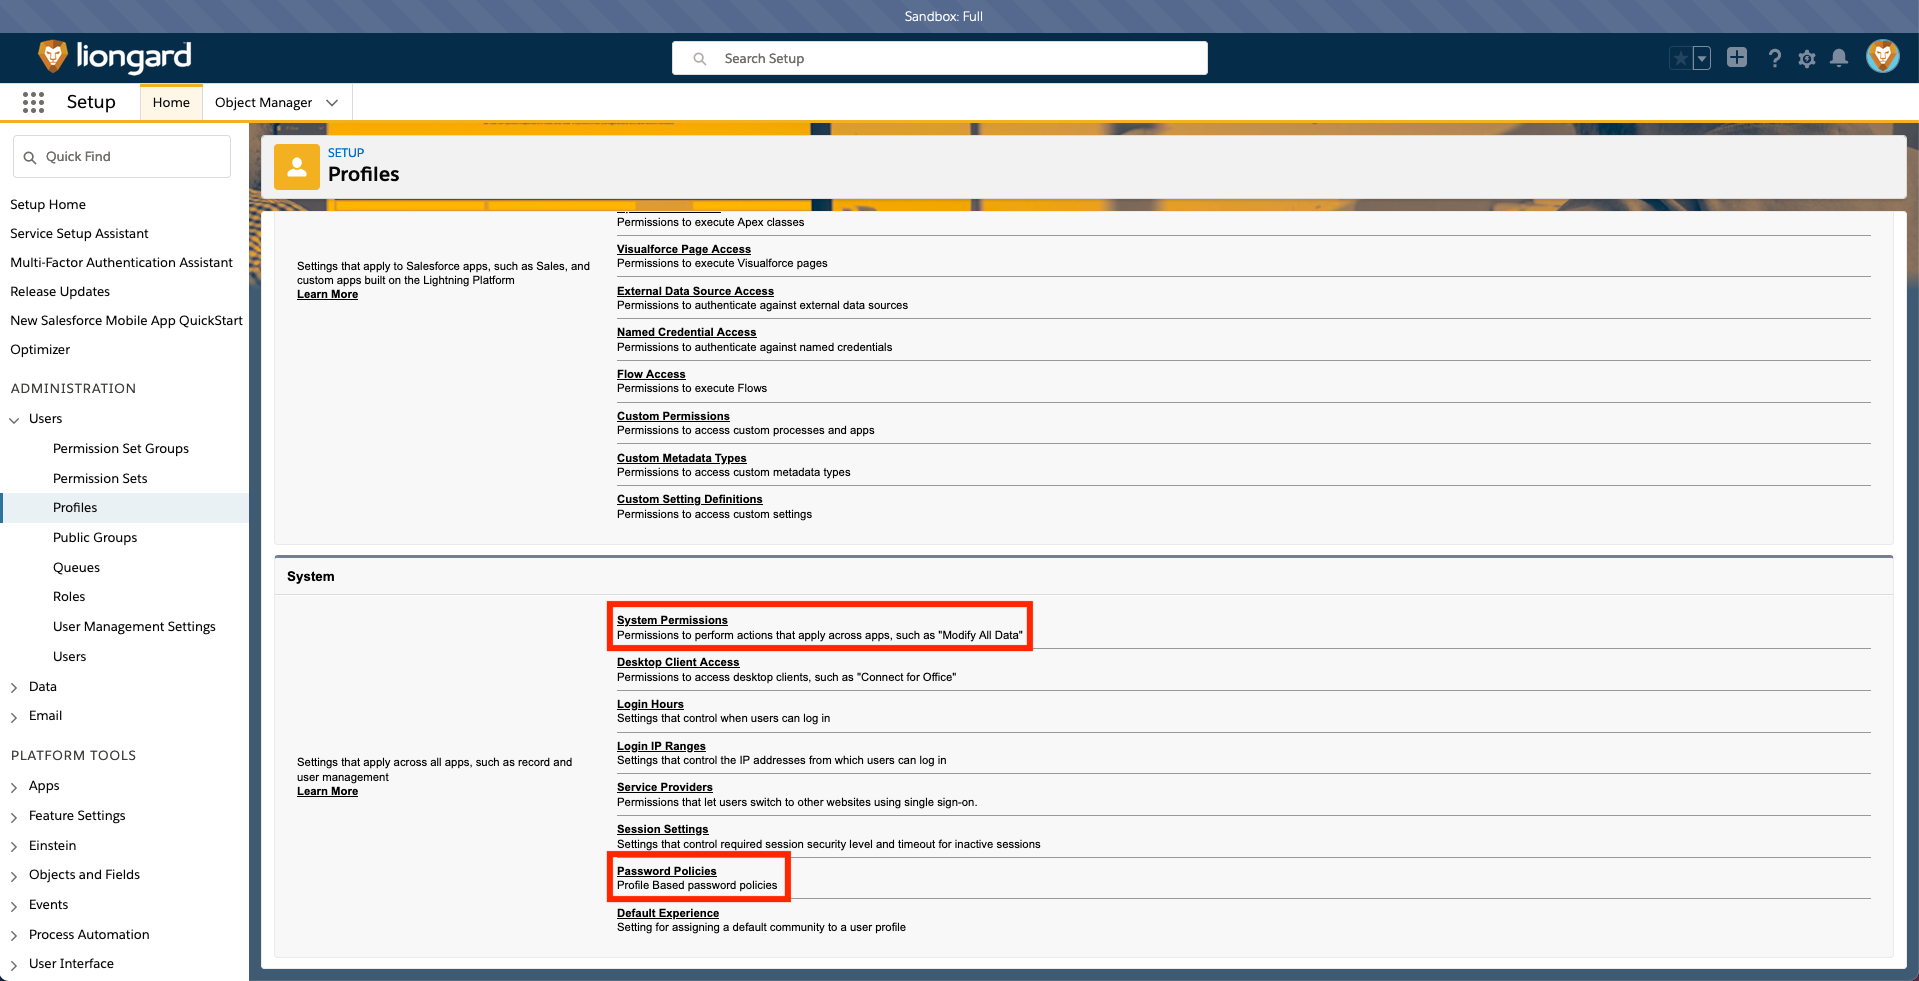
- Click Edit and update the User passwords expire in field to Never.

- Click Save.
Step 4: Create a New User
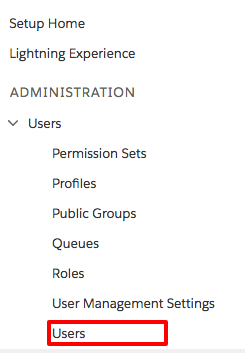
- Click on Users > Users in the left-hand navigation.
- Click on New User.
Naming Conventions
Please note you can choose alternative naming conventions for the Liongard user. Below are suggestions for naming the Liongard Inspector user.
- Fill out the User information:
- Last Name: Enter "Liongard Inspector"
- Alias: Enter "Liongard"
- Email: Enter a valid email address (e.g. [email protected])
- Username: Enter the email address used in the Email field.
- Nickname: Enter "Liongard"
- Role: Leave as ""
- User License: Select "Salesforce"
- Profile: Select "Liongard Inspector"
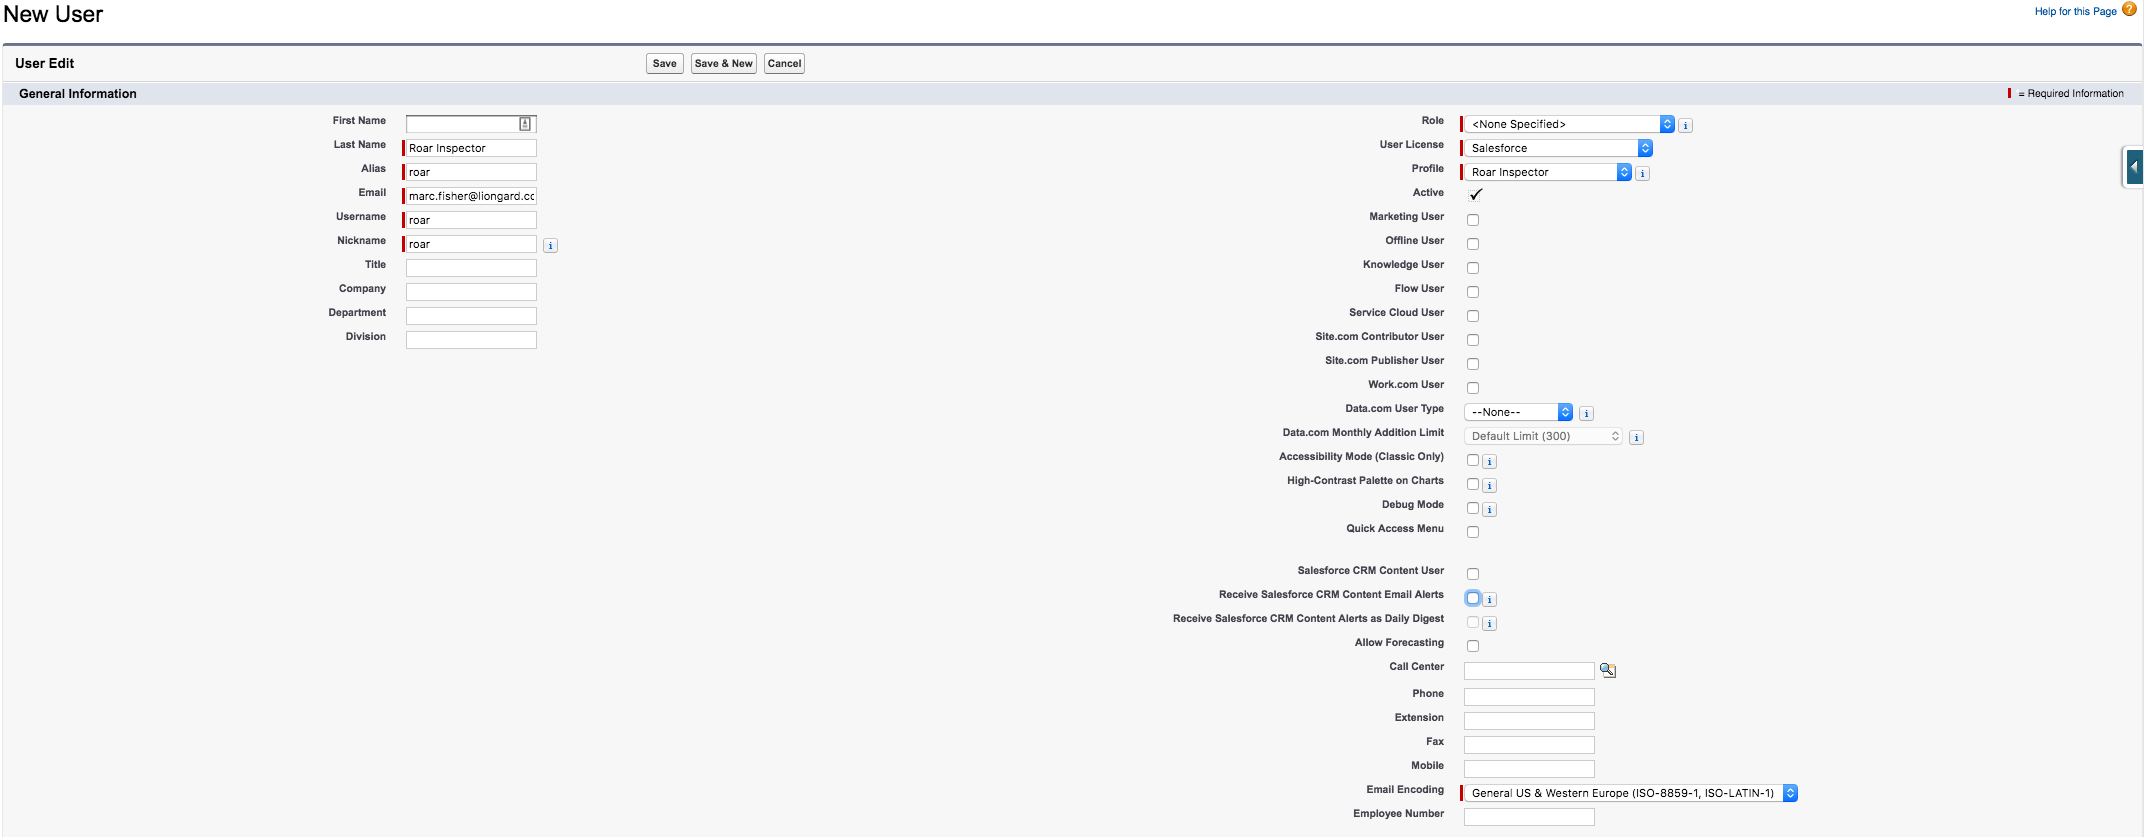
- Click Save.
- You will receive an email with the user's new password and a link to reset the password. Please follow those instructions before proceeding to the next step.
Step 5: Generating a Security Token
- After you have set up the new user above, log in as the new user into Salesforce.
- In the ~Quick Find~ search box in the left-hand navigation, type "reset my" and then click on the Reset My Security Token link.
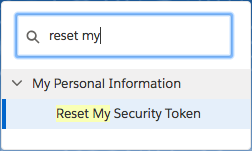
- Click on the Reset Security Token button.
- A new security token will be sent to your email.
Liongard Inspector Setup
In Liongard, navigate to Admin > Inspectors > Navigate to the Salesforce Inspector > Select Add System.
Fill in the following information:
- Environment: Select the Environment this System should be associated to
- Friendly Name: Suggested "Salesforce [Environment Name]"
- Agent: Select On-Demand Agent or Self-Hosted Agent
- Inspector Version: Latest
- Salesforce Instance URL/Domain: The URL for your Salesforce instance. (Ex: example.my.salesforce.com.)
- Salesforce Client ID (Consumer Key): This comes from the last step in the Connected App setup.
- Salesforce Client Secret (Consumer Secret): This comes from the last step in the Connected App setup.
- Salesforce Username: The Username you configured above
- Salesforce Password: The Password you received after following the email instructions for the new user
- Salesforce Security Token: The Token emailed to you
- Scheduling: The Inspector will default to run once a day at the time the Inspector is set up. Here you can adjust the schedule.
You may also enable and configure the following optional settings:
- Return Accounts and Opportunities: Enable this option to retrieve accounts and opportunities in your Salesforce instance.
- Account Types: If "Return Accounts and Opportunities" is enabled, use this field to specify account types to filter by.
- Opportunity Stages: If "Return Accounts and Opportunities" is enabled, use this field to specify opportunity stages to filter by.
Select Save. The Inspector will now be triggered to run within the minute.
Roll out Inspectors at Mass via CSV Import
For more information, please watch our How To video
To import Salesforce Inspectors via CSV Import, navigate to Admin > Inspectors > Salesforce > Select the down arrow icon in the top right-hand to Download CSV Import Template.
In the CSV Template, each row, starting on row three, will represent an Inspector. Fill in the following information for each Inspector you want to roll out:
- Agent.Name: This column is case sensitive. Copy and paste the associated Agent name from the Admin > Agents screen
- Inspector.Name: Enter "salesforce-inspector"
- Environment.Name: This column is case sensitive. Copy and paste the associated Environment name from the Dashboard screen
- Alias: Enter the Desired Friendly Name
- Config.URL: Enter the URL for your Salesforce instance (Ex: example.my.salesforce.com)
- Config.CLIENT_ID: The client ID created in the Connected App setup step above
- SecureConfig.CLIENT_SECRET: The client secret created in the Connected App setup step above
- Config.USERNAME: The username configured above
- SecureConfig.PASSWORD: The password configured above
- SecureConfig.SECRET_TOKEN: The token that was emailed to you
- Config.ENABLE_ACCOUNTS_OPPORTUNITIES: Enter true or false
- Config.ACCOUNT_TYPES: Enter true or false
- Config.OPPORTUNITY_STAGES: Enter true or false
- FreqType: Enter "days"
- FreqInterval: Enter "1"
When ready to Import the CSV Template of Inspectors, navigate to Admin > Inspectors > Salesforce > Select the up arrow icon in the top right-hand to Import CSV > Select your saved template.
After the successful import notification, reload your browser to find your imported Inspectors.
These Inspectors will automatically trigger themselves to run within a minute.
Optional: Turn on Flexible Asset/Configuration Auto-Updating
If you would like this Inspector's data to be sent to ConnectWise and/or IT Glue, turn on Flexible Assets/Configurations for this Inspector:
- ConnectWise: Admin > Integrations > ConnectWise > Configuration Types > Confirm the "Configuration Auto-Updating" toggle is enabled
- IT Glue: Admin > Integrations > IT Glue > Flexible Assets > Confirm the "Flexible Asset Auto-Updating" toggle is enabled
Updated 5 months ago
