SonicWall Capture Client
This document provides the steps required to configure the SonicWall Capture Client Inspector.
Quick Details
Recommended Agent: On-Demand
Supported Agents: On-Demand or Self-Managed
Is Auto-Discovered By: N/A
Can Auto-Discover: Child SonicWall Capture Client Inspectors
Parent/Child Type Inspector: Yes
Inspection via: API
Data Summary: Here
Overview
The SonicWall Capture Client (SCC) Inspector retrieves Endpoint, Policy, and Management settings data from their SCC instance. This Inspector assists with monitoring and reporting on endpoint health, threat detection and prevention, Malware and Virus Activity, Device Compliance and more.
Inspector Setup Preparation
Dedicated Liongard Admin Account
To prevent any potential service interruptions, we recommend creating an admin account that will only be used for Liongard inspections
Create a SonicWall Capture Client Account:
- Login to your SonicWall Capture Client account and ensure that the main is selected in the drop-down menu at the top of the page.

- In the left-hand menu, navigate to Management > Administrators.
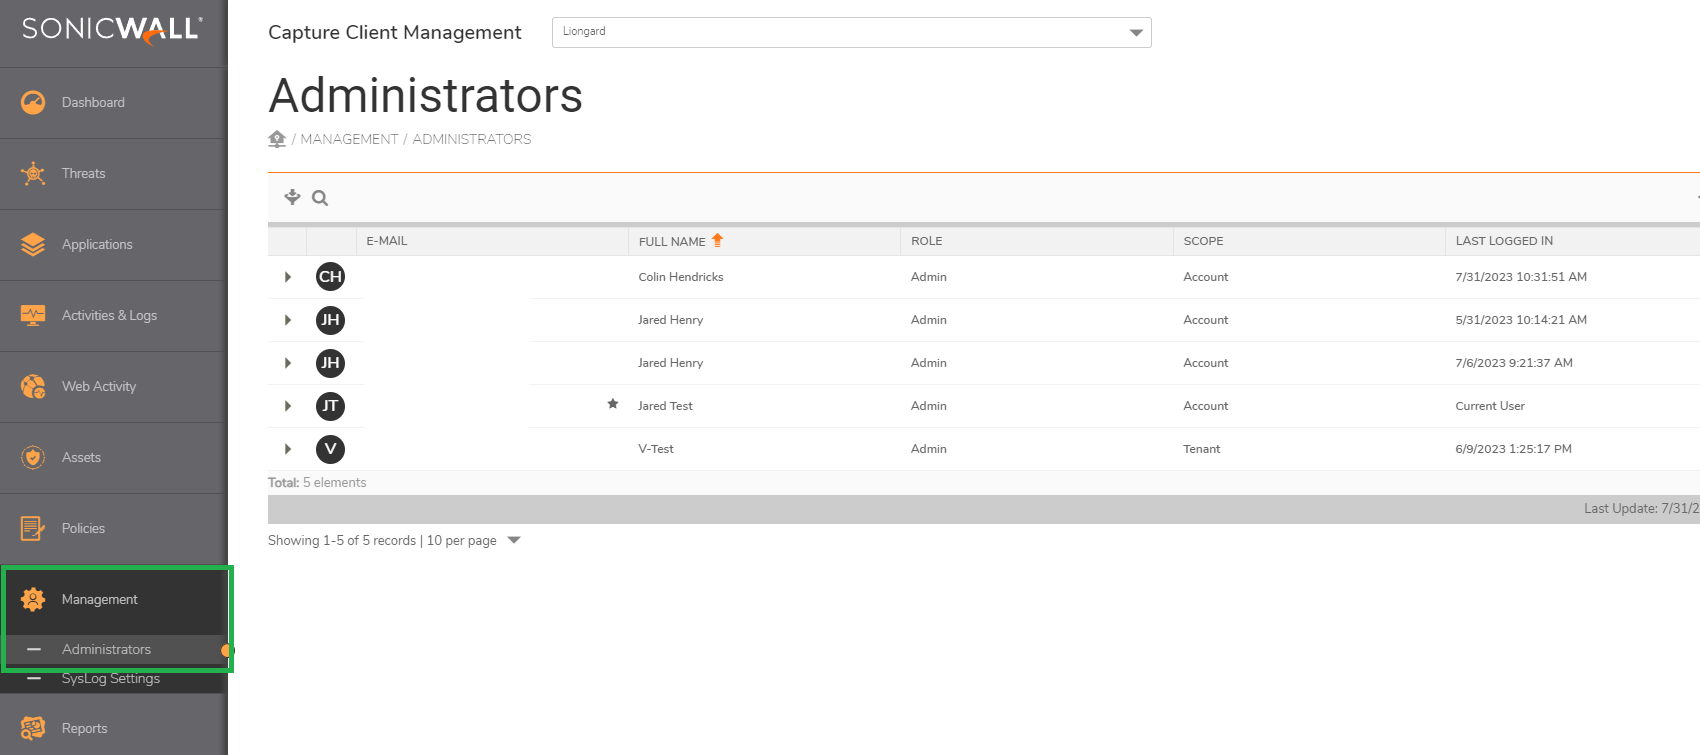
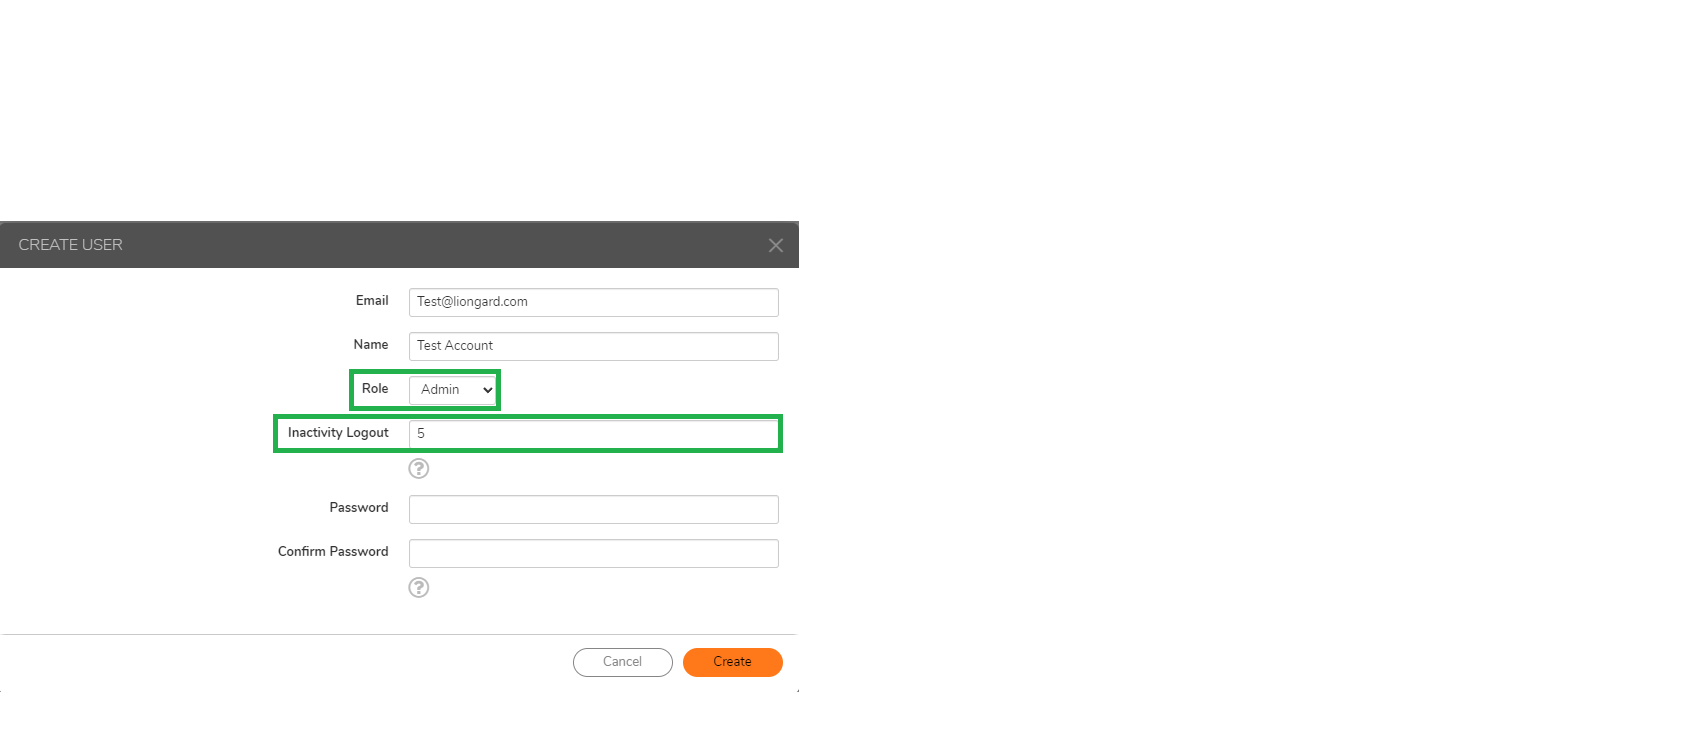
- Select the "+" button and create a new account with the role “Admin”. We also recommend setting an inactivity logout limit of 5 minutes.
Liongard Inspector Setup
In Liongard, navigate to Admin > Inspectors > Inspector Types > Navigate to the SonicWall Capture Client Inspector > Select Add System.
Fill in the following information:
- Environment: Select the Environment this System should be associated to
- Friendly Name: Suggested "SonicWall Capture Client [Environment Name]"
- Agent: Select On-Demand Agent or select the Self-Managed Agent installed for this Environment
- Inspector Version: Latest
- Input “account” level SonicWall Capture Client credentials into the Username and Password fields.
Select Save. The Inspector will now be triggered to run within the minute.
Roll out Inspectors at Mass via CSV Import
To import SonicWall Capture Client Inspectors via CSV Import, navigate to Admin > Inspectors > SonicWall Capture Client > Select the down arrow icon in the top right-hand to Download CSV Import Template.
In the CSV Template, each row, starting on row three, will represent an Inspector. Fill in the following information for each Inspector you want to roll out:
- Agent.Name: This column is case sensitive. Copy and paste the associated Agent name from the Admin > Agents screen
- Inspector.Name: Enter "sonicwall-capture-client"
- Environment.Name: This column is case sensitive. Copy and paste the associated Environment name from the Dashboard screen
- Alias: Enter the Desired Friendly Name
- Config.TENANT_ID Field is populated by Parent Inspector.
- FreqType: Enter "days"
- FreqInterval: Enter "1"
When ready to Import the CSV Template of Inspectors, navigate to Admin > Inspectors > SonicWall Capture Client > Select the up arrow icon in the top right-hand to Import CSV > Select your saved template.
After the successful import notification, reload your browser to find your imported Inspectors.
These Inspectors will automatically trigger themselves to run within a minute.
Child Inspector Setup
After the first run of the Parent Inspector, your child SonicWall Capture Client Inspectors will be Auto-Discovered in the Discovered Systems tab on the Inspectors > SonicWall Capture Client page.
Navigate to the Discovered Systems tab in your Inspectors > SonicWall Capture Client page
- Activate or Archive your Discovered Systems by ensuring that they're mapped to the correct Environment > Check the checkbox to the left of Inspector(s) > Select the Actions drop down menu > Activate Launchpoints
Optional: Turn on Flexible Asset/Configuration Auto-Updating
If you would like this Inspector's data to be sent to ConnectWise and/or IT Glue, turn on Flexible Assets/Configurations for this Inspector:
- ConnectWise: Admin > Integrations > ConnectWise > Configuration Types > Confirm the "Configuration Auto-Updating" toggle is enabled for this specific Inspector
- IT Glue: Admin > Integrations > IT Glue > Flexible Assets > Confirm the "Flexible Asset Auto-Updating" toggle is enabled for this specific Inspector
Updated 5 months ago