Cisco Meraki
This document provides the steps required to configure the Cisco Meraki Inspector.
Quick Details:
Recommended Agent: On-Demand
Supported Agents: On-Demand or Self-Managed
Is Auto-Discovered By: N/A
Can Auto-Discover: Meraki Child Inspectors
Parent/Child Type Inspector: Yes
Inspection via: API
Data Summary: Here
Meraki API Version FAQ:
It has come to our attention that Merkai has been sending messages about the discontinuation of support for their API v0. Liongard currently utilizes v1 of Meraki's API, therefore there should be no negative affect on our inspector once v0 has been discontinued.
Overview
See it in Action
Inspector Setup Preparation
Step 1: Ensure all Meraki Organizations have been set to enable access to the Dashboard API
Enabling the Meraki Dashboard API
You must enable the Meraki Dashboard API for ALL of your Organizations in Meraki to allow Liongard to query information from those Meraki systems. Liongard will not be able to auto-discover any child account that does not have this checkbox selected.
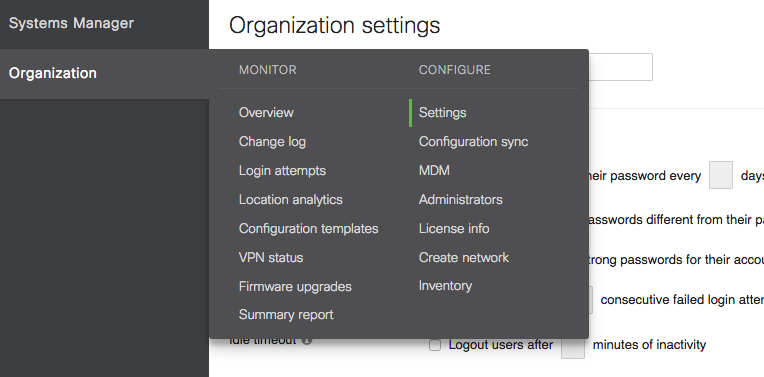
In Meraki, starting with your own Organization, go to each Organization's Organization > Settings page

- Navigate to the Dashboard API Access section
- Ensure that the Enable access to the Cisco Meraki Dashboard API box is checked. If not, check the box and hit Save

Access To Organizations
Please note that the API Key will inherit the permissions of the users who provisioned it. Be sure that the user who provisions the API Key has access to all the organizations you are looking to inspect, otherwise Liongard will not be able to discover the additional organizations.
Step 2: Create a Meraki Dashboard API Key
You will need to create an API Key for the Liongard Inspector. Using the profile hyperlink displayed in the last screenshot from step one will take you to the appropriate page. Be sure to perform this step within your own organization. Documentation to acquire a Key can also be found here: The Cisco Meraki Dashboard API
Liongard Inspector Setup
Step 1: Parent Inspector Setup
Since Meraki is a multi-tenant system where a single portal is used to manage many environments, we will set up a single "Parent" Inspector with the API Key that will then auto-discover "Child" Inspectors for each Environment.
In Liongard, navigate to Admin > Inspectors > Inspector Types > Navigate to the Cisco Meraki Inspector > Click Add System.
Fill in the following information:
- Type of Inspector: Parent
- Environment: Select your MSP's Environment
- Friendly Name: Suggested Naming: [MSP Name] Cisco Meraki Parent
- Agent: Select On-Demand Agent
- Inspector Version: Latest
- API Key: Provide the API Key generated from the Meraki User Console
- Base Meraki URL: Use the dropdown to select the Chinese URL if necessary
- Scheduling: The Inspector will default to run once a day at the time the Inspector is set up. Here you can adjust the schedule
Select Save. The Inspector will now be triggered to run within the minute.
Step 2: Child Inspector Setup
After the first run of the Parent Inspector, your client Cisco Meraki organizations will be Auto-Discovered in the Discovered Systems tab on the Inspectors > Cisco Meraki page.
Navigate to the Discovered Systems tab in your Inspectors > Cisco Meraki page
- Activate or Archive your Discovered Systems by ensuring that they're mapped to the correct Environment > Check the checkbox to the left of Inspector(s) > Select the Actions drop down menu > Activate Launchpoints
Roll out Inspectors at Mass via CSV Import
To import Cisco Meraki Inspectors via CSV Import, navigate to Admin > Inspectors > Cisco Meraki > Select the down arrow icon in the top right-hand to Download CSV Import Template.
In the CSV Template, each row, starting on row three, will represent an Inspector. Fill in the following information for each Inspector you want to roll out:
- Agent.Name: This column is case sensitive. Copy and paste the associated Agent name from the Admin > Agents screen
- Inspector.Name: Enter "cisco-meraki-inspector"
- Environment.Name: This column is case sensitive. Copy and paste the associated Environment name from the Dashboard screen
- Alias: Enter the Desired Friendly Name
- Config.ORGANIZATION: Enter the name of the Organization in Meraki
Note: This field must be included to create Cisco Meraki Child Inspectors. If left blank, the import will treat the Organization as a Parent Inspector - FreqType: Enter "days"
- FreqInterval: Enter "1"
When ready to Import the CSV Template of Inspectors, navigate to Admin > Inspectors > Cisco Meraki > Select the up arrow icon in the top right-hand to Import CSV > Select your saved template.
After the successful import notification, reload your browser to find your imported Inspectors.
These Inspectors will automatically trigger themselves to run within a minute.
Optional: Turn on Flexible Asset/Configuration Auto-Updating
If you would like this Inspector's data to be sent to ConnectWise and/or IT Glue, turn on Flexible Assets/Configurations for this Inspector:
- ConnectWise: Admin > Integrations > ConnectWise > Configuration Types > Confirm the "Configuration Auto-Updating" toggle is enabled
- IT Glue: Admin > Integrations > IT Glue > Flexible Assets > Confirm the "Flexible Asset Auto-Updating" toggle is enabled
Updated about 1 month ago
